

This is post isn’t about ways to can tomatoes, how to can tomatoes or how to preserve your tomatoes. I know right? What is it about then? It’s about the simple way of preparing your tomatoes for any of the aforementioned methods of preserving your tomato crop.
This article may contain affiliate links. I may receive compensation from any of the links utilized at no additional expense to you. Please refer to my Privacy & Disclosures. All recommendations expressed are my own.
THE HARVEST
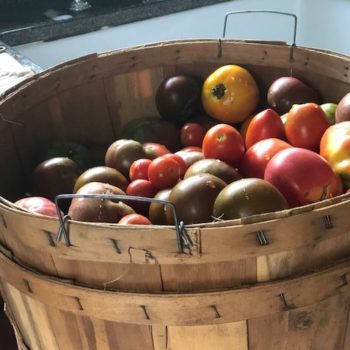
Every gardener knows that when the tomato harvest comes on, it COMES ON! And with a vengeance, I might add. They wait for no one and demand immediate attention at their own pace.
Over the years, I have learned to streamline my process to make it the most efficient it can be. Don’t get me wrong, it is a LOT of work, but as I always say, “anything worth anything takes work”.
The satisfaction I get from turning this basket filled with tomatoes into a long-lasting food product is indescribable. Not to mention that I know WHERE it was grown (and from what seed source), HOW it was grown, organically with no pesticides and nothing but natures love, as well as WHAT has gone into the preparation for preserving them.
THE PREPARATION
So, how do I prepare them for processing? Simple steps. I create “stages” in my kitchen for an easy flow from one task to the other.

Beginning with the sink, I place a large bin to discard cores and bad spots and skins in after blanching. I place several absorbent towels next to my stove as the area will get damp. I have two large stockpots, one on the stove filled 1/2 to 3/4 with water, bring to boil. The second stockpot I fill 1/2 to 3/4 with ice water. Also on hand, I have available a kitchen spider. Trust me, if you don’t already have one in your kitchen, the small investment is so worth it!
THE PROCESS
Initially, I place as many tomatoes as will comfortably fit in the sink and rinse well removing any debris from the outer skin as possible without damaging the tomato.
After rinsing, using a sharp knife, score the bottom of each tomato with a small X. This helps with the blanching and skin removal process. Once completed, take the rinsed and scored tomatoes to the stove for blanching process.

For the stove “station”, I have several towels laid on my counter by the stove. It does get a little wet throughout this process. Have a second large stockpot filled 1/2 to 3/4 way with cold water, adding a few ice cubes as well, ready by the stove.
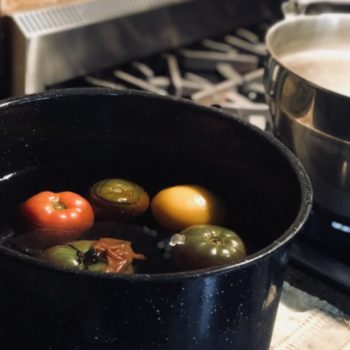
Drop the scored tomatoes into boiling water. BE CAREFUL! Boiling water spraying up on you is not fun and I speak from experience! I utilize a “spider” for this task and save myself a lot of pain!
The number of tomatoes you place into the boiling water depends on the size of your stockpot. I only have one layer of tomatoes (not stacked upon one another) at a time, and only enough that they can move freely around in the boiling water.
Allow them to boil for 15-30 seconds, leaning more toward the 15 seconds. Time will depend on the size of your tomatoes. You will see the skin beginning to peel back a bit or split when they are ready to be removed.
DO NOT over-blanch. Over-blanching will cause the tomatoes to become watery and squishy (very scientific terms here, I know). They will not hold their shape (especially if you are canning whole tomatoes). They will also be difficult to peel and core easily. Ultimately, you will end up with little tomato flesh left to be used.

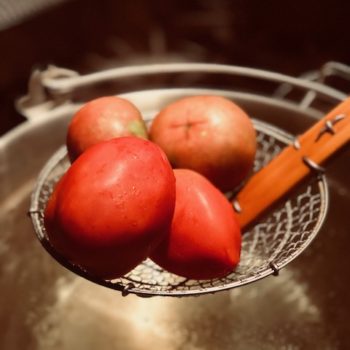
Once the skin begins to peel away, remove them from the boiling water and promptly put them into the second stockpot of ice water. The “shocking” of the tomatoes by putting them in the ice water will stop the cooking process.
Repeat until you have all your tomatoes blanched, cooled and resting in the sink. Now time to core and peel.
GETTING TO THE CORE OF IT
I remove only as much of the core as needed. Remove any bad spots and peel the skin free of the tomato. The skin should slip right off easily after blanching.
Voila! You have successfully prepared your tomatoes for whatever purpose you have for them!
The tomatoes are now ready for you to do what you will with them. Can whole, diced, stewed, sauced, salsa’d (channeling a little Forest Gump here) or create your favorite recipes with them for fresh eating.

The prepared tomatoes are ready to go for you to enjoy! I would love to hear what your favorite recipe is for your prepared tomatoes!
Be Well,
Suzan
This article was featured at Farm Fresh Tuesdays!
5 comments
Good tips! Thanks so much for linking up with me at my #UnlimitedMonthlyLinkParty 14, open until July 26. All party entries shared if social media buttons installed.
Great post. I have never canned tomatoes. So much good information Suzan. Thank you for sharing at Love Your Creativity.
I do this same process, except I’ve never heard of the X scored in the bottom. You can be sure I’ll try that this summer.
It’s a messy process, but there’s nothing like fresh tomatoes in our recipes all winter long!
Beautiful site, beautiful post!
Thank you, Amy!