

Learning how to harvest, dry your fresh basil harvest is a great way to have access to your basil throughout the year. Take advantage of the basil abundance, and dry your basil harvests using these herb drying & storing tips!
This post may contain affiliate links at no additional cost to you. By making your purchases through the links on this website, IMSL may make a small percentage at no direct cost to you. IMSL only promotes products we use & truly believe in. Please refer to my Privacy & Disclosures for further information. IMSL thanks you for your support!
This post was last updated August, 2022!
Fall herb harvesting is one of my favorite times of the gardening season. My absolute most favorite herb to harvest? Harvesting my organic basil plants! There is nothing like nutrient-rich, aromatic, fresh basil leaves. Preserving this beautifully aromatic crop by drying it allows me to utilize it in my kitchen all year long!
Fortunately, learning how to dry basil is pretty simple to do!
I plant basil all along the base of my tomato plants as they make wonderful companion plants in your garden.
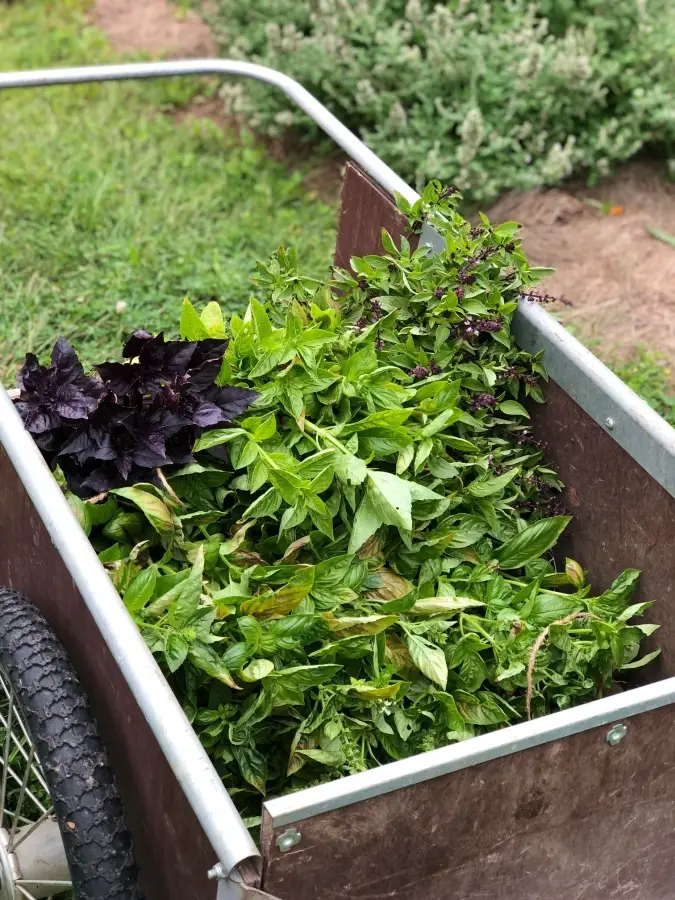
Come time to gather the basil in the fall, I have quite the substantial yield.
Although there are many options for preserving fresh herbs, many of which I do use as well, drying it preserves my fresh basil’s scent and flavor beautifully!
The taste of fresh basil from your garden is just as aromatic and notable as the scent. A taste you will crave and be looking forward to experiencing fresh, garden-grown again all winter long. During the interim, dried basil to the rescue!
BASIL PLANT
Basil is part of the Lamiaceae family or mint family. This culinary herb hails from the tropics, from central Africa to Southeast Asia, but can easily be grown outdoors or indoors on a sunny windowsill.
Even its common name, “basil”, is royal, coming from the Greek word “basileus” translating to king.
Basil, considered an annual plant, grows in abundance during the heat of the summer. Adapting well to dry conditions, it’s definitely an easy grower for most.
I have the best results direct seeding my basil in when I plant my tomato plants in the spring. I have not had success growing indoors as humidity plays a large part in whether you’re successful or not.
I hail from cold winters and heat with wood resulting in very low humidity. Thus, have had many a failure at trying to grow this beloved herb indoors!

Herbs are one of the easiest crops to grow, however. Most pests don’t bother with them and many act as pest deterrents to boot! Whoo-hoo!
Throughout the growing season, we harvest basil (almost daily!) to use in our culinary adventures. Caprese salad anyone?
Fortunately, the basil plant only benefits from frequent harvesting, resulting in a bushier and more productive plant!
In addition to being delicious, it’s also known for its medicinal properties including its actions as an anti-inflammatory & antibacterial.
FAVORITE BASIL VARIETIES TO GROW & DRY
My absolute favorites and must-haves when growing and drying basil?
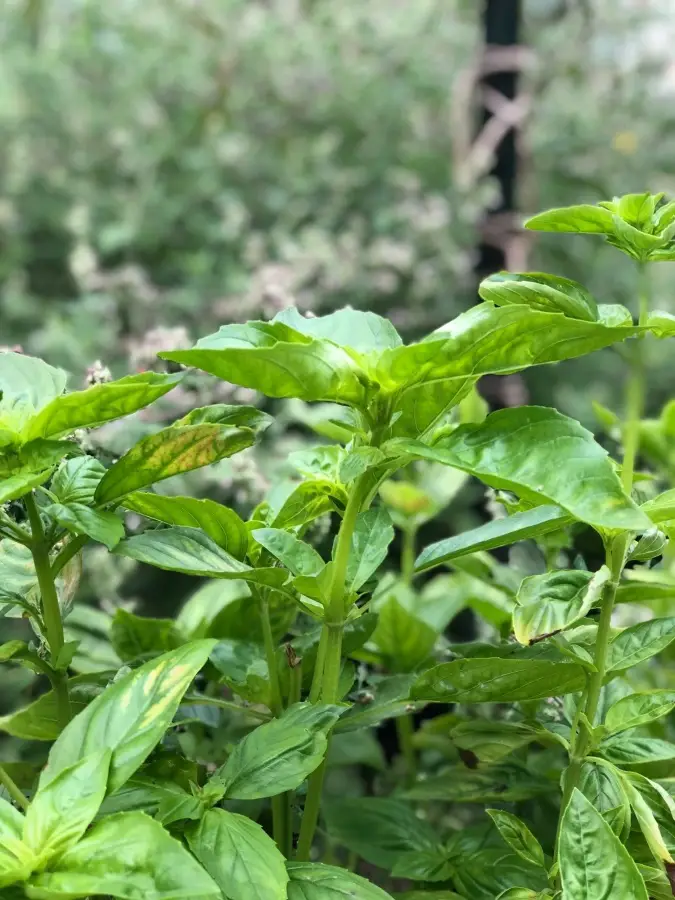
Of course, the traditional, Sweet Basil, is an all time favorite! This variety is wonderful for use in pesto, sauces and storing.
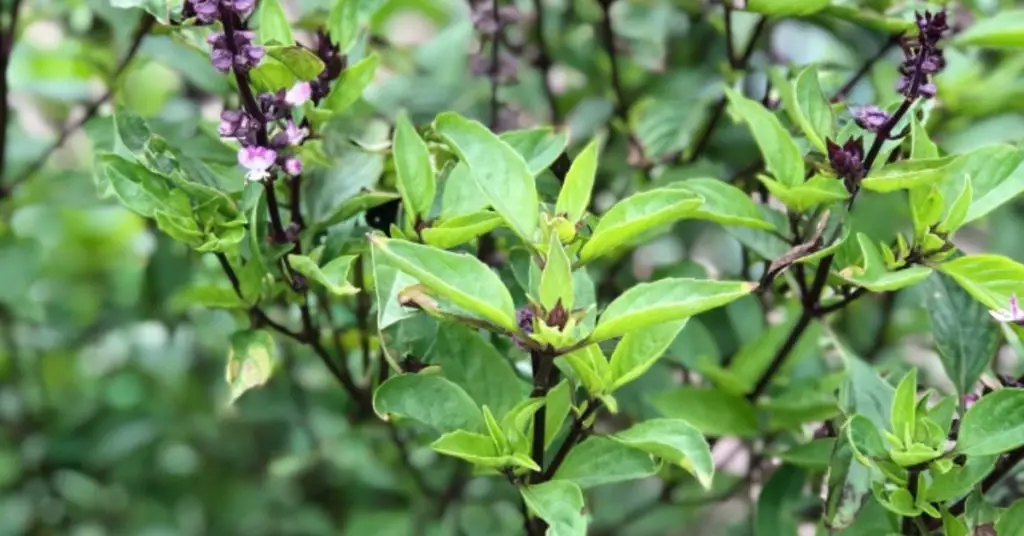
Thai basil is also on the must-have list! This is the MOST aromatic of all the basil that I have come across.
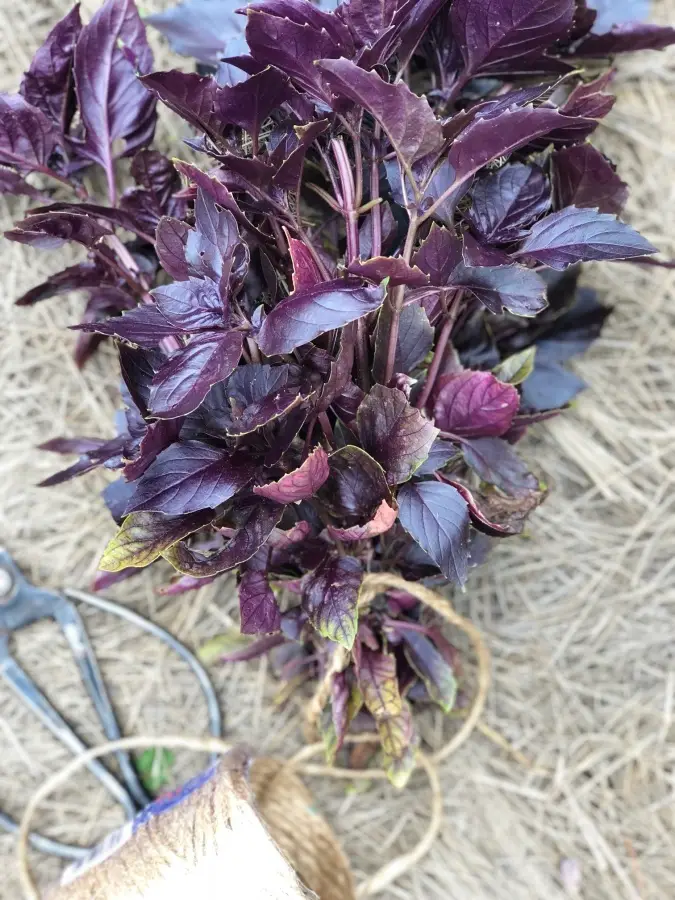
I also absolutely love Purple Basil! Beautiful in color and full of flavor. This basil makes the most beautiful tomato & mozzarella caprese salad with its vibrant color!
Finally, an option that I love for many reasons, Tulsi Basil (aka Holy Basil). This basil I keep separate when drying and storing so that I may use for my tea in the winter. This variety of basil offers a subtle & unique basil flavor, but it’s magic lays in its healing properties!
Tulsi, aka Holy Basil, is not your average basil. After all, it’s not called the “queen of herbs” for nothing 😊
Studies are now highlighting what Ayurvedic practitioners throughout time have already known, it’s filled with many beneficial therapeutic applications!
High in nutrients (Vitamins A & C, calcium, zinc, iron, and chlorophyll), tulsi has long been utilized as an adaptogenic herb (assisting the body to adapt to stresses and mental balance)!

TIPS FOR HARVESTING BASIL
Harvesting basil to dry and store is one of my all time favorite homestead chores! Oh, the scent!!
When you grow as much basil as I do, thank goodness harvesting is easy and quick.
To harvest, I wait until the end of the growing season, for my zone 5b, weather permitting, this is usually the end of September.
This gives me nice large stocks of basil with plenty of large leaves, which is great for drying.
Some grower’s recommend harvesting before the plant flowers as they claim it can become bitter. However, I have not found this to be the case and harvest both the plant and the flower to utilize.
I recommend using a sharp pair of gardening snips or kitchen scissors when harvesting your basil.
Basil is extremely sensitive and can be easily bruise resulting in the leaves oxidizing and turning black.
HOW TO HARVEST FRESH BASIL
When harvesting fresh basil, do keep in mind it’s a delicate herb, so harvest as gently as possible.
To harvest basil, simply, cut the stalks as low to the ground as you can if you are at the end of your growing season and not need fresh basil any longer.
Should you choose to harvest earlier, snip the stem just above a leaf node at the desired height or length. Gently place the cut stems into a garden trug, basket, or as in my case, cart 😊
I find it easier to lay each of the basil stalks in the same direction to create ease when bundling, or handling the stalks individually.
Plan on harvesting and preparing your basil for drying all in one day. This fragile herb waits for no one! When left for extended periods, you can be sure the basil will not remain fresh, will most likely wilt, and in some cases can turn black.
When it comes to drying your basil, you have options. Three in fact! But first, are there benefits to drying basil instead of utilizing other preserving methods?
BENEFITS OF DRYING BASIL
There are many options for preserving fresh basil. Making a pesto and freezing it, preserving it in oil, preserving it in water and freezing, and probably more!
Sharing Is Caring ❤️
That being said, when you have a hearty harvest with little time to spend on preserving it, drying your basil is the cheapest & easiest way to go!
In addition, drying your fresh basil offers these added benefits …
- FOR THE EASE – Drying basil is easy to do, taking little time for big results
- SAVES MONEY – Drying your own basil in bulk saves money from having to purchase store-bought options. When choosing to air dry your basil, you are also saving $$$ on utility bills
- QUALITY – When growing your own basil most likely it will be organically done, know where it’s sourced, and chemical free
- LONG-TERM STORAGE – Drying basil offers an extended shelf life of basil. Properly & stored dried basil can last for several years and still be aromatic, nutritional and flavorful
- FLAVOR – Dried basil leaves maintain a concentrated flavor and scent reminiscent of fresh basil
PREPARING BASIL FOR DRYING
Should you not grow your own basil and are unsure about pests and the like, you may want to consider giving it a good wash prior to drying.
HOW TO WASH FRESH BASIL
As I grow everything organically, I personally don’t wash or rinse before drying. Washing can lead to residual moisture being left on the delicate herb, taking it longer to dry & risking damage to the plant material.
Concerned with pests living in your basil? When utilizing the hanging method of drying, details can be found below, rest assured they will move on to better grazing and tend to vacate on their own during the drying process when hanging to dry.
Should your basil have a lot of grit or dirt, usually the case when mulch is not used in the garden, washing it before drying is definitely recommended.
To wash your freshly harvested basil, fill a sink or tub with fresh water & place your basil in it. Swish it gently but vigorously around to remove any debris.
Remove as much excess water remaining on the plant material as possible by patting dry between 2 clean kitchen towels.
Alternatively, if you are processing just a little basil, place the washed leaves in a salad spinner and remove even more moisture 😊
Keep in mind that any excess moisture left on the basil will in fact cook it, not dry it!
I have had great success in all 3 drying methods; air-drying, dehydrating, and oven(s) methods.
AIR-DRYING FRESH BASIL
Once you’ve harvested your basil stalks & choose to air dry them, it’s really a simple process when hanging them to dry!
- Grab a handful of basil stalks by the end in which you made the cut making small bundles
- Tie the bundle. I use twine, but feel free to use whatever you have on hand, culinary twine, twist ties, rubber bands all work great to bind the bundles. Be sure to bind tightly as they tend to shrink as they dry. If you use twine like me, make sure to leave a long tail once you tie the bundle as shown. Depending on the length of the bundle, I usually leave 8-12 inch tail used to hang the bundles upside down
- Hang your tied bundles to dry using the directions below
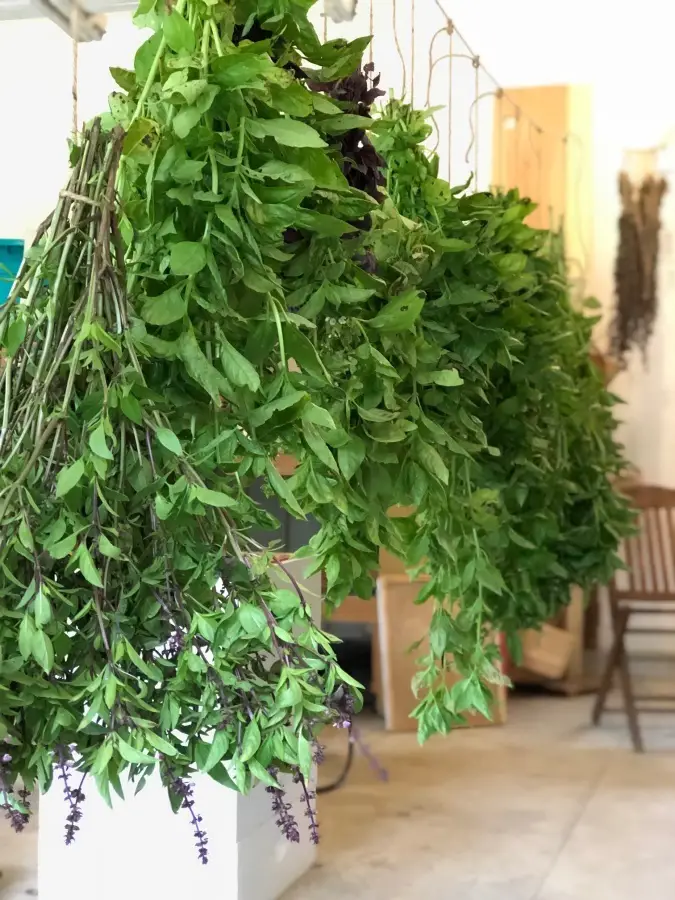
HOW TO HANG BASIL TO DRY
Once you have all your bundles tied, time to bring in to hang to dry!
I have a clothesline hung in my garage just for this purpose. I call it my processing station during the growing season 😊
I use this line to dry all my herbs and garlic. This area remains pretty undisturbed and I can allow my herbs to dry in a well-ventilated area out of direct sunlight without worry.
When hanging fresh basil bundles to dry, be sure to make note of the following points…
- Avoid the kitchen (although they look so romantically beautiful) as this room has a lot of foot traffic and high humidity. Think low traffic, low humidity (prevent mold), with good ventilation. Hang from pegs, laundry rack, rafters, curtain rods or whatever you have on hand!
- Adhere to the “small bundle” rule of thumb. Basil has a high moisture content and is prone to decay without enough airflow
- Hang the small bundles away from walls turning often if you need to hang against an object or wall, high traffic area’s, or area’s with little ventilation
- Plan on 4 to 8 weeks drying time to fully dry
The drying process varies according to your weather. Enjoy this time! Your space will have the most heavenly scent during this process!
HOW TO OVEN DRY BASIL
To oven dry basil, the basil should be completely dry at the start. Should you feel any moisture whatsoever, consider letting the basil air dry for a day or two prior to drying in the oven
To oven dry basil …
- Pre-heat the oven to its lowest setting, typically between 150°F to 175°F. Try to keep the heat below 180°F at all times. Should your oven not go as low in temp, consider propping the oven door open slightly to adjust the temperature
- Detach the basil leaves from the stems using either a sharp pair of clean kitchen scissors or carefully pinching between your thumb and forefinger
- Lay the leaves in a single layer with no overlapping on an oven tray lined with parchment paper to avoid any discoloration of the leaves during the drying process
- Keep a VERY close eye on your basil, checking it every few minutes to make sure there is no burning. You can also consider drying the basil with the oven on for 10 to 15 minutes, shutting the oven off and checking several hours later to see if completely dry. If not, heat the oven back to temperature and turn off again
- Depending upon your oven temperature, plan on it taking a minimum of 1.5 Hr up to 2.5 Hr until completely dry
Remove the trays of basil from the oven and allow them to completely cool.
How to store your dried basil is discussed below.
HOW TO DRY BASIL USING A DEHYDRATOR
Utilizing a dehydrator may be the easiest way to dry basil, but it does come with a couple drawbacks.
- TEMPERATURE MATTERS – My dehydrator, an old model which does not allow for temperature control, simply gets too hot to dry my herbs correctly. Unless yours does, I recommend choosing one of the other two drying methods offered
- TAKES LONGER THAN OVEN DRYING – Dehydrating actually takes longer to dry basil than oven drying, typically between 4 to 10 hours
To dry basil using a dehydrator …
- Lay the prepared basil leaves in a single layer on the dehydrator trays
- Place the filled trays into the dehydrator and turn to its lowest setting, below 115°F, preferably at around 95°F, or should your machine allow, the herb setting
- Continue to check the basil for dryness, but it could take anywhere between 4 to 10 hours or longer
- Turn off the machine and allow to completely cool before removing and storing via the directions below
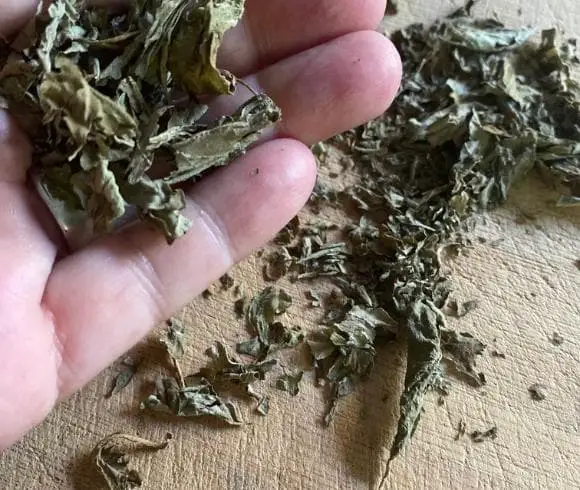
You will know when the herbs are ready to process & store when you squeeze a few branches and the leaves crumble easily (think crunchy here).
It’s important to note that once dried, basil takes on an alternative color, changing from a brilliant green to a dark, deep olive green.
HOW TO STORE DRIED BASIL
Now that you’ve dried the basil harvest, processing it & storing it properly is key to enjoying it long-term.
HOW TO PROCESS DRIED BASIL
To process you have several options, to crumble or leave whole.
To crumble the basil simply squeeze or crush the leaves and flowers (good flavor!) over a large container. There may be a few small stems that you can remove by hand.
Crumbling the basil works best when the air drying method was used as it’s difficult to remove the leaves whole from the stems once dried.
Optionally, you can leave the leaves in their whole state (best for the oven & dehydrator methods). When using, remove the whole leaves and crush between your hands to add to your meals.
I have found no difference in the long-term color, scent, or flavor between the crushed or the whole. It’s really a personal preference.
HOW TO STORE DRIED BASIL
Dried basil enjoys a dark environment. To store the dried basil in a cool dark place, placing it in an airtight container is sufficient. Large glass jars work wonderful. I use something similar to this for my storage.
Should you not have access to a cool, dark environment, and plan on storing it in a decorative manner such as open shelving, I would recommend using darker colored jars & containers.
Regardless, the containers should be as airtight as possible. Those residing in high humidity environments, consider adding food grade silica desiccant packs to your containers. Alternatively, you could vacuum seal into small packets and open as needed.
Although it may be tempting, storing your dried herbs in paper bags or other biodegradable container is definitely not an option when the goal is to maintain flavor long-term.
Properly stored dried basil lasts. Plan using your dried basil for a minimum of one year and longer!
USING DRIED BASIL IN COOKING
Although fresh herbs are always the best choice when it comes to cooking, sadly many don’t have access to fresh year round.
Fortunately, dried herbs make a great second choice to flavor our meals!
HOW TO SUBSTITUTE DRIED BASIL FOR FRESH
When it comes to substituting dried for fresh, it boils down to knowing the ratio’s to use.
The basic rule of thumb is using a ratio of 3:1 fresh herb to dried.
Why the big difference? Largely due to the fact that dried has a more concentrated flavor, is more compact in form, and doesn’t contain the same water content that fresh basil does.
When using a recipe which calls for fresh basil, substitute dried by using roughly 1/3 of what the recipe calls for fresh or 3 times the amount of fresh to dried.
In other-words, when a recipe calls for 1 teaspoon of dried basil you would use 3 teaspoons of fresh.
When the recipe calls for 1 Cup of fresh basil, substitute 1/3 cup of dried.
DRIED BASIL USES & SUGGESTIONS
Incorporating the use of dried basil into your everyday cooking is pretty simple to do.
A flavorful addition to soups, I even add it to my old fashioned chicken soup sometimes, tomato sauce, my New England American Chop Suey, homemade pizza & pizza sauce & more!
As an added benefit, dried herbs are considered a safe addition to canning recipes! Win, Win!!
Learning to harvest, dry, and store your fresh basil is easy to do and will have you enjoying the flavors of summer throughout the year!
Now that you know how to dry basil, which drying method was most useful?
Love, Light, & Laughter ~

SHOP THIS POST
Enjoy this article? Please consider sharing it on your favorite social media channel! Want more? Subscribe below for the occasional update with all the “happenings on the hill”!
60 comments
Suzan,
I love Basil and have it growing now in my garden. I love the purple the best although I have never tried Thai basil. I dry mine too but this year I put some in the dehydrator. It worked fine but I like hanging it the best.
Congratulations, you are being featured at Thursday Favorite Things. I hope you stop by.
Hugs,
Bev
Thank you, Bev, for reading & for the feature! I’m honored!!
Good to know! Thanks so much for linking up with me at my #UnlimitedMonthlyLinkParty 12, open May 1 to 26. All party entries shared if social media buttons installed.
We use loads of basil in our recipes. I’m trying to grow some basil from seed this year but the seedlings are still so tiny, I’m not sure they will come to anything.
I just planted my herb garden yesterday so your post is very timely. Thanks for the tutorial on how to harvest and dry it. I am definitely trying my hand at drying herbs this year.
I have grown it from time to time but had not thought about drying it. Guess I need to get those seeds planted! 🙂
Beautiful. I have planted Basil already but here in Zone 6B we are a bit behind this year. It feels like March keeps on going , and going, and going. It snowed a bit last week and my basil plants got a little peeved about it but I think they will recover. I don’t have a garage and we’ve just a wee garden space so I don’t think I’ll have enough to dry. But, I can finish the rest off in a lovely pesto.
Oh, that sounds lovely. May you warm up soon!
This post is just want I needed. I’m growing tons of basil and if we don’t use it up before the end of summer I was wanting to know how to preserve it best. Thanks for sharing.
Thank you, Chas! Happy preserving.
Thank you so much for the great tips! I love growing basil but you definitely gave me some guidance for better yield. Thanks so much for sharing on the Homestead Blog Hop. Hope to see more this Wednesday.
Thank you Kelly!
Thanks for the tips and sharing at Inspire Me Monday. You are one of my features this week. I hope you come by and check it out at https://www.farmhouse40.com/inspire-me-monday-233
Thank you so much for the feature! I enjoy this gathering of amazing links every week.
I used to always have basil in my kitchen window in a little flower pot. I loved the smell, and it was so beautiful and green! I always just used it fresh, but I am definitely going to dry it next time I get some!
Hope you give it a try, Eileen! Thank you for stopping by.
Yum! Basil is one of my favorite herbs! We tried cinnamon basil one year, it was interesting! I never knew it was part of the mint family or that they had purple basil out there!
Mine too! Purple is such intense, rich anise-flavored basil. Highly recommend giving it a try!
I bet your garage / proccessing station smells wonderful
It definitely takes on the scent for sure!
I love basil, and the fact you mentioned many herbs being pest deterrents is more than enough to get me to try gardening! Next challenge would be keeping my cats from exploring the growing plants too much!
Cats do love to explore! Try spreading orange peels around any plants you don’t want them in. Or better yet, plant some catnip far away from the area to lure them away! Good luck!
We were just talking about drying out some of our herbs. Our basil plant is getting huge.
Cut it back, dry the overage. Your basil plant will love it! They do tend to get “lanky” if let go. Good luck!
Great tips. I do not grow herbs but I will be sharing this with my daughter-in-law. Thanks!
I love herbs and grow many varieties in my garden. Basil is a favorite! However I do not have a place to dry herbs. No garage. So I use fresh herbs all summer for tea and cooking. I just gathered sprigs of lemon balm this evening for tea!
Love fresh as well!
I enjoyed learning the “proper” way to dry basil. I laid mine on a table last year (my first year growing basil). Is there a reason to hang instead of laying? It’s a learning process for sure.
I like to hang so that there is air-flow. I feel this greatly reduces the risk of molding. Thanks for stopping by!
I love this. Here’s a question for you — do you find that the older leaves on the plant have a more bitter taste? I’ve started growing basil (along with some other lovely herbs) and feel like the leaves near the bottom of the stem don’t taste as good. But now that I think about it, it’s really probably just me! I’ve got a pretty green thumb with flowers, but not so much with veggies! HAHA!
Yes, the older leaves definitely have a different flavor & get tougher. I don’t find that it makes a difference when using the dried…maybe because its all mixed with older and newer leaves?
I’ve shared this. I’ve never thought of basil tea. And I’ve never dried mine…. just use it through the season…. and grow more in the kitchen. Pacific Northwest has NO problem with humidity in the winter. 😀
So wish I could have access to fresh year round. Fresh is always best 🙂
I did no grow up eating or using herbs, but as an adult I have grown to love them. Thanks for the guidance!
Suzan – your basil plants are beautiful! I don’t grow much of it on my own, but my mother-in-law has a lemon basil plant that’s been around for more than 80 years and I love it.
Thank you, Leigh Ann!
This is a really informative article – I’ve saved it for future reference! Thank you!
I love growing my own basil The smell is the best. I sit on my deck and let the wind push it my way. Love!
Nothing like the scent! I find myself bending down when gardening or running my hands through the plant just to smell 🙂
Great tutorial & pictures
My favorite spice! Growing two kinds on the lanai! Best on pizza with fresh mozzarella. And the smell – best smell ever!
YES!
I LOVE growing herbs and especially basil. Each year I enjoy tending to my herb garden. Just something about it =)
Great Information! Love Basil!
I love basil! I’ve never tried to grow it myself though!
Give it a try…so easy to grow!
I love this! I’m not currently growing basil but I’m bookmarking this article for future reference. Thanks!
It’s good to know how to dry herbs. Thanks for the info!
I’ve never tried growing basil, but now I kind of want to! I agree about the taste and the scent; I do know about eating basil. Now I want to eat some pasta!
Definitely give it a try. Grows well in containers too!
I have a brown thumb and everything I grow dies. Maybe I should try herbs first since you said they’re easy to grow. It would probably be a boost to my ego and encourage me to try to grow other things, too. BTW, I love basil!
You can do it, Laura! Basil is easy to grow & a great beginner herb to try!
What a great idea! We usually grow a few varieties of basil. My husband is more of the gardener than me! I know we’ve grown both Thai basil and purple basil in the past. I think this is the first I’ve heard of Tulsi basil though – I want to see if he’d like to grow it this year as well.
Tulsi has such a unique flavor & scent. You won’t be sorry to give it a try!
oooo we just planted two kinds of basil in our planter out front! Can’t wait to harvest!
I love the look of hanging herbs. I can’t wait to get my garden back up.
I love basil and I have never thought to dry them. Thank you so much for this! Love it!
Always wanted to learn more about using homegrown herbs and am convinced this is the best way! Thanks!
Fabulous, we have been trimming basil too! Although my yield is far smaller than yours so is my growing area lol Due to the high humidity here in SWFL I dry mine in the dining room and it works perfectly. Sharing on FB too thanks so much for this info-packed post!
Thank you so much for the share, Angela! Many dry their herbs indoors. Glad that works for you…so wonderful to break open the dried jar of herbs and receive that intense “basil” scent in the middle of the winter!