
")
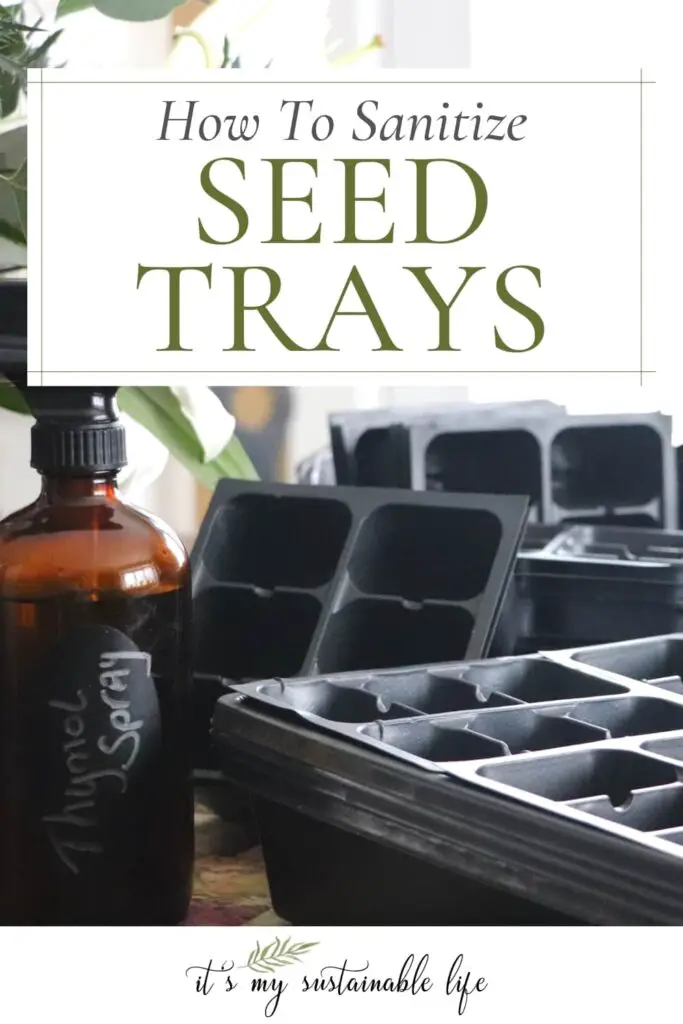
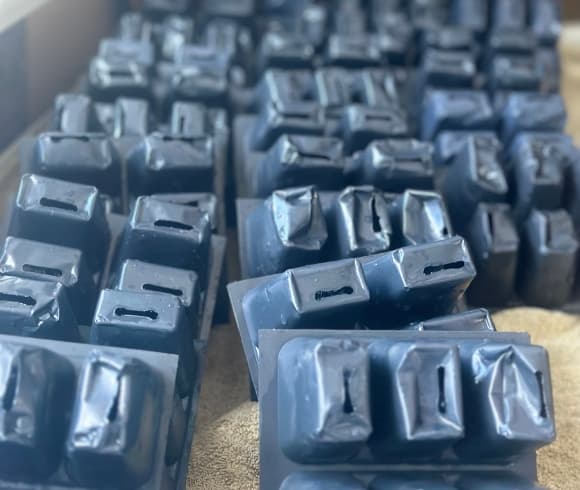
When starting your plants from seeds, it’s imperative to begin with sanitized and disinfected trays or containers in order to grow healthy plants. Learn how to sanitize seed trays and supplies with these simple tips.
This post may contain affiliate links at no additional cost to you. By making your purchases through the links on this website, IMSL may make a small percentage at no direct cost to you. IMSL only promotes products we use & truly believe in. Please refer to my Privacy & Disclosures for further information. IMSL thanks you for your support!
Waste-not, want-not, is our motto here on the hill, especially when it comes to our gardens. Reusing & recycling plastic seed trays, pots, and containers that I’ve acquired from years of nursery visits, not only saves me tons of $$$, but also makes me feel better about using plastics in the first place.
Join Us!

Learning how to sanitize seeds trays & other garden supplies is imperative if you want success in growing healthy seedlings.
THE PROBLEM WITH USING DIRTY GARDEN SUPPLIES
Ok. You caught me.
Have I used garden tools, seed trays, and garden supplies which haven’t been cleaned properly thinking, well, maybe just this one time I can get away with it?
Absolutely.
Now ask me, “have I paid the price for doing so before?”
Absolutely.
Sharing Is Caring ❤️
… and I thank you for it 🤗
The problem with using dirty garden supplies is just that. They are dirty. They are filled with possible bacteria which can ultimately affect the seedling you are growing & caring for!
I’ve had issues with seedlings in the past just up and die on me from an issue known as “damping off”. This can be very devastating, especially when so much effort and time has been spent on nurturing those tiny sprouts 🌱
DAMPING OFF DEFINED
Most gardener’s at one time or another have experienced damping off, aka seedling blight, when growing plants from seed.
So what is damping off?
Damping off is not something you are likely to forget. It’s basically the seedling stem one day deciding to shrivel up, fall over, and die. Just as you thought to yourself, “oh, great! I’ve had success!”.
What are the causes of damping off? Seedling blight happens for a few possible reasons. Bacteria, disease, fungal issues, molds, and other harmful pathogens may be lingering in the soil matter left behind in unwashed/sanitized trays & supplies.
It’s important to note that this issue can affect only a few stems OR it can wipe out entire tray(s) of tender plants!
Fortunately, preventing damping off is not rocket science!
PREVENTING DAMPING OFF
Preventing damping off from occurring is pretty simple when a few guidelines are followed.
- Always start with new seed starter soil (how I mix my soil coming soon), and stay clear of using soil from your garden
- Always sanitize & disinfect used seed trays, flats, seed starting cells, domes and other essential gardening tools prior to planting
- Always maintain your seeds preferred temperature (I use a seed starting heat mat for those that enjoy the warmth; peppers, tomatoes etc)
- Always water with room temperature water to prevent shock
- Always give the appropriate spacing required with room to grow
- Always give sufficient light (12 to 16 hours), when in colder climates, plan on supplementing lighting with either fluorescent full spectrum grow lights or full spectrum LED lights
IMPORTANCE OF DISINFECTING GARDEN TOOLS
You may be asking, “what’s the importance of disinfecting my garden tools when I’ve already sanitized seed trays and other seed starting equipment?”.
Transmission.
Everything from powdery mildew, bacteria, fungi, and viruses, aka, plant pathogens, can easily be transferred from common garden tools (snips, shovels, and even hands) to infect other plants.
Creating a good schedule of tool cleaning is essential to maintaining a healthy garden.
Plan on cleaning …
- In the fall prior to putting all tools away for the winter, aka, fall garden chores
- In the spring prior to using them in the garden, aka, spring garden prep
- Immediately after using with an infected plant/prior to using on another
- After using in any other garden/before using them in your own
SANITIZING SEED TRAYS
When it comes to the “how”, and maybe more importantly, “the what you will use” to sanitize trays, you guessed it.
You have options 😅
THE DIFFERENCE BETWEEN “SANITIZING” AND “DISINFECTING”
Although these terms, “sanitizing” and “disinfecting” are used interchangeably, they are indeed, not the same. Almost, but not quite.
These terms each have their own legal terms which are defined by the Environmental Protection Agency (EPA).

What’s the difference?
Sanitizing is where a product is used that kills 99% of the germs.
Disinfecting is where a product is used that kills 100% of the germs.
Not a big difference, but one that should be mentioned.
Why mention it at all? Toxicity. All sanitizers and disinfectants that are chemically created are, in my opinion, potentially toxic. Toxic to you, to your family, to your home, and to the environment.
As such, I was on a mission to find a safe, effective alternative to utilize for sanitizing seed trays this year.
But first, let’s break down a few of the common options for products to aid in your cleaning efforts.
THE PROBLEM WITH BLEACH
Although bleach is “relatively” safe to use, there are potential hazards to using it. So much so that the EWG (Environmental Watch Group) has given bleach a big fat F due to its toxicity.
Bleach has the potential to …
- Can potentially increase asthmatic symptoms
- Can potentially cause asthma
- Can potentially irritate skin & eyes
- Can potentially increase risk of disease
- Can potentially be fatal when ingested
- Can harm septic systems by killing beneficial bacteria
You can safely say, the hill is a no bleach zone. My lungs & my septic system thank me for it 🤗
If you feel bleach is a right choice for you and all you have on hand, in a large tub make a solution of one part bleach to nine parts water. Soak the trays, cells, and domes for at least 15 to 20 minutes. Rinse and dry thoroughly.
NOTE: Bleach can degrade over time, losing 20% effectiveness each year. Should yours be over 6 months old, you may want to purchase a new bottle.
WHAT ABOUT HYDROGEN PEROXIDE?
Many who don’t want to go the bleach route will turn to hydrogen peroxide. The over-the-counter, 3% hydrogen peroxide.
And why not? It’s readily accessible, cost-effective, and seemingly innocuous compared to bleach. And when compared to bleach, it is as it breaks down into water and oxygen.
Although fairly safe, especially with the household concentration levels, it’s still a chemical and can be toxic.
Next. For me, anyway.
Should you want to utilize hydrogen peroxide to sterilize your equipment, using 3% hydrogen peroxide, fill a spray bottle (or you could reuse a sprayer top right onto the hydrogen peroxide bottle) and spray away!
No need to dilute. Spray full strength, leave for at least 10 minutes but up to 20 minutes, rinse, and dry.
NOTE: Hydrogen peroxide can damage plastics over time.
It should also be noted according to this article …
“it can be unstable. If it comes into contact with other molecules like organics and soil that haven’t been cleaned before the disinfectant was sprayed, then effectiveness will degrade. Processes that include thorough cleaning before the disinfectant application will need to be a high priority when using hydrogen peroxide disinfectants.”
Definitely a concern as the items we are trying to sanitize are just that, covered in dirt and debris, some of which may be lingering unbeknownst.
You can increase the efficacy of hydrogen peroxide by adding several essential oils to the mix. My favorites are listed below.
IS PERACETIC ACID SAFE TO USE?
After researching options, I came across peracetic acid, something I have to be honest about, I’d never heard of!
Peracetic acid, aka peroxyacetic acid or PAA, is an “organic compound” or an organic acid “generated by reacting acetic acid and hydrogen peroxide”.
“Peroxyacetic Acid is a colorless liquid which is transported and stored in diluted solutions to prevent explosions. It is an Organic Peroxide used in bleaching textiles, paper, oils, waxes and starch, as a bactericide and fungicide in food processing, and as a catalyst for epoxy resins.”
NJGOV
Now I’m pretty old school, and the thought of combining ANY two compounds falls under the NO THANKYOU VERY MUCH category.
According to the NJ Dept of Health, peracetic acid is “highly corrosive chemical” that can “severely irritate and burn the skin and eyes leading to eye damage”.
They also go on to state that this chemical is “a HIGHLY REACTIVE CHEMICAL and a DANGEROUS EXPLOSION HAZARD” 😳
Even when considering that the concentration levels would most likely & should be MUCH lower when used in a non-commercial setting, in my opinion, it’s just not worth the risk.
IS VINEGAR A BETTER OPTION?
Plain ole’ distilled white vinegar is a viable option, especially for those not wanting to go the bleach route.
Certainly a more environmentally safe option than that of those listed above, vinegar is not as efficient as the above when it comes to sanitizing, killing only certain types of pathogens (think, E. coli, Salmonella, and Listeria monocytogenes here).
Fortunately, we are not looking to kill every living cell under the sun. Straight-up, distilled white vinegar placed into a spray bottle should work more than sufficiently in this case.
To sanitize, once your trays and such have been washed & dried, spray it all down well & allow to sit for at least 15 minutes, but up to 30 is even better, rinse and dry well.
Essential oils are a great addition when using vinegar as well to help increase the efficacy.
ENTER THYMOL
What’s thymol? And more importantly, does it kill the unwanted bacteria, molds, and such we are looking to get rid of?
You may have noticed this term before if you choose natural products. Thymol, a plant based ingredient & essential oil, is added to many products, including disinfectants.
Why?
Because it works.
What is it, and where does it come from?
Thymol, chemically referred to as “2-isopropyl-5-methylphenol”, is a dietary monoterpene phenol found in many plants (think bee balms, a few wildflowers here), and abundantly in its namesake, thyme.
Boasting strong antiseptic properties right alongside just about any other “anti’s” you could imagine, thymol is extremely soluble in alcohols and other organic solvents.
This last statement got my wheels turning. Why not make my own disinfectant to sanitize my seed trays? After all, it is EPA approved for use as a disinfectant if that’s a concern, and a natural, organic alternative to many of the chemically based options.
HOMEMADE THYMOL DISINFECTANT SPRAY
First up, making my own “thymol” infusion or tincture if you will, by using the standard tincture rule of thumb of a 1:5 ratio of herbs to alcohol for dried herbs. As this time of year I only have access to dried, this is what I used.
As I wasn’t looking to make a huge amount, I used 6 tablespoons of dried thyme and added it to 30 tablespoons (just under 2 cups) of Isopropyl Alcohol (good ole’ rubbing alcohol).
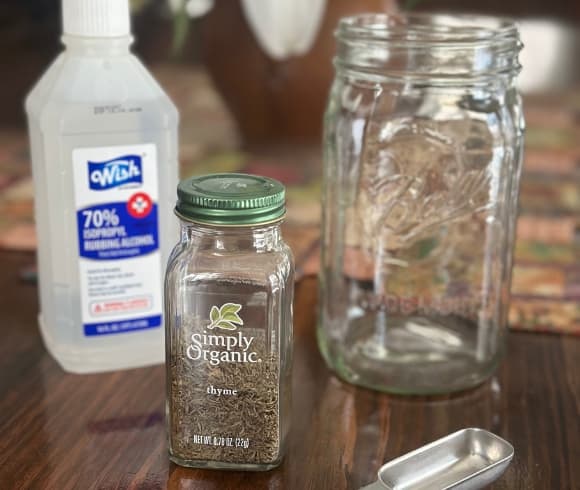
Rubbing alcohol will do triple duty here: kill 70% of bacteria, fungi and the like, be used as a solvent for extracting the thymol we are looking for, and help to quickly dry the disinfectant spray once used on the trays.
I allowed the combo to infuse for a couple days. Once set, strain the plant material from the alcohol.
I ended up with just under 2 cups of liquid/tincture. Plenty enough to thoroughly spray my 4 trays and cells AND have some leftover for the upcoming planting season.
Once I had my thymol solution, I thought, “well why not add a bit more added security and add a few essential oils?
Thyme essential oil typically has approximately 40% thymol content which means for this scant amount of solution I would need to add only a few drops to hit the .05% concentration I’m looking for.
NOTE: There are several chemotypes of thyme essential oils, largely dependent on the EO composition. Choices are …
- Linalool
- Borneol
- Geraniol
- Sabinene hydrate
- Thymol
- Carvacrol
According to this article, thymol and carvacrol proved to have the best anti-fungal effects, but linalool will do in a pinch.
The National Association for Holistic Aromatherapy, NAHA, recommends using 10 to 15 drops of essential oil per ounce of water. To my 2 cups of solution/tincture, as I didn’t really need full strength EO (I already have a pretty good base of thymol working for me already) I added 30 drops of thymol EO.
In addition, I added a couple more essential oils I had on hand that work to my favor as well. For each of the following I added about ½ tsp each (or just under) of rosemary, which offers a bit of bacteria killing activity, clove, which offers antibacterial, antifungal, antiseptic, and antiviral properties, and orange, offering antibacterial and anti-fungal properties.
Grab Your Essential Oils 👇🏻👇🏻👇🏻
All went into my spray bottle for use. And boy, did it smell pretty good 😍
Will the alcohol affect the plastics negatively? From everything I’ve researched, it shouldn’t.
Will it affect my plantings? Nope. As an added insurance, after sanitizing you could always give an additional rinse if you like. Rubbing alcohol is in fact used right in the garden, at times directly sprayed onto plants to kill mealybugs, aphids, spider mites, slugs, whiteflies and thrips as well as treat powdery mildew when using a diluted 4% alcohol solution.
Where the seedling cells and trays are completely dry prior to planting, it should not affect any plantings whatsoever.
Do you need to use rubbing alcohol? I really don’t think so. With the efficacy rate of thymol itself, I may also make my own sanitizing spray using an herbal infusion only of the thyme & water, strain once completed and then add my essential oils.
NOTE: This infusion is potent! The green from the thyme is definitely present. I would use caution when spraying on surfaces that may stain. Or you could easily dilute this concentrate with distilled water.
Be sure to bookmark or print the recipe for my homemade thymol sanitizing spray concentrate recipe for future use.
Oh, and keep an eye out in the coming weeks for how I morph this disinfecting concentrate into an effective counter top cleaner!
HOMEMADE THYMOL SANITIZING SPRAY RECIPE
Bookmark or print your copy!
")
Ingredients
- 2 C Rubbing Alcohol
- 6 Tbl Dried Org. Thyme (double this amount when using fresh)
- *Optional Essential Oils
- 30 Drops Thyme Thymol
- 15-30 Drops each of Orange, Rosemary, and Clove
Instructions
1. Create thymol infusion/tincture by adding the rubbing alcohol and thyme to a jar. Leave overnight, or up to several days.
2. Strain the plant material through a fine mesh strainer, reserving liquid.
3. Add the infusion/tincture liquid to a glass spray bottle.
4. Add the optional essential oils and shake well.
CAN YOU SOAK INSTEAD OF SPRAYING TO SANITIZE?
Yes, you can soak instead of spraying.
BUT, when you have a large number of seed starting supplies all needing disinfecting, it would take a LOT of sanitizer solution to do so.
Spraying reduces the need for large amounts of solution, and thoroughly spraying works just as well when left on for the appropriate time frame as soaking does.
CAN YOU ADD EO’S TO VINEGAR OR HYDROGEN PEROXIDE?
If you choose to use either vinegar or hydrogen peroxide for your sanitization process, yes you can add any of the above listed essential oils to the liquid!
By doing so, you only increase the efficacy of the liquid in combating the nasties along with whichever carrier you decide to go with!
HOW TO SANITIZE SEED TRAYS
Now that we know the why’s & what to use when sanitizing seed trays, let’s go over exactly how to sanitize seed trays and other seed starting equipment, step-by-step.

So my homemade thymol sanitizing spray is the choice I’ve gone with. Follow the instructions listed in any other options listed above if you choose to go a different route.
STEP ONE
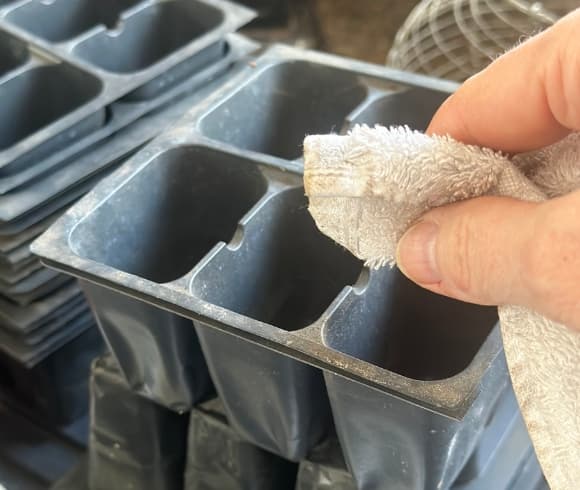
Shake out any leftover soil or debris from the flats, trays, and seedling cells. If it’s pretty heavy, as mine was, you may need to take a rag or bottle brush and give it a good going over.
If you can’t do this outside due to weather, you’ll want to do this step over a bin to capture the dirt & debris.
STEP TWO
Give the equipment a good wash either in a washtub, bucket, or sink using hot soapy water.
Allow them to air dry. I laid mine on a bath towel to dry and left them for several hours.
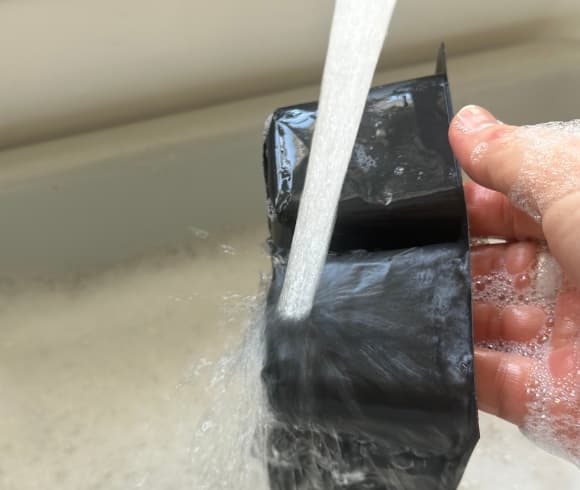
This is especially helpful if you skipped rinsing and washing out the trays at the end of the growing season.
This step is essential to removing crusty, caked on residual dirt.
NOTE: You don’t want water left on the trays as I feel it will result in a diluted solution when sanitizing by spraying them, and I want full strength here. Be sure completely dried before continuing to step three.
STEP THREE
Once completely dried, spray the prepared thymol spray onto the trays. Be sure to be generous with it, getting the spray into corners, nooks, and crannies, as well as the undersides.
Allow the solution to set and dry in place. No rinsing is necessary unless you feel it’s needed. Should you want to rinse, leave the spray untouched for at least 15 to 20 minutes prior to doing so.
I went ahead and rinsed as this is the first time using this disinfectant.
DON’T NEGLECT LARGER POTS
When growing plants from seed in our neck of the woods with a much shorter growing season than that of warmer climates, we have to start our plants early enough in the season to get a good headstart with the garden.
This means, the seeds you sow will ultimately need to be repotted into larger pots long before they actually reach the garden.
And that means, you got it, the larger pots will need to go through the same process of washing and sanitizing as do the small seed trays!
Don’t be a lazy gardener (like someone you may know 😊). Disinfect and sanitize seed trays and all the equipment that goes along with growing your plants from seed.
Hopefully this has offered a few alternative product options for how to sanitize seed trays!
Love, Light, & Laughter ~

Shop IMSL’s Favorites

OTHER SEED STARTING POST OF INTEREST
How To Test Seeds For Viability (With Seed Viability Chart)
Alternative DIY Seed Planting Pots
Reading And Understanding Seed Packets
13 comments
We never thought about sanitizing seed trays. Thank you for sharing information on how to.
Thank you for sharing about the process of sanitizing seed trays! This is an important step in the garden starting process.
I just got mine out and I was wondering how to sanitize my seed trays! Thank you for all this information! It’s so helpful!
This is a great guide on how to sanitize and disinfect trays or containers to grow healthy plants. Especially love that you also included the why and that there are several options.
I’m glad to to know about sanitizing seed trays! I’ve never thought to do this but it makes sense.
I haven’t thought of sanitizing before, but now I know how!
Sanitizing seeds trays and equipment is such an important step! Thanks so much for stopping by 🤗
You know, I truly never thought to sanitize seed trays or even my gardening tools for that matter, but it makes so much sense! You just think dirt is dirt but not all dirt is clean dirt. Thanks for these great tips.
I have always used bleach to sanitize my seed tays. I’ve never heard of thymol. Very interesting.
Bleach is a bit harsh for my septic system. The thymol spray I created has worked great! So far, so good 🤗
Very informative post about how to sanitize seed trays, and I love the recipe for making homemade thymol spray. I will be trying this…thank you for sharing!
Enjoy!!
I had never thought about the need to sanitize seed trays. These are great tips!