
")
Reviving refrigerated sourdough starter success! When you’ve taken a vacay from maintaining a healthy sourdough starter, reviving your sourdough starter with this easy to follow guide will have you back to baking your favorites in no time!
This post may contain affiliate links at no additional cost to you. By making your purchases through the links on this website, IMSL may make a small percentage at no direct cost to you. IMSL only promotes products we use & truly believe in. Please refer to my Privacy & Disclosures for further information. IMSL thanks you for your support!
Every so often you just have to take a break, ask anyone who maintains a healthy, happily fed sourdough starter 😂. Fortunately for us sourdough lovers, a sourdough starter is resilient thing.
Sending your starter to refrigerator camp when you need a break for a week, a month, and even longer (I am speaking from experience here!) is a simple process and one that can be reversed just as easily by following these easy step-by-step methods.
CAN YOU BRING SOURDOUGH STARTER BACK TO LIFE
The cold hard facts are that anything worth making takes effort. Whether you are creating your own sourdough starter from scratch (post coming soon on how to do just that), maintaining an existing starter, or reviving an old, neglected sourdough starter kept in the fridge for who knows how long, there’s hope.
With a bit of time, patience, consistency, and a few sprinkles of love added in for good measure, you can restore, revive, and infuse life once again to your favorite dough ferment!
Sharing Is Caring ❤️
HOW TO STORE SOURDOUGH STARTER IN THE FRIDGE
Every so often, even the hardiest of baker’s need a vacation or a break. Should you be in need of a respite from the daily or weekly feed, storing your sourdough starter in the fridge is a viable option for putting the starter to sleep for awhile.
It’s important to note that sourdough starter can be stored in the refrigerator successfully when you begin with a healthy starter. One that’s active and happily bubbling away.
Storing your sourdough starter in the refrigerator to slow the fermentation process is a wonderful option for those who don’t need to bake as frequently. Since we are now considered “empty nester’s”, I don’t bake as often and only need to remove my starter from the fridge when I need to bake.
To prepare your sourdough starter for its rest in the fridge, use a 1:2:2 ratio of starter to flour & water to feed your existing healthy starter before placing it into the fridge.
EXAMPLE: Take 50g sourdough starter and mix in 100g flour & 100g water.
Once you’ve fed your starter, cover it and place it into the fridge at around 38°F (3°C) for storage. Easy, peasy!
No need to wait for your starter to double prior to placing it into the fridge. We don’t want your existing starter to eat up all its food before going to camp!
DETERMINE IF YOUR SOURDOUGH STARTER CAN BE REVIVED
If when you stored your starter it was healthy and active, you should have a healthy and happy sourdough starter that’s just in sleep mode when you go to retrieve it from camp 😊
And thank goodness for that little nugget as my starter has been severely neglected (ok, actually forgotten) for I honestly don’t know how long. Too long, that’s for sure!
Your starter taken from the fridge should show no signs of severe neglect. Should you discover mold in any of its various colors, have any fuzzy growth showing anywhere in the jar, or have a pink or orange streak or growth, be sure to throw away the starter as these are sure signs the starter has gone rancid or turned, and the bacteria have overtaken the yeasts. Time to start over.

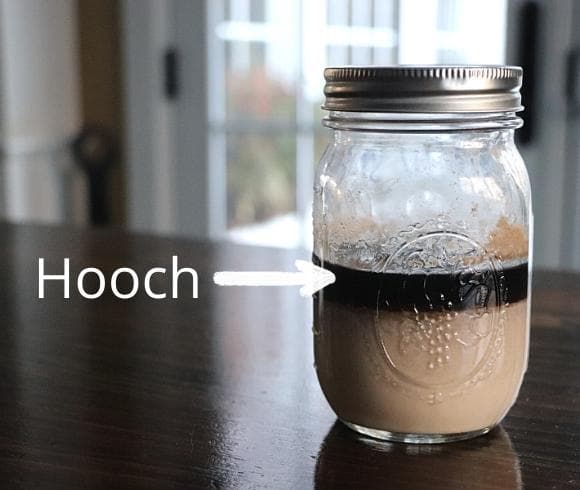
However, should the starter you remove from the fridge look as the one in the image below does, with a line of black liquid on top and no signs of spoilage, you are good to go.
This liquid is referred as “hooch” and is the alcohol produced from the wild yeasts ferments.
A sniff test is always a wise choice as well in determining if your starter is viable for reviving. My very neglected sourdough starter taken from the refrigerator as shown below has a distinct smell of alcohol. Yours could also have a tangy scent similar to vinegar or even nail polish remover, all of which are indications it remains viable.
Should yours smell like, well, vomit, throw it out and start over.
My sourdough starter is simply starving for some added attention. Once it’s reached this state, it’s still easily revived, although it may require a bit more attention than that which has been kept for shorter periods.
When you’re trying to determine if your sourdough starter can be revived or not, when in doubt, start over.
REVIVING REFRIGERATED SOURDOUGH STARTER
Reviving or reactivating sourdough starter that has been refrigerated is possible and pretty straight forward.
When it comes to reviving refrigerated sourdough starter that’s developed hooch, you have two options. Drain the black liquid off or stir it in.
SOURDOUGH HOOCH – TO DRAIN OR NOT TO DRAIN
I’m of the stir it back in mindset as draining it off may effect the starter’s hydration levels. Not to mention possible flavor 😊
If you can’t bring yourself to stir the hooch back in to the starter, simply pour as much of the hooch off as you can and go from there.
When reviving your starter it really is dependent on how long your starter has been lazing away in refrigerator camp.
HOW TO REVIVE NEGLECTED REFRIGERATED SOURDOUGH STARTER
A neglected sourdough starter is one that has been residing in the fridge & having not been fed for a much longer period of time than just a week.
To revive your neglected sourdough starter from the fridge, remove it from the refrigerator and allow it to come to room temperature. This will typically take from 1 to 2 hours or more.
When it comes to sourdough, you can feed it either by weight (utilizing a kitchen scale) or by volume (utilizing measuring cups). Although either method can be used, I recommend using the weight method as a more accurate way to feed your starter.
Below is the one I use and is very reasonable in cost.
To begin the re-awakening of your starter, do the following …
- MIX – Stir your starter so all is incorporated together well. At this point, your starter may or may not be bubbly. Mine definitely was not showing signs of being active
- REMOVE STARTER – Remove 50g of sourdough starter and place into a jar or bowl

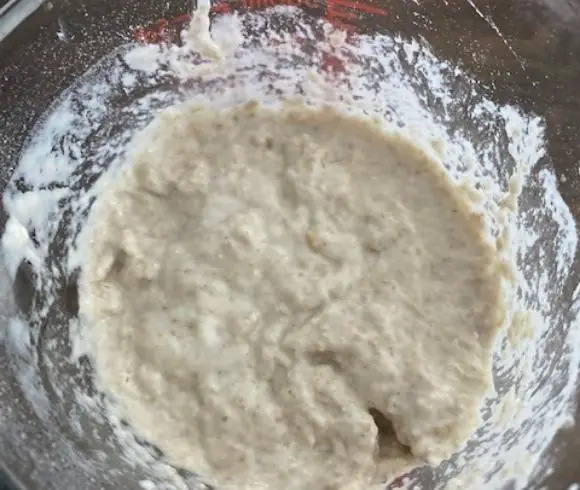
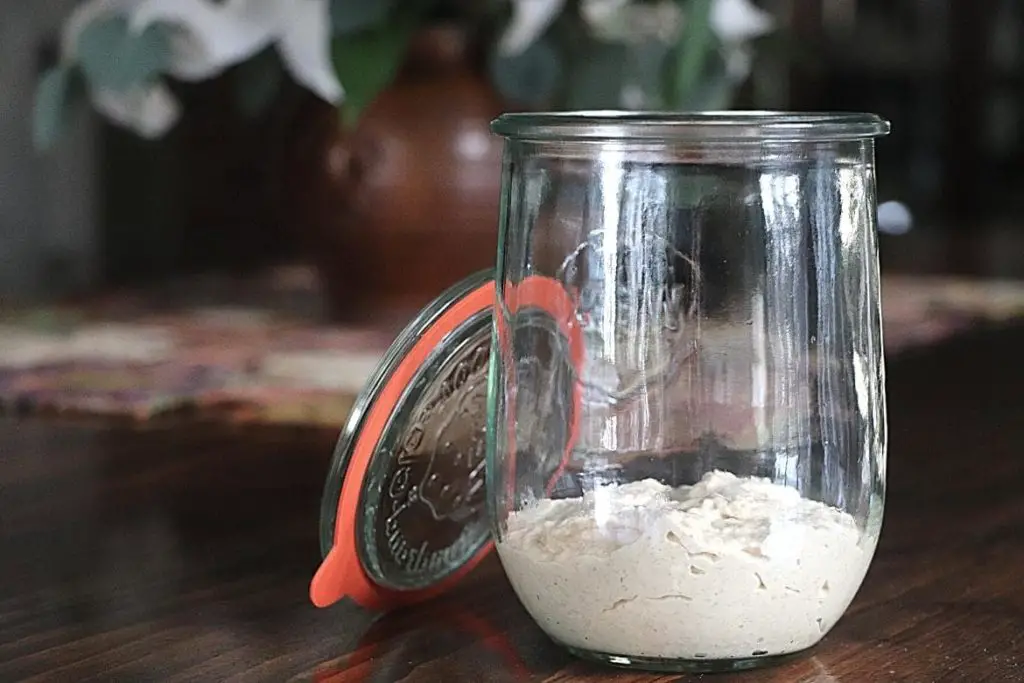
- FEED – Weigh 100g of flour (about 1.5 cup) and 100g of water (about 1/4 cup) separately and mix both with the starter until well combined
Below is an image of my first feeding.
- WARMTH MATTERS – When reviving your sourdough starter, warmth matters for reactivation of the yeasts. Ideally, your room temperature wants to be approximately 70°F to 75°F to maintain sourdough, but when reviving the starter will enjoy a bit warmer temps of 78°F (25°C) to 80°F (26°C) if possible.
Should your home be cooler, consider placing the fed starter near a cook wood stove or wood stove (not too near tho’), or if you’re like me, on top of my cast iron radiators 😊
- REST – Allow the newly fed starter to rest in a warm area for about 12 hours
- RE-FEED – After rest, repeat another feeding by removing 50g of starter and combining it with 100g flour and 100g water, mixing well. Allow this second feeding to rest once again in a warm area covered for about 12 hours.
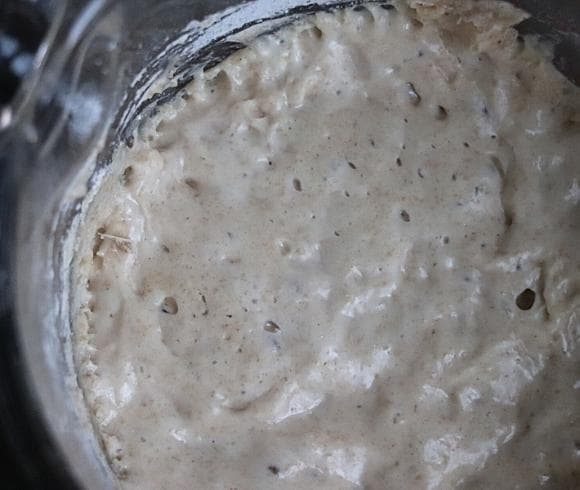
After this feeding, your starter should be showing some signs of life returning. No worries, however, if not, just repeat the feeding every 12 hours or so until it begins to almost double in size and is nice and bubbly.
HINT: It may be helpful to mark your jar with a starting level so you can easily determine when the starter begins to grow.
Once your starter has actively doubled in size, reduce the feeding time and feed only once every 24 hour period.
If your starter is doubling in size each and every time it’s fed, maintain a feeding schedule of 24 hours for 4 to 5 more days. This will strengthen your revived sourdough starter and create a beautifully, healthy & active one.
SOURDOUGH STARTER MAINTENANCE GUIDE
Hopefully at this point you’ve successfully revived your starving sourdough starter & it’s now a healthy and happy one. Fortunately, maintaining a healthy starter is straight-forward & simple.
First up, setting your baking schedule. How often are you in need of a fresh loaf or other bake? A few considerations for setting a schedule that suits your household are …
- NEEDS – Are you a large household & in need of several fresh bakes every few days? Or are you only in need to bake once a week for even less?
- TIME – How much time do you have available to feed and maintain your starter on a daily basis? Or are you looking to send your starter to the fridge camp weekly?
Once you have determined your baking needs and schedule, you can adjust your sourdough maintenance accordingly.

INFREQUENT BAKER
For those who need to bake infrequently (once a week or less), sending your starter to refrigerator camp would be a good approach.
Prior to placing your starter in the fridge, feed it with a 1:2:2 ratio & store in fridge. To maintain a healthy starter in the fridge for longer than a weeks time, plan on feeding it once per week.
When you need a bake, remove the starter, let it come to room temp, and feed once again with the 1:2:2 ratio, allowing it to rest in a warm area covered for 12 to 24 hours.
Use as normal in your intended bake.
FREQUENT BAKER
Using the baker’s percentages method (20% ripe starter to 100% flour/water) will allow you to adjust how much you need to maintain and have on hand.
For those who utilize your sourdough starter in bakes often, keep your starter on a countertop at room temp and give a daily feeding. The ratio can be adjusted according to your needs.
HINT: Combination of flours can be used in any percentage amounts you like. For example: 30% Rye and 70% All-Purpose.
Should I need to feed daily using the baker’s percentage method I would reduce my ripe starter down to 20g, weigh out 100g of my combination 30% rye and 70% all-purpose totaling 100%, and 100% water. Give it a thorough mixing, cover with my glass lid (Weck jar) loosely placed on top (not sealed) and store in a warm area.
NOTE: The more ripe sourdough starter you begin with translates into faster ripening times, and less ripe starter used translates to slower ripening.
REVIVING REFRIGERATED SOURDOUGH STARTER – QUESTIONS/TROUBLESHOOTING
When your sourdough starter is in need of some love and attention, and a bit of know-how these common questions and tips for troubleshooting may help.
WHAT IS THE BEST FLOUR TO USE TO REVIVE SOURDOUGH STARTER?
Although not a hard rule, I recommend using the same flour to revive and maintain your starter as you did to create the starter. Similar to training the body, you’re in essence training your starter to behave in the manner you like.
To change the flour you want to use permanently, do just that. Make the switch and continue with that flour choice, realizing that it may take the starter a few days feeding time to recognize the change and shift its “behavior”.
It’s definitely not recommended to change the flour being used for daily feeding often as it will definitely weaken the state of your starter.
BEST TEMPERATURE’S FOR REVIVING SOURDOUGH STARTER
Sourdough starter that’s being revived thrives in warm temperatures between 78°F (25°C) to 80°F (26°C). These warmer temps will speed up the revival process nicely.
Note that active yeasts are not invincible and can be killed when temps reach over 140°F.
TOO MUCH OR TOO LITTLE STARTER
The common theme when maintaining sourdough starter is having too much on hand. However, there are times when too little is available. Fortunately, you can easily adjust the amount of starter you keep on hand with time and experience.
When you are feeding your starter on a daily basis, it stands to reason you will have a LOT of discard. The good news? It can be used so don’t throw it away!
Sourdough starter is a ferment and as such makes a great addition to your compost pile or fed to the chickens should you have them! Alternatively, gift some, turn it into yummy biscuits, baguettes, pancakes, waffles, cakes, pizza dough/flatbread, used as a batter for fried foods, made into crackers, and even used as a sauce thickener.
Alternatively, when you find your starter dwindling, simply feed it larger amounts to increase the amount available.
ALTERNATIVE SOURDOUGH STARTER STORAGE
There are other methods of storage for your starter than just the countertop or refrigerator.
FREEZE – For long-term storage instead of refrigerator camp where it can be neglected pretty easily (yes, like mine), consider freezing your starter. It won’t need to be fed until you are ready to unthaw and use. It’s simple to revive by allowing it to thaw at room temp, and feed it as you would to revive with a ratio of 1:2:2.
DRY – A method I’ve yet to try myself is to dry your starter for long-term storage. This method is done by spreading it out on a parchment lined baking sheet as thinly as possible. Dry the starter at room temperature until completely dry and brittle. The time it takes to accomplish this is entirely dependent on your location and humidity levels.
Once completely dried, it should easily peel from the parchment and easily break when doing so. Your dried starter should be weighed and noted for future use.
HINT: 4 oz of fresh starter weight will equal to about 2 oz when dried.
Break the dried chips into pieces or pulverize it, place in an air-tight container, glass is preferable.
To revive dried sourdough starter, weigh equal parts of the dried starter and warm water. Once completely rehydrated, feed it with 1:1:1 ratio of starter, flour, and water.
ONCE REVIVED, DO YOU HAVE TO DISCARD SOURDOUGH STARTER AT EACH FEEDING?
No. No. Nope! Once revived and reactivated, an established, healthy, and active sourdough starter does not need to be discarded at each feeding.
To feed without discarding, simply add your normal flour and water ratio’s, stir, and continue on your merry way.
MAINTAINING SOURDOUGH STARTER TIPS
You may feel like Rocky at the top of the steps doing a little jig once you’ve established a healthy starter 😂. I know I did!
Keeping it healthy and active may seem a bit daunting, but it actually isn’t when the above tips for reviving and maintaining it are followed.
To make sure it continues to flourish here are a few tips for maintaining that baby.
TIMING MATTERS
Adhering to a set schedule is a great way to ensure continued success with your starter no matter what your feeding schedule is.
I like to go one step further with not just how many times per week to feed (refrigerator storage = 1x/wk and countertop storage = 1x/day) but also adhere to what time of the day you feed it.
Should you feed first thing in the a.m., stick with that etc.
WATER QUALITY MATTERS
Unfortunately, water is not just water any longer. Depending on where you reside, the water you have access to can be chemically treated.
Should this be the case, to keep your starter as healthy and viable as possible, I recommend you boil you water for 15 minutes to release any contaminants. Alternatively, use bottled water.
Creating a successful sourdough starter routine is paramount to creating successful bakes. Keeping it healthy along the way is the challenge.
Hopefully these tips and suggestions for maintaining and reviving your refrigerated & stored sourdough starter will have you baking successfully no matter how long a break you may need!
Are you reviving refrigerated sourdough starter?
Love, Light, & Laughter ~

SHOP THIS POST
Enjoy this article? Please consider sharing it on your favorite social media channel! Want more? Subscribe below for the occasional update with all the “happenings on the hill”!
MAY BE OF INTEREST
10 comments
I am kicking myself for not even considering that a neglected starter could be revived! I’ve bookmarked this page for future reference!!!
This was such an educational post. I definitely see some sourdough in my future.
We had no idea that we could revive our sourdough starter! Thank you so much for sharing.
I enjoy your posts but I rarely bake. However, lately I’m starting to consider it. I didn’t know you have to maintain a starter for sourdough.
I didn’t know you could revive sourdough starter! Very cool.
Oh! I love home made bread! Thank you for sharing tips how to revive the starter
I have this in my frig and really need to do a batch!
This makes me want a warm loaf of bread soooo badly.
I had no idea that you could save your starter! Awesome!!
The struggle is real sometimes- it’s good that there might be hope for my old starter!