

This Elderberry Jam Recipe made with either fresh elderberries, dried or frozen, makes for a tasty and healthy addition to any pantry.
This post may contain affiliate links at no additional cost to you. By making your purchases through the links on this website, IMSL may make a small percentage at no direct cost to you. IMSL only promotes products we use & truly believe in. Please refer to my Privacy & Disclosures for further information. IMSL thanks you for your support!
Capture the flavor & herbal health of elderberry any time of the year by making & preserving this elderberry jam recipe! Here you can discover how easy it is to harvest elderberries during the height of the growing season, how easy it is to prepare the elderberries for use, how quick it is to make this elderberry jam recipe, & how simple it is to preserve elderberry jam by steam canning it!
Most who know me, know my love of all things elderberry related. From the early signs of flowering, we put all the elderflower benefits to work for us. Especially with our elderflower tincture!

But we don’t stop there. After all, the elderberry benefits are many, and we don’t let one little fruit go to waste!
Our favorite elderberry use(s)? Elderberry syrup and elderberry tincture. We often supplement both of these by making a healthy herbal oxymel using the berry as well. All are filled with lovely herbal health we can access throughout the year.
One further way we can harness all the benefits of our beloved elderberry? By making this Elderberry Jam Recipe!
WHAT DOES ELDERBERRY JAM TASTE LIKE?
This elderberry jam recipe tastes a bit like blackberries, but with their own unique flavor.
SHARING IS CARING ❤️
I’ve also heard mention that the jam flavor is likened to that of black currant jam.
When making elderberry jam, I don’t worry about the seeds. Once cooked, they pose no threat and add a bit of crunch to the jam very similar to that of my raspberry jam!
Needless to say, it’s delectable for all, old and young alike.
P.S. Making this elderberry jam recipe is a great way for young one’s to enjoy the herbal health of elderberry in a sweet way 😊
Fortunately, making this jam is easy to do and pretty straight forward, and quick.
That is once you have the elderberries prepped and ready to go 😅
IS THIS AN ELDERBERRY JAM OR JELLY?
What is the difference between a jam and a jelly? Consistency.
Jelly is made from the juice only of the fruit. Juice that has been strained and contains no pieces of fruit.
Jam on the other hand, is made from both the juice and the fruit which has been mashed and cooked along with the juice.
That being said, I’m referring to my elderberry jelly/jam as jam, since I will not be straining just the juice.
We do enjoy a bit more texture to our spreads than what jelly has to offer. Should you not be a fan of seeds in your preserves, straining just the juice will be the route for you.
A BIT ABOUT ELDERBERRIES
Elderberries are the fruit or berry from the Elder plant. This flowering shrub or tree known as Sambucus nigra is part of the Adoxaceae family of plants.
HEALTH BENEFITS OF ELDERBERRIES
Long used in home apothecaries for immune support, elderberries are filled with “anti’s”. Anti-bacterial, anti-inflammatory, and antioxidants.
Highly nutritious (vitamins C, A, & B6 as well as other essential nutrients) and full of medicinal health, the more ways we can utilize the elderberry in both our home remedies and our table the better!
By making jam instead of jelly, I’m also able to capture the roughage offered from the berry itself.
NOTE: Although elderberries which have been cooked are highly nutritious & full of herbal health benefits, the raw berries, leaves, and stems are not, and can be toxic.
Foraging is easy to do as this plant is readily identifiable growing near boggy areas, alongside riverbanks, and at the forest edge.
You can also grow your own elderberry patch should you have the space. I’m fortunate to have 2 large stands of elderberry here on the property.
As capturing this fleeting crop before the wildlife takes advantage can be tricky, growing our own helps with a timely harvest.
Depending on your location, you can expect to harvest the deeply purple, bordering on black berries come mid to late summer. Here in gardening zone 5b, that means mid-July.
Both the flowers and the berries are edible, but stay clear of ingesting stems, leaves, and uncooked seeds as they contain alkaloids and cyanidin glycosides which may be harmful.
HOW TO HARVEST AND PREPARE ELDERBERRIES FOR JAM
When you find the berry clusters hanging “face” down toward the ground, and the berries are plump and black in color, it’s time to harvest.
HARVESTING ELDERBERRY FOR JAM
As the elder shrub or tree can grow upwards of 20 feet tall, you may need to invest in a pair of telescopic loppers in order to harvest the berry clusters, depending on the area in which you live.
Here in the N.E. our elderberry grows only to shrub-like heights.
As with any foraging endeavor, being respectful of landowners, the land, and the wildlife is always recommended. Ask permission when appropriate, be careful of damaging the plant, and never taking more than ⅓ of the plant when harvesting.
Snipping the ripe clusters is a simple process of cutting the cluster stem to where it attaches to the branch at the V as shown in the video above.
Harvesting the berries is a quick and simple process. The actual berry preparation, well, it can be a bit tedious as some would call it. Personally, I call it meditative 🤗
PREPARING ELDERBERRIES FOR JAM
Preparing fresh elderberries for making your jam requires one thing.
Patience.
Some find it helpful to freeze the berry clusters prior to stripping the berries from their stems. I have found no difference between stripping them frozen or fresh. Frozen does, however, reduce the residual purple stains you may acquire from using fresh!
It just takes time, a bit of patience, and a lot of love 😍
To strip the berries, take a fork and run the fork from the center of the cluster to the tip removing the berries. Be sure to do so over a large container to catch the berries.
Alternatively, you can simply use your fingers to gently rub the berries from their tiny stems.
Once the berries have been removed you will most likely have a good amount of tiny stems remaining from where the berry attaches itself to the cluster.
Remove as many of these tiny stems as possible from the berries.
Likewise, you will want to remove any unripe or green berries from the rest.
CAN YOU MAKE ELDERBERRY JAM FROM DRIED OR FROZEN ELDERBERRIES?
Should you not be fortunate to have access or the time to forage & harvest your own berries, elderberry jam can be made from elderberries which have been frozen or dried!
This is what I’ve done this year as time just ran out during the elderberry harvest months. I simply froze the berries until I had the time, well, time and the energy to make the elderberry jam!
Sourcing high quality dried elderberry online is made easy when going through Amazon or my favorite source Mountain Rose Herbs.
Keep in mind when using dried elderberries, they will need to be reconstituted. To do so, simply soak them overnight in water.
HOW TO USE ELDERBERRY JAM
Elderberry jam goes far beyond a topping for your morning toast. Although that is yummy too!
Our favorite is on top of our buttered Homemade Biscuits, but a close second is drizzled over the top of our Old Fashioned Vanilla Bean Ice Cream!
Other uses to consider …
- Mixed with a thick, homemade yogurt
- On scones
- In PB&J sandwich
- Used in Thumbprint Cookies
- As a sweet addition to any charcuterie board
- Over baked brie
- In marinades
- Over French Toast
- In crepes
- As filling in cakes and other baked goods
- Along with your morning oatmeal
- As a homemade pop-tart filling
I’ve also heard of parents giving their young ones a spoonful of sweetness a day for continued immune support throughout the year. Especially helpful for those littles who may not enjoy taking the elderberry syrup!
Be creative! Use this jam as you would any other!
REASONS TO LOVE THIS ELDERBERRY JAM RECIPE!
If the uses for this elderberry jam weren’t enough reasons to love it, here are a few more for ‘ya!
- SIMPLE INGREDIENTS – The base recipe calls for just 3 ingredients; elderberries, sugar, and lemon juice. Optional ingredients in addition to the above listed; pectin or apple juice
- EASE – This jam recipe is quick and easy to whip up anytime
- TASTE – Once you’ve discovered elderberry jam, it will soon be a favorite
- HEALTHY – Most everyone loves a sweet jam, but add to that one that boasts many health benefits as well? Win, Win
ELDERBERRY JAM RECIPE
Making this elderberry jam recipe is straightforward with simple ingredients.
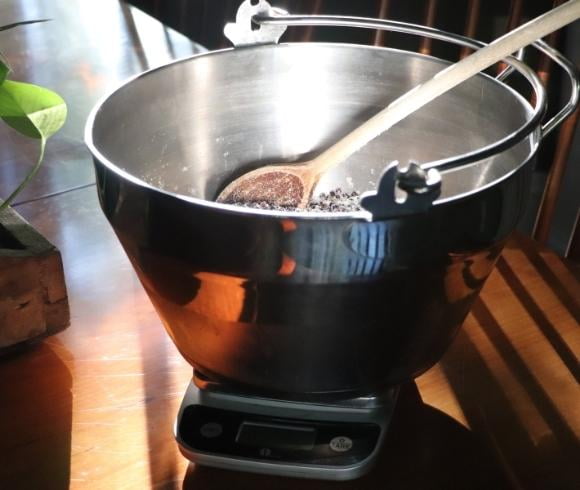
I prefer to use the French method of making jam as it’s, well, just easier! To do this is simply a matter of placing the ripe berries into my jamming pot or maslin pan, my favorite can be found HERE, and macerating the fruit in the sugar overnight.
Cover the pot, and come morning you will find the sugar will completely be dissolved and the berries will have released much of its juice.
It’s now ready to cook, and quickly I might add as you don’t have to slow cook to dissolve the sugar, by adding the lemon juice (or following the instructions on the pectin box should you be going that route) and bring the entire mix to the boil.
For my elderberry jam recipe, I’ve used 2 lbs of whole elderberries (weighed as I will be processing using a steam canner) along with weighed sugar in the amount of 2.3625 lbs of sugar. I’ve combined both weighed ingredients in my maslin pan and allowed them to macerate overnight. This encourages the juices of the berries to release, making for a quicker cook time in the morning!
When ready to cook, bring the sugar and the berries to a boil slowly to the gelling or set point of 220 F (105 C). More on that below.
Once the jam is ready, fill your clean jars (hot if canning), cover and store in your refrigerator for use once completely cooled.
JAM & JELLY SETTING POINT TEST OPTIONS
When making jams and jellies without the use of added pectin, the setting point test is essential.
The jam setting or gelling point is 220°F or 105C. Using a candy thermometer is by far the easiest method to test for gelling.
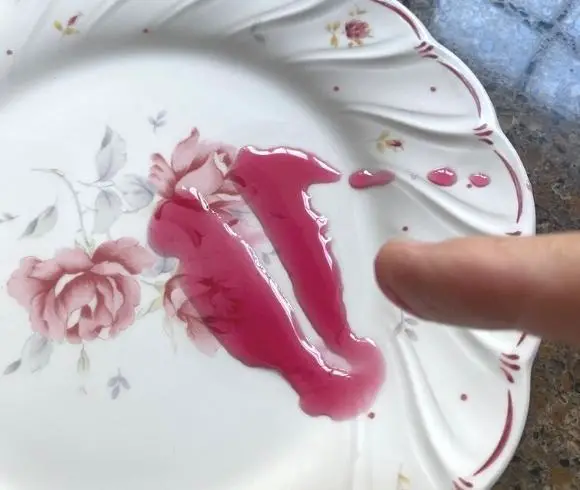
In addition to the temperature test, you can freeze a small plate and spoon a bit onto the cold plate. When you run your finger through it when cooled, it should pretty much remain passive & not wrinkle. If the jam does not fill the gap you made with your finger, it’s set perfectly.
Alternatively, you can do the same using a spoon, using the sheeting method. To use this method, dip a cool metal spoon into the boiling jam/jelly and lift out so that the liquid runs off the edge of the spoon. When there are no longer any drops running off the spoon, but instead form a “sheet”, it’s set.
When using additional pectin, although I still perform a sheeting test, it’s not so essential that this step is completed. Instead, go by the manufacturer’s instructions.
IS THIS ELDERBERRY JAM RECIPE SAFE TO CAN?
As elderberries are naturally low in acid, canning elderberries alone or in syrup is not recommended. However, the exception to that rule is elderberry jam or elderberry jelly IS safe to can as long as the ingredients are weighed and a few precautions are met.
- WEIGH INSTEAD OF MEASURE – It’s imperative that both the elderberries & the sugar are weighed & not measured. For jam (the jelly ratios are a bit different) that translates to a ratio of 47:55 = 0.85, berry pulp to sugar. For instance, 16 oz of fruit pulp (1 pound) the recipe must have 18.9 oz (1.18125 pounds) of sugar. Again, these ingredients need to be weighed
- NO ALTERNATIVE SWEETENERS – Honey, low sugar, or any alternative sweetener cannot be used to safely can this jam recipe
CANNING ELDERBERRY JAM
For most jam and jelly recipes, using the water bath canning or steam canning are both safe methods for preserving these items long-term.
I prefer to water bath can when I am processing larger batches. But for small batch canning, the steam method is my go to option for preserving.
Why? It uses a LOT less water AND a LOT less stove energy to process.
GRAB YOUR CANNING MANAGEMENT PLANNER TODAY!
Follow my easy instructions to water bath can should you not have a steam canner. Be sure to leave ¼ inch headspace and process the jars for 5 minutes when making jelly and 10 minutes for jam.
STEAM CANNING ELDERBERRY JAM
Steam canning, aka ASC or atmospheric steam canner, is a quick and easy method of processing foods for long-term use.
Until just recently, this method of canning or preserving was not recognized as a safe method to utilize. The University of Wisconsin has now published research indicating this method of home food preservation is now safe under certain circumstances.
This is great news for a more sustainable method of food preservation! Not only does it use much less water and less energy to process, but it also shortens the time needed to not only bring the water to temperature, but also shortens the time to safely remove the canner from the heat once processing is complete.
CONSIDERATIONS WHEN CHOOSING TO STEAM CAN
- Foods must have a pH of 4.6 or lower
- Use only research tested and evidenced based recipes
- Use only pre-heated jars when either packing raw or hot
- Be vigilant in observing and adjusting the heat accordingly. Boiling too vigorously will deplete the water completely within 20 minutes
- Use only ¼ pint, ½ pint, pint or quart size jars
- Modify altitude processing times as you would when using a water bath canner
- Use the steam canner only for those food products which require under 45 minute processing time
- Follow the water bath canning processing times when steam canning (anything under the 45 min. rule)
HOW TO STEAM CAN ELDERBERRY JAM
When it comes to processing this elderberry jam recipe using a steam canner, I’ve made a simple video below showing the process to simplify.
Bring 2-3 inches of water to a boil in the steam canner. Pre-temping the water in preparation for placing the hot packed jars directly onto the steam canner rack.
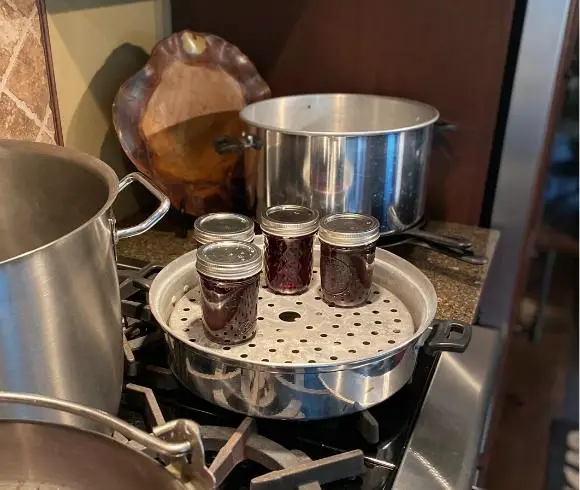
Steam canning elderberry jam is really a simple matter of making the jam, hot pack the jam into sterilized hot jars leaving ¼ inch headspace. Place the lid and rings on jars with clean & dry rims, finger tightening only.
PROCESSING ELDERBERRY JAM IN STEAM CANNER
STEP 1
Place the filled, hot packed jars directly onto the steam canner rack which has been brought to the boil & kept at temperature.
STEP 2
Cover the steam canner and secure the lid (following the manufacturer recommendations from your canner).
STEP 3
Turn the temperature to high. Once a steady stream of steam has developed, usually between 6 to 8 inches in length, begin the processing time.
STEP 4
Process the elderberry jam for 10 minutes, 5 minutes for jelly. Turn the heat off once the processing time is complete.
STEP 5
Carefully slide the canner from the heat & allow it to rest with cover still on for 5 minutes.
STEP6
Carefully remove the canner lid, making sure to aim it AWAY from you as a lot of hot steam will remain.
STEP 7
Remove the processed jars, leaving them upright*, and place them on a towel to completely cool and set.
*NOTE: I’ve heard of many turning the jars upside down (inverting) to reduce the risk of spoiler micro-organisms. I err on the side of caution and follow only safe canning procedures which have been tested. Inversion canning in my opinion is not a safe method as it can lead to seal quality issues.
In addition to the above note, stacking processed jars, pushing the lid down to test the seal, and inverting them are all no’ no’s here on the hill 😊 As with everything, opinions will differ. I recommend due diligence and research to see what is appropriate for you and your family.
STEP 8
Once completely cooled, test for seal by removing the screw cap and take hold of the lid only & try to lift the jar slightly. Any give in that process, place the jar into the refrigerator for use first.
FINAL STEP
Wash the sealed jars with warm soapy water and allow to dry completely.
Once dried, label & date your jars and store for up to 2 years in a cool, dark pantry.
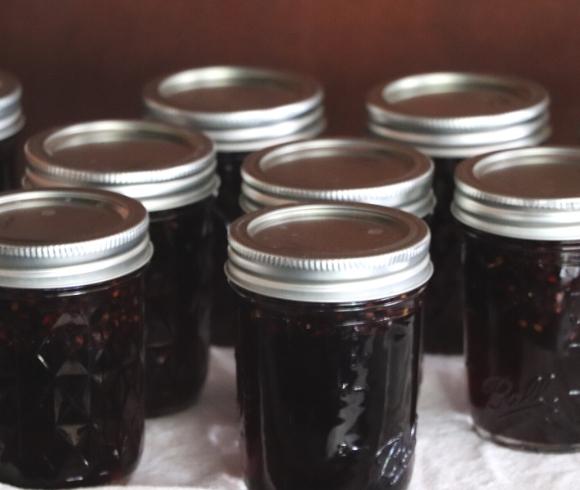
The above recipe made a total of 9 ½-pint jars of elderberry jam.
Save The Recipe!

Instructions

Elderberry Jam Recipe
Equipment
- 1 Jam Pot
- 1 Measuring Cups & Spoons
- * Optional Canning Equipment
- * Optional Kitchen Scale
Ingredients
- 2 Lbs Elderberries
- *2 Lbs Sugar *weighed to 2.3625# when steam canning
- 1 Pkg Pectin (optional)
- 1/2 tsp Butter (optional)
- 1/2 Whole Lemon juiced
Instructions
- Prepare the elderberries, removing green berries, stems and leaves
- Add the prepared elderberries and sugar to the jamming pot. Allow to sit overnight
- Follow the manufacturer's instructions from here when using pectin
- Place the pot onto the stove and turn the heat to medium. Add the lemon juice and butter (reducing foaming) to the elderberry and sugar mixture. Slowly bring the mix to a boil, stir often
- Continue to boil until the setting point has been reached. 220 F (105 C). Skim foam should any develop
- Test for gelling by performing setting test. Place a bit of jam onto a chilled saucer and place into the fridge for a minute. Remove the saucer and run a finger through the center of the jam spot. No jam should run back into the space created
- Boil for another 2 minutes should the jam not pass the setting test and retry
- Follow proper canning instructions and process jam for 10 minutes or jelly for 5 minutes. Store processed, shelf stable jars in a cool and dark pantry for up to 2 years
- When not processing or canning, simply pot into jam jars that have been sterilized, place lids and allow to completely cool. Place into the refrigerator and enjoy!
There you have it! Elderberry jam can be safely canned when following the above guide. A great way to extend the elderberry harvest in a sweet way 🤗
Will you be making this elderberry jam recipe?
Love, Light, & Laughter ~

SHOP THIS POST
Enjoy this article? Please consider sharing it on your favorite social media channel! Want more? Subscribe below for the occasional update with all the “happenings on the hill”!
11 comments
We love a good jam and will be making this Elderberry Jam! The recipe is easy sounding. Thank you for sharing.
What a great recipe for elderberry jam! So many benefits and yummy!
I want to try this recipe for Elderberry Jam! I’d eat it with sourdough bread toast.
This looks so good! Perfect for biscuits. I didn’t really know the difference between jam and jelly before reading this post. That’s cool to know for when I go shopping. Thank you!
I love that your Elderberry Jam recipe is simple and straightforward. I can almost taste it on my toast!
I am completely new to Elderberries and have to admit I had no idea they were poisonous if not cooked. At what point do you know they are safe? This elderberry jam looks absolutely delicious and I am excited to add it to my list of jams to try when I make my next yearly batch. However, I am curious, is this one that I need to make on my own without the kids? Usually when we make jam they are tasting as we go. But if the elderberries need to be cooked, is that a strict no-go? I know this question may seem silly, I just want to make sure I understand before we make a batch. 🙂
No silly questions here! I would not let my kiddo’s eat raw elderberry. When consumed in quantity they can be toxic. They are completely safe once cooked. Hope that helps a bit!
This elderberry jam sounds delicious! I’ve used elderberry tincture for health benefits for years. But I haven’t really gotten enough of the taste to know what it would be like as a jam. If it’s like blackberry jam, sign me up!
My grandmother used to make elderberry jam and jelly…so good! I didn’t realize the health benefits.
What a wonderful food memory! Thanks for stopping by and sharing it.
S
I’ve never made jam before, but I’ve always wanted to. Elderberries have so many health benefits, and your directions sound easy. It would benefit me instead of buying store-bought jelly full of unknown ingredients. I love your three simple ingredients.