
")
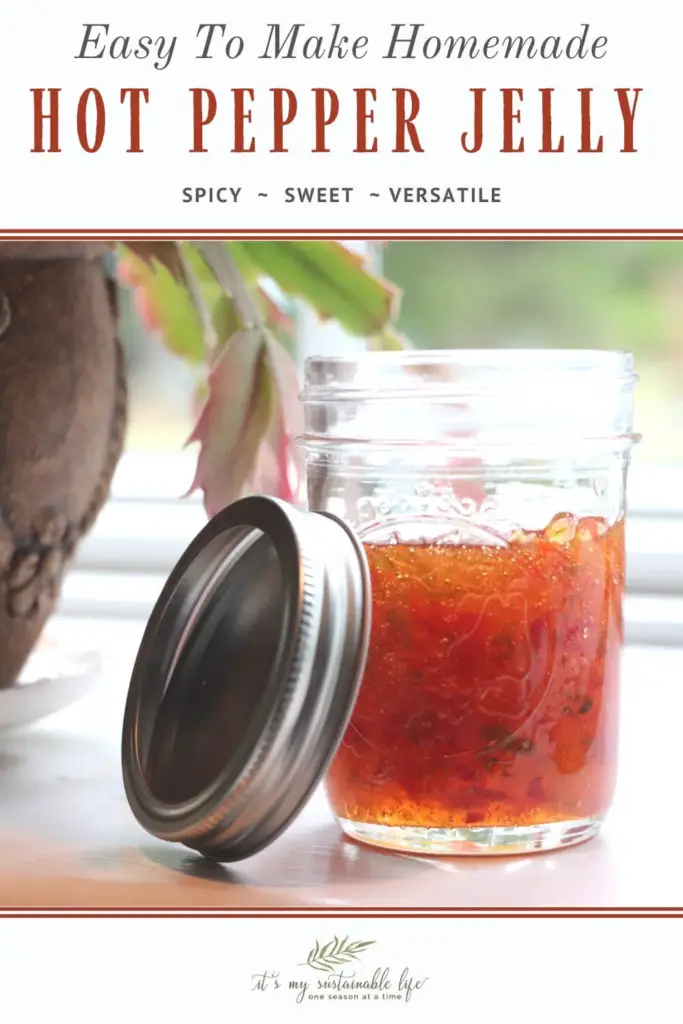
Homemade hot pepper jelly, a perfect balance of sweet and spicy, is perfect to serve at any gathering, to give as gifts, or enjoy anytime of the year.
This post may contain affiliate links at no additional cost to you. By making your purchases through the links on this website, IMSL may make a small percentage at no direct cost to you. IMSL only promotes products we use & truly believe in. Please refer to my Privacy & Disclosures for further information. IMSL thanks you for your support!
When I enjoy a bumper crop of peppers, both sweet and hot, I turn to making homemade hot pepper jelly. Why? It’s versatile to make & use. And did I mention how delicious it is?
HOMEMADE HOT PEPPER JELLY DEFINED
For those who have not had the pleasure of enjoying homemade hot pepper jelly, hot pepper jelly is made using, well, peppers 😊. How spicy you want to make it is totally up to you. Here on the hill we like things hot. Spicy that is 😂
The combination of sweetness and heat make for a pair made in heaven when served with cream cheese. And can I say just how pretty it is to boot?
HOMEMADE HOT PEPPER JELLY WITHOUT CANNING
Although I will be briefly sharing the canning instructions I’ve used to make this homemade hot pepper jelly, by no means do you have to can it. Cut the recipe in half and store it in your refrigerator, this pepper jelly will last months. That is unless it’s devoured before then 😁
The canning instructions are brief and to the point. Should you be a beginner canner, or un-familiar with basic canning, I recommend you review “Water Bath Canning For Beginner’s” and any other applicable canning topics which can be found HERE.
INGREDIENTS NEEDED FOR HOMEMADE HOT PEPPER JELLY
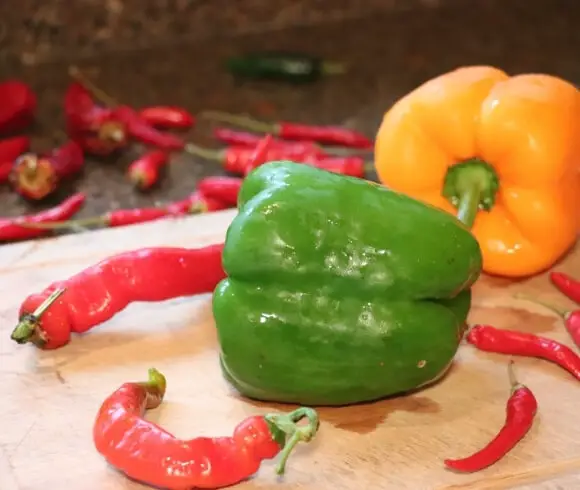
I’ve used a variety of sweet peppers only cuz’ I think it makes for a prettier presentation, almost a confetti look. Which type of hot peppers you use is totally up to you. Again, I’ve used a variety as this is what I have an abundance of!
To put this homemade hot pepper jelly together you will need the following ingredients…
- GREEN PEPPER – A total of 1 cup of finely diced
- YELLOW OR ORANGE PEPPER – 1 cup finely diced
- RED PEPPER – 1.5 cup finely diced
- HOT PEPPERS – As we like things spicier than most, I’ve added 1/2 cup of seeded & finely diced hot peppers*
*NOTE: When handling hot peppers, especially when in this amount, I highly recommend using disposable gloves. NEVER handle with your bare hands or touch your eyes after handling! Should you forget and have a reaction such as a burning sensation, rub plain yogurt or milk on your hands several times.
- 5% APPLE CIDER VINEGAR – 1 Cup
- SUGAR – 5 Cups*
- PECTIN – 1 (1.75 oz) package powdered pectin**
*NOTE: I am aware this is a lot of sugar. However, this jelly is so flavorful you only need very little when using.
**NOTE: For those wanting to reduce the sugar, consider utilizing low sugar pectins such as Pomona’s Pectin® or Ball® Low or No-Sugar pectins and cut the sugar in half. I cannot attest to the flavor or outcome of using this alternative, so let me know if you do and how you like it!
**NOTE: When it comes to pectin you have choices, powdered or liquid. I’ve only utilized the powdered when making this recipe. Should you choose an alternative, be sure to follow the manufacturer’s directions.
WHY PUT VINEGAR IN PEPPER JELLY
You may be shaking your head and wonder why the heck is there vinegar in a jelly recipe?
Although it seems a bit odd even to me, don’t leave it out! Peppers, a low acid food, requires this small addition of acid (in this case vinegar) to aid the pectin and sugar to do its job correctly. Helping the jelly set.
The addition of vinegar also aids in extending the shelf-life of the product when its processed.
If you’re worried about flavor, trust me. The final product is not vinegary at all!
EQUIPMENT NEEDED TO MAKE HOMEMADE HOT PEPPER JELLY
If you choose to make a smaller batch that doesn’t require canning, skip to the the instructions below. Should you be looking to make your pepper jelly shelf-stable, you will need the following canning equipment.
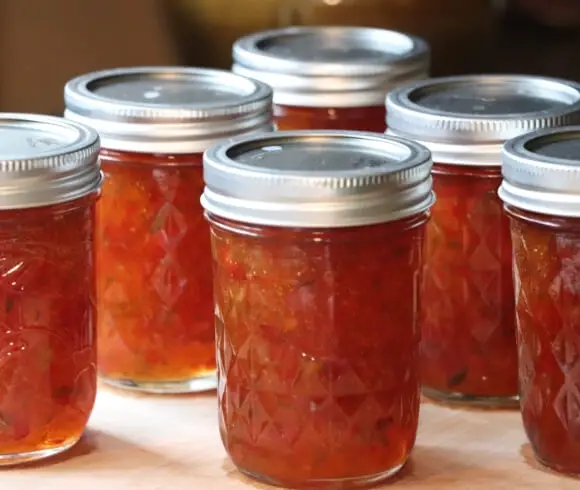
- HALF PINT CANNING JARS – This recipe as is will make approximately 6 to 8 half pint jar’s of jelly. My batch made 6 half pints plus another half jar which we devoured 😊
- WATER BATH CANNER / STEAM CANNER – I utilized a steam canner (click this link for a tutorial on how to steam can) for processing my pepper jelly. However, a water bath canner will work just fine
- CANNING LIDS & SCREW CAPS – Enough for the number of jars you will be using
- CANNING TOOLS – Jar lifter, bubble remover, magnetic wand
- *OPTIONAL BUT RECOMMENDED FOOD PROCESSOR
HOW TO MAKE HOMEMADE HOT PEPPER JELLY
Although there are a few steps in making this jelly, it is by no means difficult. Follow these guidelines, and maybe make some extra, & you will have all you need to enjoy yourself or give as gifts!
After all homemade anything is always appreciated, and this homemade hot pepper jelly maybe wrapped in a tea towel made by you along with a generous supply of homemade flatbread crackers, will result in nothing but praise & appreciation.
Being the traditionalist that I am, this recipe calls for full sugar (that’s 5 cups). In my defense, this treat is not something you sit down and eat a jar of at a time. Well, I don’t anyway.
For those concerned with sugar intake, as stated, simply cut the sugar in half (I would definitely reduce the amount of hot peppers I’ve suggested & make up the difference by using sweet peppers instead) and use an appropriate no sugar or low sugar pectin.

For those not wanting to can their pepper jelly, simply skip the canning instructions. Make your homemade hot pepper jelly, place into clean, washed jars with lids and refrigerate.
However, those who do you can either utilize the water bath canning method or the steam canning method. Steam canning is a great option for small batch processing!
HOMEMADE HOT PEPPER JELLY – STERILIZE JARS & WASH LIDS AND RIMS
Cleanliness is key when canning as bacteria lurking in jars can be deadly. Seriously. Deadly.
Sterilizing your jars is the first step in creating a safe, delicious product. A product you can be firmly confident in eating yourself and sharing with others.
To sterilize your jars is a matter of boiling them. Taken from “Water Bath Canning For Beginners” the following steps should not be skipped.
“Place washed jars (empty here) into the canner, right side up. Bring the water back to a simmer, 180 F, and simmer for at least 10 minutes. This helps to sterilize the jars, but also heats the jars to the appropriate temperature for filling, reducing the likelihood of breakage during the “hot pack” process (filling the hot jars with hot product). Keep the jars in the hot water until directed below.”
IMSL
There are recommendations for using your dishwasher on the “sterilize” setting for completing this task for you. However, I’ve personally experienced a high rate of breakage during the processing time when I’ve tried this. It’s not a method I use any longer and cannot recommend it.
Don’t stop with just your jars, however.
“Wash your jars, new lids (never re-use), and rims/bands in hot soapy water and dry. Check for nicks, cracks, rust, dents, or any other damage on the jars, lids & rims than can disrupt proper & safe processing. Lids should have even, seamless sealing compound on the underside of the lid without any scratches etc. Although the bands/rims are re-useable, they don’t last forever. Any rust, scratches & dents causing them to not fit the jars easily may cause issues with proper sealing. Time to re-purpose them when they reach that state.”
IMSL
Place the lids, top or shiny side up, in a small sauce pan with water just covering them. Bring the water to a low simmer and then reduce the heat to its lowest setting to keep warm. Place your magnetic wand on top of one of lid’s and you are ready to go.
“Many are now foregoing this step as the Ball company determined it was not necessary. However, this is what I’ve always done, it doesn’t hurt the lids in any way, and now many are experiencing jars unsealing at a later date. Coincidence? Not sure, but I recommend you don’t skip this step as we have not (knock on wood) experienced any un-sealing of jars stored.”
IMSL
HOMEMADE HOT PEPPER JELLY – PREPARE
Begin by gathering all your peppers and preparing them by slicing in half and removing the stems & seeds.
Once you’ve removed the seeds, begin to finely dice. You can do this by hand, but if you have a food processor, all the better 😁
I prepare each by color or type so that I can measure each out easily. Once you’ve measured, add to a large pan.
A word of CAUTION when using a food processor to pulse your hot peppers. The capsaicin in hot peppers can cause lung irritation. I hold my breath, literally, while opening up the processor after pulsing my hot peppers, and walk away to let it air. I enjoy breathing 😂
HOMEMADE HOT PEPPER JELLY – MAKING THE JELLY
To the peppers in the pan add 1 cup apple cider vinegar (with at least 5% acidity if canning) and the powdered pectin packet (1.75 oz). Stirring constantly, bring this mixture to a rolling boil.
NOTE: You know it’s a rolling boil when it still is showing signs of boiling while you are stirring.
Add 5 cups of sugar, or half that amount (2.5 cups) if you are using Pomona’s Pectin® or the like always following the manufacturer’s directions, and return to a rolling boil for one minute.
Remove from the heat and skim off any foam that may have materialized on the top and discard.
If you are not canning, at this point, add to your jar(s) and allow the jars to cool on a cooling rack or cutting board. Once room temperature has been met, you can place the jars into the refrigerator and hope they last a bit 😊
Sharing Is Caring & I Thank You For It ❤️
HOMEMADE HOT PEPPER JELLY – CANNING IT
If like me, you prefer to have the jars shelf stable, you will need to proceed with processing the jars in a water bath canner, or canning steamer if you choose.
To can them, your jars should still be in the hot water from sterilizing them. For this jam, I remove my jars from the hot water bath and place them on a towel by the jelly pan.
For a few full descriptive images of the tools and jam making process, visit my “Red Raspberry Jam” tutorial.
While the jelly is still hot, using a funnel, fill the hot jars (you many need to stir it to get even distribution of the peppers before filling your ladle), leaving 1/4 inch headspace.
With a clean, dry kitchen towel, dry the rim of any spills or wet looking areas. Using the magnetic wand, place a lid onto the jar, centering it. Screw a band on only fingertip-tight.
Return the jar(s) to the hot water bath canner (make sure you have some kind of rack in the bottom of the pan between the pan and the jars, and the water should cover the jars by 2 inches) and bring it to the boil.
Process or boil the filled jars in a covered water bath canner for 10 minutes, adjusting for altitude (found below). Turn off the heat and allow to “rest” or stand as is for 5 minutes.
Using the jar lifter, remove the jars, placing them onto a cooling rack or cutting board. Do NOT press the top of the lids down! Let them be as is for 24 hours.
The seals should not be flexible or have a center bubble or raised portion once completely sealed.
Label the jars with what’s found inside it, as well as the date, and store in a cool, dark area.
DETERMINING PROCESSING TIMES WITH ALTITUDE
The processing times given in this recipe are for those who reside above sea level of up to 1000 ft. Below are the processing time adjustments you will need to follow should you need. Don’t know your altitude? Find out HERE.
- Up to 1000 ft – follow the recipe guidelines
- 1000 ft to 3000 ft – increase the processing time by 5 minutes
- 3001 ft to 6000 ft – increase the processing time by 10 minutes
- 6001 ft to 8000 ft – increase the processing time by 15 minutes
- 8001 ft to 10,000 ft – increase the processing time by 20 minutes
HOW LONG DOES HOT PEPPER JELLY LAST
How long hot pepper jelly will last really depends on how you’ve made it. Or should I say, how you canned it, or not.
Canned homemade hot pepper jelly that has sealed appropriately will last upwards of 2 years when stored properly in a dark, cool area.
Those jars that have not been sealed or canned using a water bath canner will last in the refrigerator for approximately 3 months.
TROUBLESHOOTING HOMEMADE HOT PEPPER JELLY
There are occasions when you may think you have followed all the directions to the “t” and your final end product still did not come out as it should.
The biggest issue may be a “runny” jelly, or a jelly that doesn’t seem to have “set”. First, know that homemade hot pepper jelly should be like, well, jelly. Just like the store-bought, “you know who” kind of jellies. It should not be runny or soupy.
If after waiting at a minimum of 24 hours up to 48 hours (it can sometimes take that long for pectin to reach its finished “set”) steps can be taken to correct it. Follow these steps should your jelly remain runny.
HOW TO USE HOMEMADE HOT PEPPER JELLY
This homemade hot pepper jelly is such a uniquely delicious flavor, it’s uses extend far beyond layering it with cream cheese on top of your favorite crackers. Although this may still be my favorite way to enjoy it 😊
Consider these delicious ways to serve & enjoy your hot pepper jelly…
- SPREAD – Spread on your favorite bagel, toast, or english muffin along with cream cheese
- GLAZE – Use as a glaze for pork, chicken, or turkey
- SAUCE – Add to BBQ sauce, in coleslaw, and in sauce for mussels
- SANDWICH SPREAD – Spread on your favorite panini, sandwich, burger or BLT
- TOPPING – Top baked brie, use for thumbprint cookies, or top waffles & pancakes
- DIPS – Use as a tempura dip, or make a cheese dip for chips & vegetables
")
Ingredients
- GREEN PEPPER - A total of 1 cup of finely diced
- YELLOW OR ORANGE PEPPER - 1 cup finely diced
- RED PEPPER - 1.5 cup finely diced
- HOT PEPPERS - As we like things spicier than most, I've added 1/2 cup of seeded & finely diced hot peppers
- 5% APPLE CIDER VINEGAR - 1 Cup
- SUGAR - 5 Cups*
- PECTIN - 1 (1.75 oz) package powdered pectin
Instructions
Prepare the peppers by removing the stems and seeds. Finely chop or dice the peppers either by hand or in a food processor, making sure to measure out the desired amounts for each type of pepper you are using.
To the peppers in the pan add 1 cup apple cider vinegar (with at least 5% acidity if canning) and the powdered pectin packet (1.75 oz). Stirring constantly, bring this mixture to a rolling boil.
NOTE: You know it's a rolling boil when it still is showing signs of boiling while you are stirring.
Add 5 cups of sugar, or half that amount (2.5 cups) if you are using Pomona's Pectin® or the like, and return to a rolling boil for one minute.
Remove from the heat and skim off any foam that may have materialized on the top and discard.
Removing the jars from the hot sterilization water bath, place them beside the jam pan for filling.
While the jelly is still hot, using a funnel, fill the hot jars (you many need to stir it to get even distribution of the peppers before filling your ladle), leaving 1/4 inch headspace.
With a clean, dry kitchen towel, dry the rim of any spills or wet looking areas. Using the magnetic wand, place a lid onto the jar, centering it. Screw a band on only fingertip-tight.
Return the jar(s) to the hot water bath canner (make sure you have some kind of rack in the bottom of the pan between the pan and the jars, and the water should cover the jars by 2 inches) and bring it to the boil.
Process or boil the filled jars in a covered water bath canner for 10 minutes, adjusting for altitude (found below). Turn off the heat and allow to "rest" or stand as is for 5 minutes.
Using the jar lifter, remove the jars, placing them onto a cooling rack or cutting board. Do NOT press the top of the lids down! Let them be as is for 24 hours.
The seals should not be flexible or have a center bubble or raised portion once completely sealed.
Notes
*NOTE: When handling hot peppers especially when in this amount, I highly recommend using disposable gloves. By no means NEVER handle with your bare hands or touch your eyes after handling! Should you forget and have a reaction such as a burning sensation, rub plain yogurt on your hands several times.
Whether you want to make this homemade hot pepper jelly for your own use or to give as gifts, I hope you can give this recipe a try & enjoy it as much as we do!
Have you made your own homemade hot pepper jelly?
Love, Light, & Laughter ~

Enjoy this article? Please consider sharing it on your favorite social media channel! Want more? Subscribe below for the occasional update with all the “happenings on the hill”!