

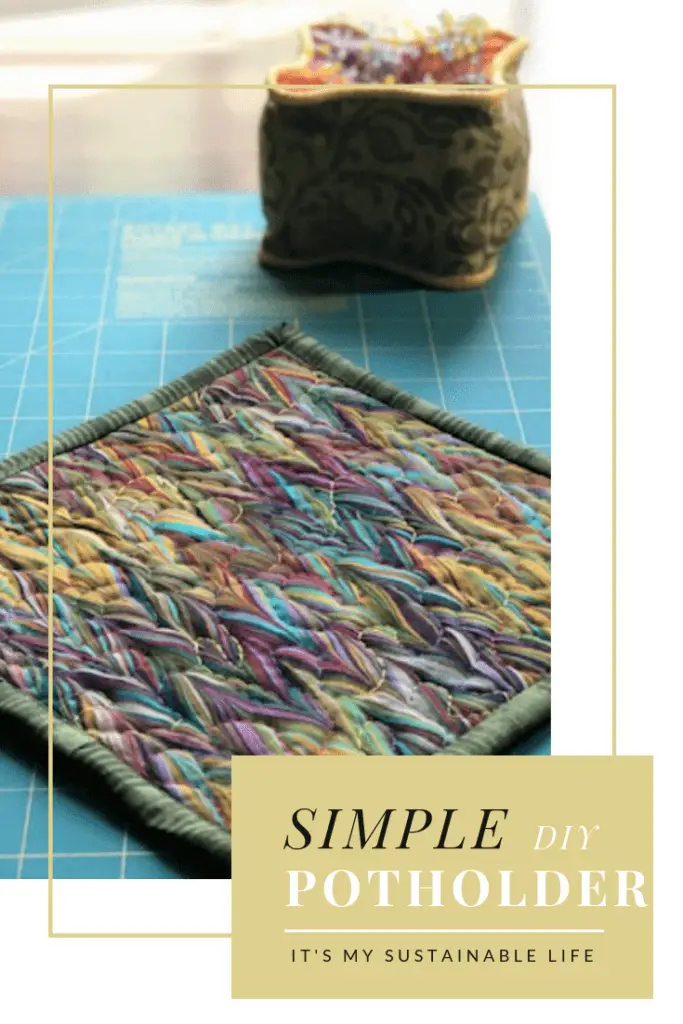
What do you do when you literally burn through your existing potholders or hot pads? Make some!! This versatile, quick & easy simple quilted potholder tutorial is a project than anyone can complete regardless of sewing experience.
HAVE YOU VISITED OUR NEW SHOP?
This post may contain affiliate links at no additional cost to you. By making your purchases through the links on this website, IMSL may make a small percentage at no direct cost to you. IMSL only promotes products we use & truly believe in. Please refer to my Privacy & Disclosures for further information. IMSL thanks you for your support!
Whether you are replacing well-worn existing hot pads, practicing your sewing or quilting skills, or looking to make a unique personalized gift, this simple quilted potholder is something anyone can make. With few supplies needed (sewing machine is optional!), this project is one that is rewarding & useful.
WHY MAKE YOUR OWN
Being asked this question repeatedly, “why take the time to make your own?” is commonly heard. There are many reasons why making it yourself is more rewarding than purchasing.
- PRIDE – Making “anything” on your own creates a strong sense of pride.
- ACHIEVEMENT – When looking at something you’ve created with your own two hands, you cannot help but feel a sense of achievement. A “look what I made” moment 🙂 .
- APPRECIATION – When you make it yourself, better known as DIY, an appreciation for all that goes into creating a product whether purchased or DIY’d; the time, energy, & expense of creating it, begins to develop.
- SELF-CONFIDENCE – Self-confidence is created by doing it on your own.
- INCREASED CREATIVITY – Creativity needs to be nurtured, developed, & practiced.
- HAPPINESS – In a controlled study conducted with Johanna Brunneder on “how making products influences the consumption experience” it was found when individuals make it themselves, “they appreciate it to a greater degree, are likely to consume it more mindfully, and experience greater domain-specific and general well-being”.
- FUN – Simply put, it’s fun! An example of how fun and rewarding doing it yourself is can be found in an article by Anna M. Clark, “The Joy of DIY” from the Huffington Post.
Getting into the real nitty-gritty of why it’s important to get back to our roots & begin making it ourselves again, be sure to keep a lookout for, “Let’s Get To The Root-Why We Should DIY” coming to the blog soon.
KEEP IT SIMPLE
Calling all beginners! This project is perfect for ANY level of expertise. You can make it as simple as the one shown below or as involved as creating a “quilter’s block” (great for practicing those quilting skills!). A beautiful more involved round quilted potholder example can be found over at Polkadot Chair.
SUPPLIES NEEDED
The following supplies will be needed to create 2 quilted potholders.
- 1/4 yard each of two complimentary fabrics (front & back) OR 2 Fat Quarters. I love this company for sourcing my online fabric
- 1/6 yard coordinating fabric for the binding
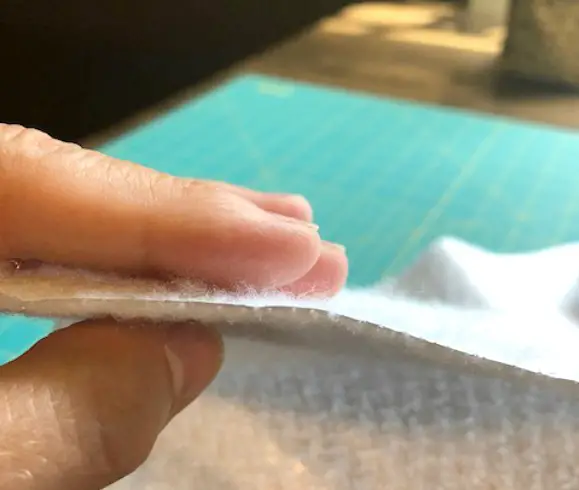
- 1/4 yard Insul-Bright (a thin batting-like material that has an insulating layer on one side and batting on the other. Note in the picture below the insulation is on top of the layers) can be found HERE
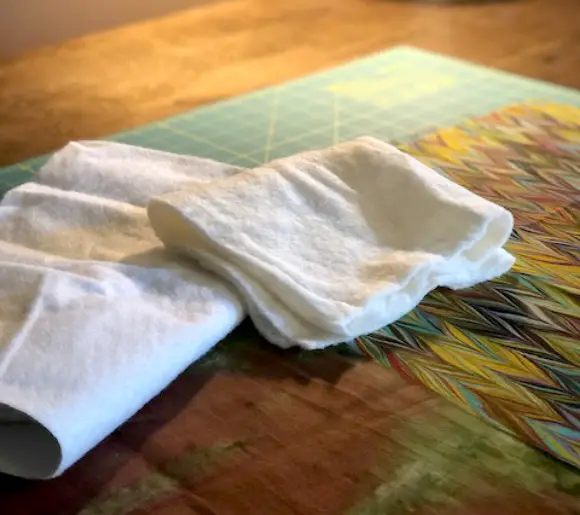
- Two 9″x9″ pieces of cotton batting. My favorite batting can be found HERE
- Coordinating thread
The following instructions are for creating 1 quilted potholder. If two are desired, double the amounts cut.
QUILTED POTHOLDER INSTRUCTIONS
Step 1 – Gathering Needed Materials
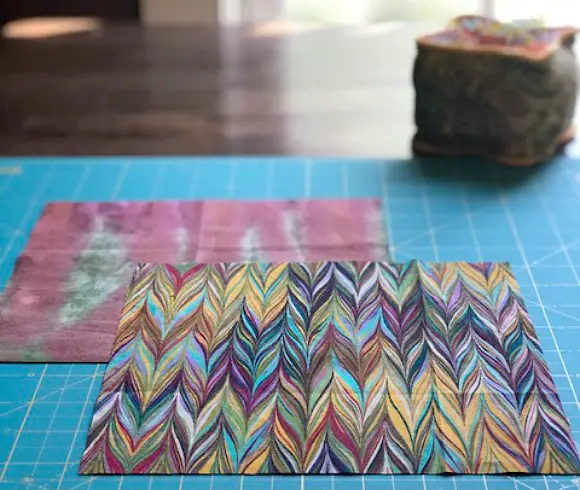
Sometimes the hardest part of any project is picking out your materials. Finding fabrics that contrast yet coordinate can be a challenge. Fortunately, these fabric pieces were in the stash and readily available. Once you have your fabrics chosen and the rest of the materials gathered proceed on to the next step.
Step 2 – Cutting
Cut out 2 pieces of fabric, one for the top side and one for the bottom, each 8.5″ square. Larger ones can be created (great for any male cooks in the house) by simply increasing all measurements by 1/2″.
Cut out 1 each of both the Insul-bright and the batting, each measuring 9″ (you want both to be 1/2″ larger than the fabric cutouts. Again if increasing size, add 1/2″ to the measurement.

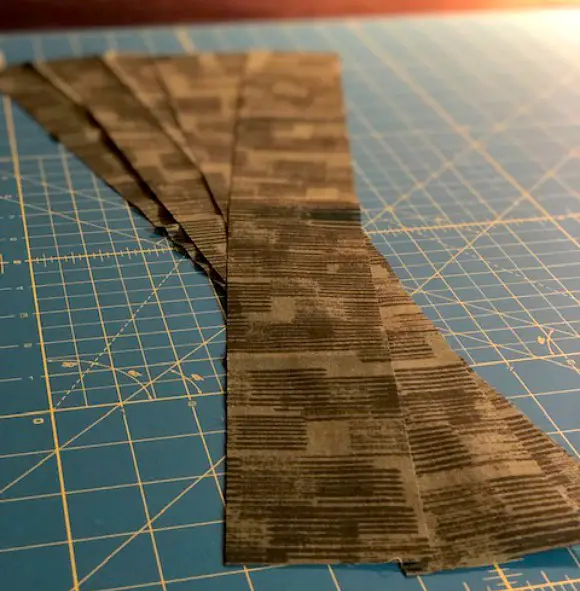
Cut the binding strips. The fabric should be cut into 2.5″ x WOF (width of fabric) strips (do not increase the size of the binding if making a larger potholder, the measurement remains 2.5″/increase the length needed however). If you’re cutting from a smaller piece of fabric, you will need approximately a total of 40″ in length. As the fabric chosen for this potholder was small and the goal was to make two quilted potholders (eventually 🙂 ) several strips were cut.
Step 3 – Create The Binding
Join the strips together to create one long strip. To join, simply place right sides together and stitch with 1/4 inch seam.
Finger press the 1/4″ inch seam open to lessen any bulk created.
Fold joined strips in half.
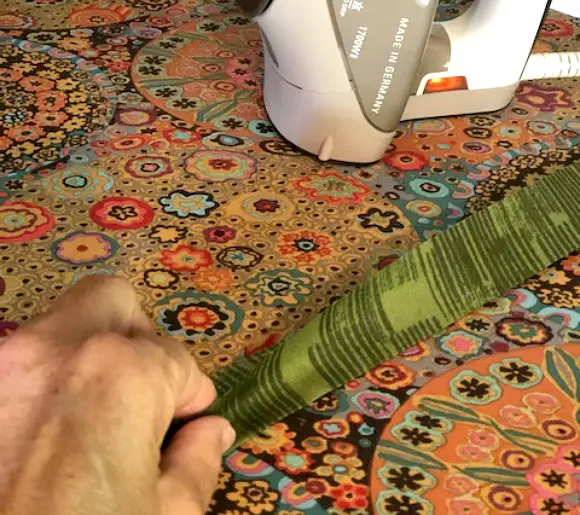
Press folded strips to create the final binding strips.
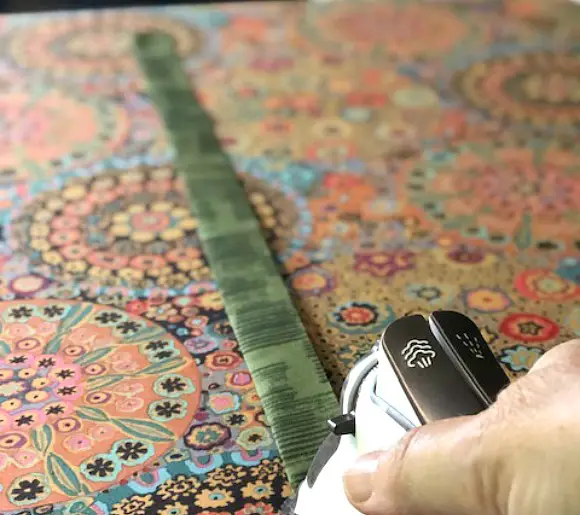
Traditionally binding is completed on the “bias” as the fabric is woven. Bias simply means cutting at a 45-degree angle to lessen the possibility of the fabric warping when working with it. Since this project is fairly small, this step was skipped by the very lazy seamstress 🙂 .
A wonderful tutorial on how to cut on the bias can be found over at Pate-Meadows Designs.
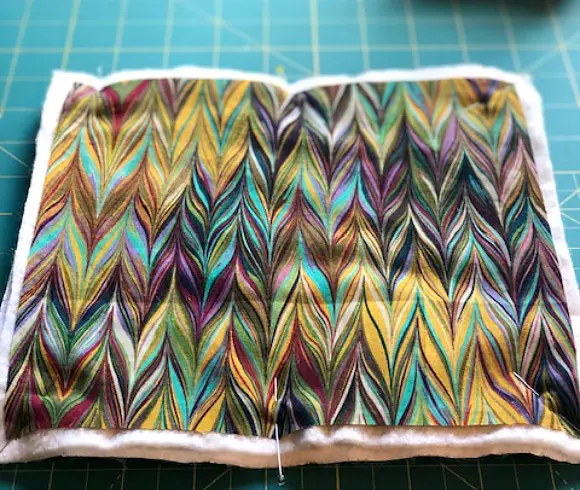
Step 4 – Creating The Quilters Sandwich
Lay the bottom fabric face down, add both the Insul-bright and the batting on the bottom fabric, and then add the top fabric face side up. Be sure that the bottom fabric and the top fabric align. You have created a quilters “sandwich”. The batting & Insul-brite should overhang the top and bottom fabric pieces.
Pin through all the layers in 4-6 different areas along the edging, preparing your “sandwich” for quilting.
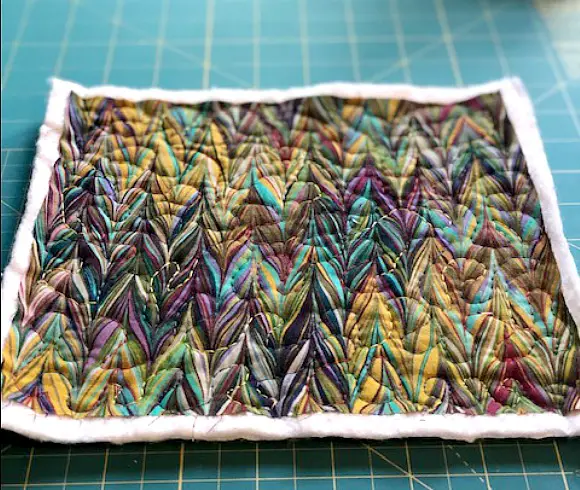
Step 5 – Quilting
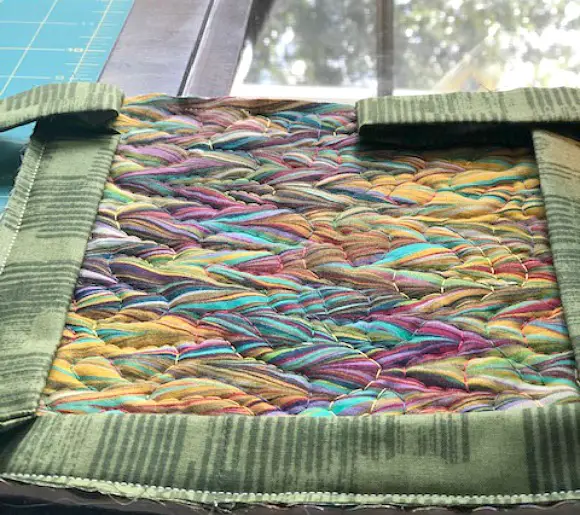
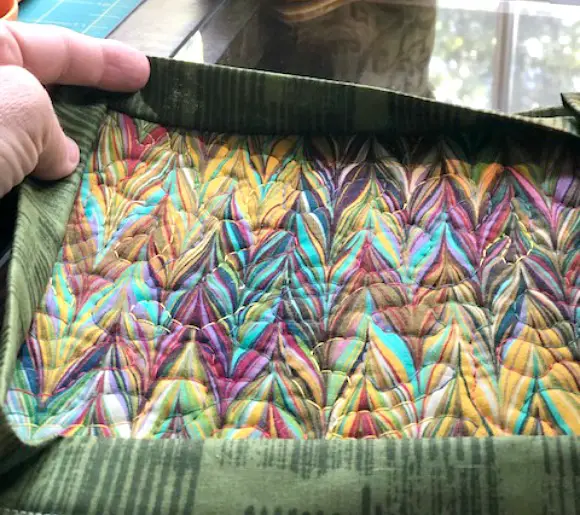
Quilt all layers together. Simply put, sew all the layers together. This is a great practice for those wishing to improve their FMQ (free motion quilting) skills, that would be me 🙂 , or simply quilt together using straight lines evenly spaced apart. The design chosen for this project with FMQ is a “meandering” style…simple curves all over. Please don’t judge as this skill is very new to this quilter 🙂 .
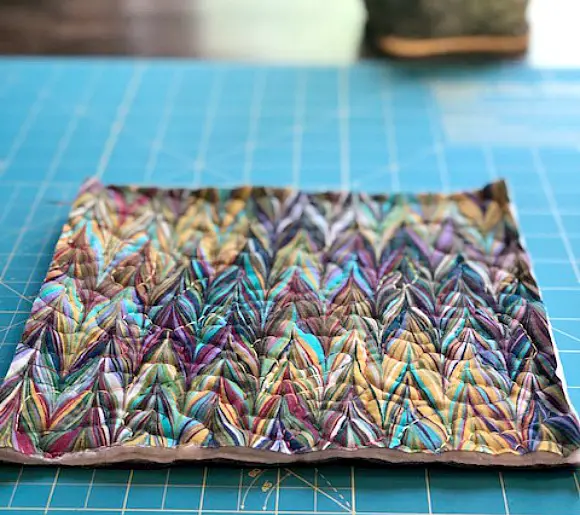
Step 6 – Trimming
Once the quilting is complete, trim the batting & Insul-bright from around the edges. The square should be about 8 1/2″. If slightly under those measurements, no worries. Quilting may cause the total circumference to slightly “shrink”.
Step 7 – Attach Binding
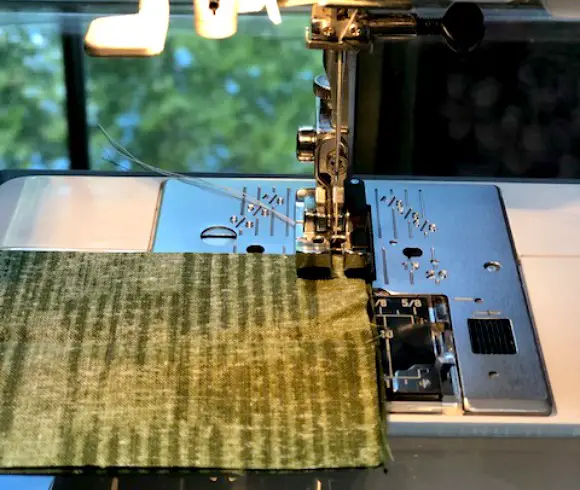
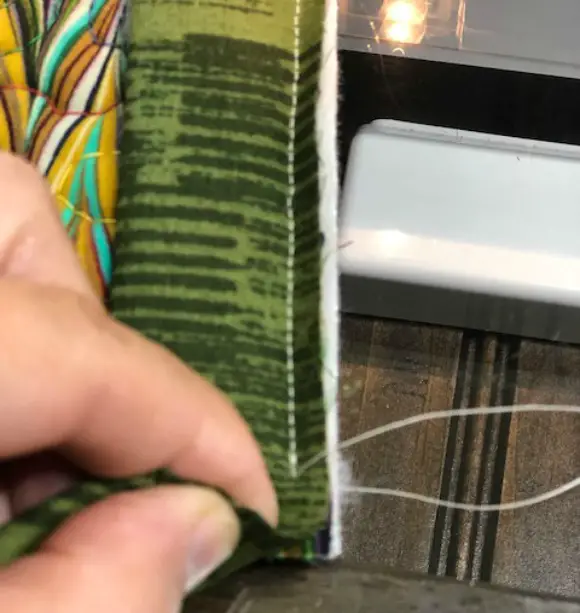
Place the completed binding strip on the top side of the potholder, raw edge (open side) of the strip aligned with the edge of the hot pad (the folded side facing toward the center of potholder). Leave approximately 4 -5 inches of the binding free (leaving a tail) and begin attaching the binding with a 1/4 inch seam allowance. Begin sewing in the middle of the pad, backstitching to secure the end.
 Cotton Custom
The purpose of this “tail” and beginning 1/2 way down the length is to leave an opening or gap after sewing 3/4 of the way around the pad, giving room to be able to join the ends of the binding to finish off.
Sew to 1/4 inch to the edge or end of the first side. Backstitch to secure & clip the threads. Apologies for the picture quality below showing stitching to 1/4 inch of the end (edge) of the first length.
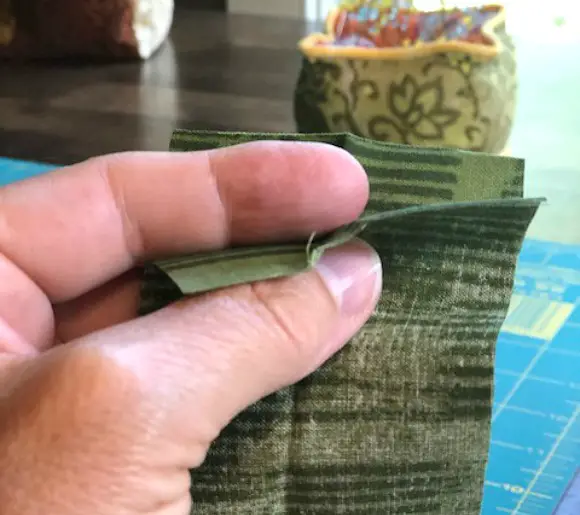
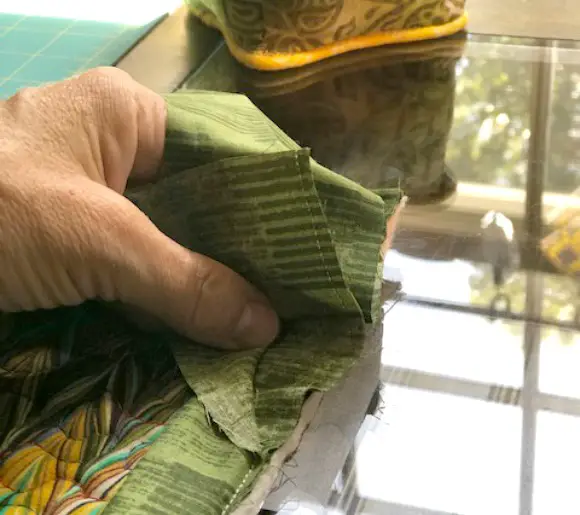
Remove the pad to adjust the binding strip and prepare it for attaching it to the next side. Take the binding strip and fold it to the right so that is it perpendicular to where you were you just stitched, and aligning the raw edge to the edge of the next side of the hot pad.
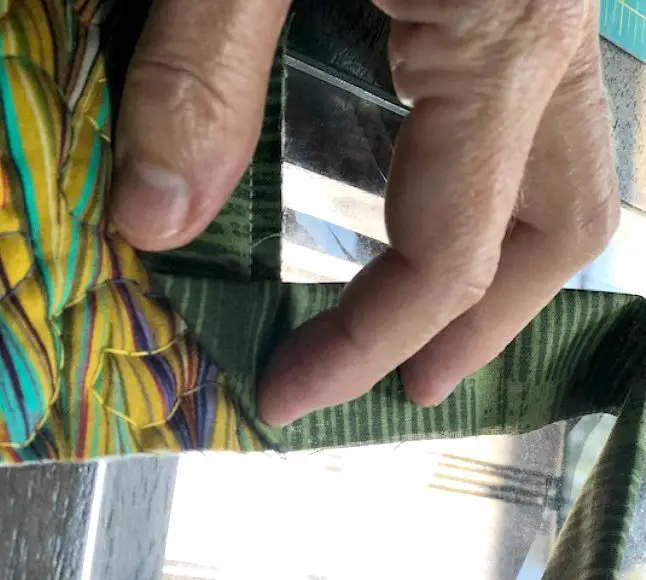
Fold it back onto itself so that the raw edges of the strip align with the outer edge of the potholder, being sure that the strips folded edge aligns evenly with the top of the pad as well.

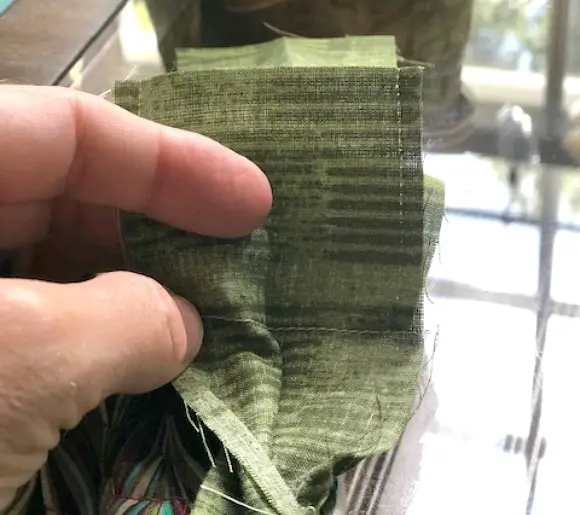
Begin stitching right at the top, backstitching to secure, and stitch all the way down the length of the side. Stopping 1/4 inch from the edge, backstitch and clip the threads.
Cotton Custom
Repeat the above steps for attaching the binding all the way around the hot pad. Once you have turned the last corner, stitch about 1/2 inch, backstitch to secure.
Step 8 – Attaching Binding Ends
After stitching around the last corner and stopping about 1/2 inch in, you will have an opening between the two binding ends on the last side about 4-5 inches in between.
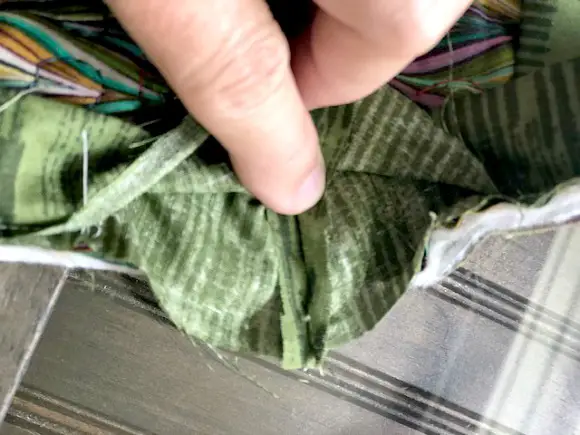
The binding ends need to be joined before proceeding further. Lay the binding down along the edges and find where they meet. Pinch together to find where they meet.
Open both binding pieces up and place right sides together. Mark both binding pieces where they meet to create a stitch line.
Stitch the two binding pieces together (making sure right sides are aligned). This will take some maneuvering but it can be done 🙂 .
Trim the binding about 1/4 inch above the stitch line and finger press open the seam.
Lay the binding down once again with raw edges toward the edge of the pad and complete attaching the binding to the pad, backstitching to secure.
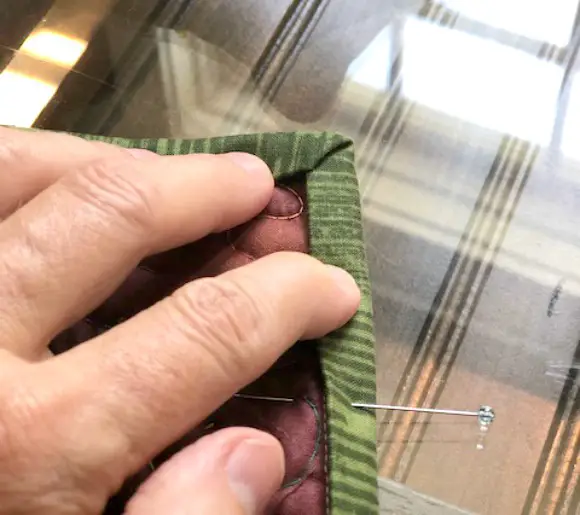
Step 9 – Turning & Creating Corners
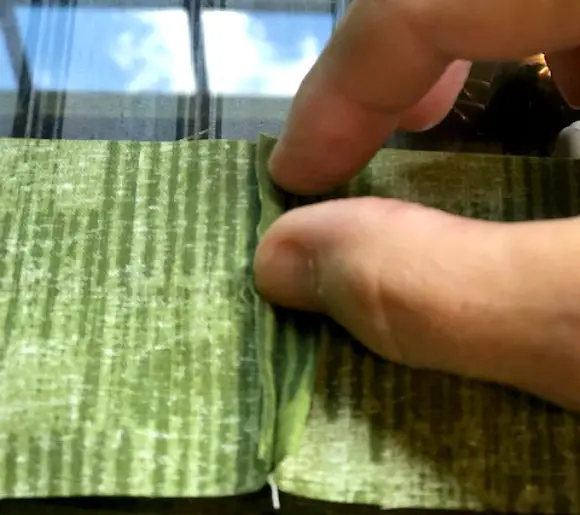
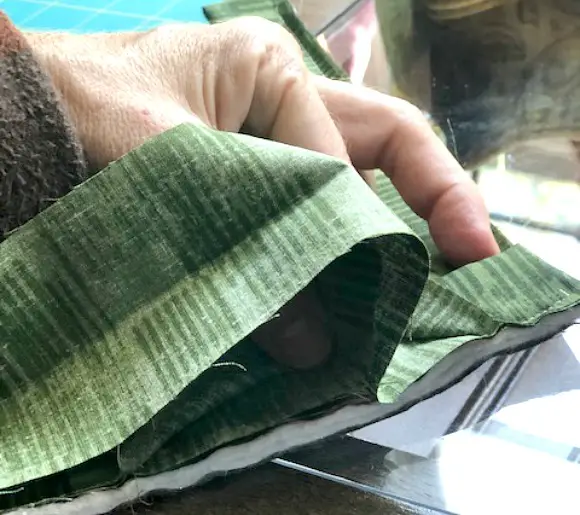
Turn the binding right side out and fold it over the raw edge of the hot pad so that it covers the other side of stitching and secure with pins or clips every 3-4 inches.
To create the corners, hold the edge of the binding down at the 1/4 inch seam allowance area. Please don’t judge the meandering FMQ…still needs a lot of practice 🙂 .
Fold the next length of binding down to create a nice fold and secure in place with a pin or clip.
Continue this around the potholder until all the binding is set in place and ready to be stitched to secure. To attach the remaining edge of the binding to the pad you have two options. Machine (stitching in the ditch) or hand sewing. Hand sewing for this inexperienced machine stitcher is by far the neatest and easiest, but the most time-consuming. As this project has been all about practicing skills and is not going to be given as a gift, stitch in the ditch it will be 🙂 .
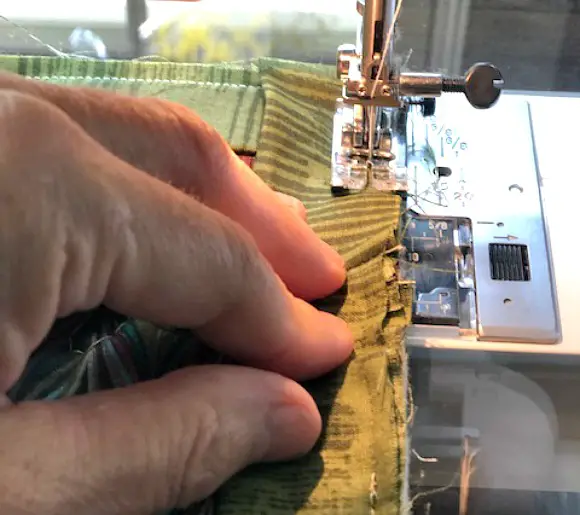
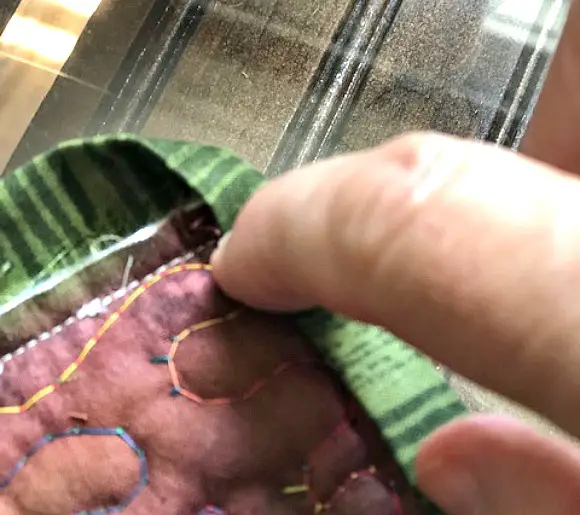
Step 10 – Stitching In The Ditch
Working with the front side up and beginning in the middle of one side of the hot pad, align the sewing needle along the “ditch” (where the binding has been attached to the pad). Sewing in the ditch will catch the folded edge of the binding on the other side. Sew all the way around and backstitch to secure.
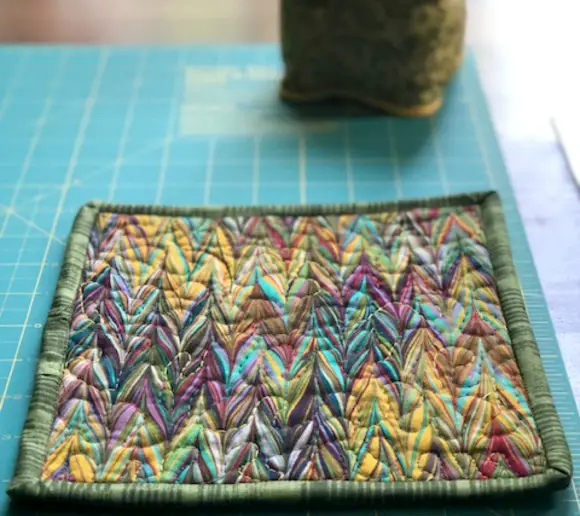
Although not perfect, this small project has been a skill builder and one that anyone can complete.
These simple quilted potholders are ones we love & use.
Sharing Is Caring ❤️
… and I love you for it 🙏🏻
Have you made your own potholders? If so, what is your favorite pattern? Love for you to join in the conversation below! While you’re at it, be sure to subscribe to stay on top of all the “happenings here on the hill”! Happy Stitching!
Love, Light, & Laughter ~

49 comments
I have made potholders before but never free quilted. I will have to try this. Looks like a great gift idea. Thanks!
Congrats on your feature on the Simple Homestead Hop last week!
What a pretty potholder, Suzan, and your step by step instructions make it look quite straight-forward, even for someone not so crafty like me! I really like your ideas around why you should make your own things as well. Thank you so much for being a part of the Hearth and Soul Community. I’m featuring your post at the link party this week. Hope to ‘see’ you there! Have a lovely week!
Thank you for reading and your kind comments, April! AND for featuring the tutorial. I’m so glad you found it of value.
Beautifully illustrated thanks very inspiring. 🙂
So impressive! I used to love sewing..I need to pick it back up again!
I love these! So pretty. The Joplin tornado in 2011 got my sewing machine. But my mom has one. This would be a fun Christmas gift project to do together!
And a lovely way to spend the time together! Thank you for reading, Cindy!
I’ve been wanting to get more creative with my sewing machine. Thank you for posting this. I love your fabric choices.
Oh that makes me happy, Lisa! Thank you for reading.
I’m featuring your potholder tutorial on Farm Fresh Tuesdays today! Thanks so much for sharing, Suzan!
Thank you, Lisa! I’m honored to be featured.
This is a great tutorial! Your site really makes me want to get back into crafting. I used to do a lot when my kids were little and somehow the past few years it’s fallen to the wayside. Thanks for the inspiration!
Yay!! Love to hear things like this. Thank you for taking the time to read!
Very crafty and resourceful!! I used to make potholders when I was younger ~ using a loom. It’s been a long time, though ~ yet I feel a little more inspired to see if I still have it in my memory box.
I think I still have the loom packed away! They were always so colorful, quick to make, and lasted forever!
Over the years I have accumulated a very nice sewing machine, surger, and a few other crafting machines… this tutorial made me anxious to pull them out and start on some crafts. Maybe some kitchen towel and matching pot holders. Thanks for the tutorial!
Your welcome, Amber! Be sure to come back and share your end results!
Great step by step. My daughter just got a sewing machine. I will show her this!
Come back and let us know how she does!
So cute! Im pinning for later when i have some time to make this! Found at Over the Moon 189
Thank you, Sylvia!
Very good directions for a simple project. I’m pulling out my stash in the morning. I need several!!!!
That is great! The detail in your post would make it easy for someone to follow the directions! (I’m not that crafty, but I love it! It’s beautiful!)
What a cute project! I loved making potholders as a kid. I need to look into this again!
This looks like a nice winter project or a kids project for 4H. This is really cute.
Absolutely, Pauline. Thanks for reading!
Thanks for the idea and the detailed instructions! I’m excited to give it a try! They will make great Christmas gifts for my extended family!
They certainly do! Have fun.
This would make a beautiful and practical gift – and in my opinion homemade gifts are extra special! 🙂
Great tutorial! So good even a guy who’s never touched a sewing machine could do it. 😉
Hahaha! Yes, even them 🙂
Suzan, this looks beautiful and easy to make. Thanks for your clear, step-by-step instructions!
Your welcome!
I always need pot holders! This is a great tutorial! Thanks!
Wow, I am so super impressed with anyone who knows how to handle a sewing machine! And I like the stat on making and using your own products, makes a lot of sense.
Excellent tutorial and beautiful pot holder! I am slowly getting back into sewing — mostly repairing chewed up stuffed dog toys for now — but projects like these look fun and make fantastic, personalized homemade gifts. Thank you for sharing this project!
You are most welcome, Ramae!
Awesome tutorial, very easy instructions.
What a fun project! Thanks for the info! Pinned for later 🙂
Thank you for reading & pinning Beth!
Cute idea and would be fun for gift giving using holiday colors
Absolutely!
Fantastic tutorial! Pinning!
Thank you, Michelle, for your kind words & pinning!
Great project, thanks for sharing.
Thank you for reading, Anita!
This is an excellent, detailed tutorial! Easy to follow, and even though the post is long, it does not look like a difficult project. I’m thinking Christmas gifts for everyone! (including myself) Pinning on my personal page for Holiday reference!
I’m so glad you enjoyed it, Lori! Yes, they make wonderful gifts either using seasonal fabrics or not. Thank you for reading & pinning 🙂