

Rope bowls are an easy project that’s quick and fun to whip up. This easy to follow rope bowl tutorial will have you putting them to use in the home or as gifts in no time flat!
This post may contain affiliate links at no additional cost to you. By making your purchases through the links on this website, IMSL may make a small percentage at no direct cost to you. IMSL only promotes products we use & truly believe in. Please refer to my Privacy & Disclosures for further information. IMSL thanks you for your support!
What do you do when you live in the boonies and travel to purchase EVERYTHING and need a gift basket in a hurry? You make a rope bowl! This easy to follow rope bowl tutorial is an easier project than you may think!
With no special sewing skills needed other than basic knowledge of your sewing machine (although, you can make these bowls utilizing a hot glue gun as well), this simple “bought for a song” project is a creative & rewarding one to say the least!
MAKING ROPE BOWLS – A MEDITATIVE PROCESS
There are many crafts and projects that just put me in a meditative state. You know the chores or projects that I’m speaking of here!
Making these rope bowls puts me in that zone, kind of like thinning carrots in the garden does 😊. It must be something about the repetitive & methodical motion of sewing in a circle with a simple zigzag stitch that makes so soul gratifying.
Sharing Is Caring ❤️
Once you get a few rounds under your belt, pun intended 😂, the items you can make thereafter abound. Using the same sewing method, you can easily adjust to create coasters, larger or smaller rope baskets & rope bowls, chargers for a more formal dining table, hot mats, table runners, and even market bags!
This technique for creating rope bowls not only produce a functional product, but also a decorative one as well! Although I made a simple white rope bowl, you can add strips of fabric to sections of the rope as you sew or even use colorful thread in lieu of simple white.
ROPE BOWLS MAKE UNIQUE GIFTS
When a friend’s daughter recently gave birth, I knew I needed to not only gift my organic baby products (baby oil, baby lotion, and baby butt balm), but also a vessel to hold these gifts along with a cute outfit!
Now I just need to get off my own butt and add these products to my Etsy Shop!
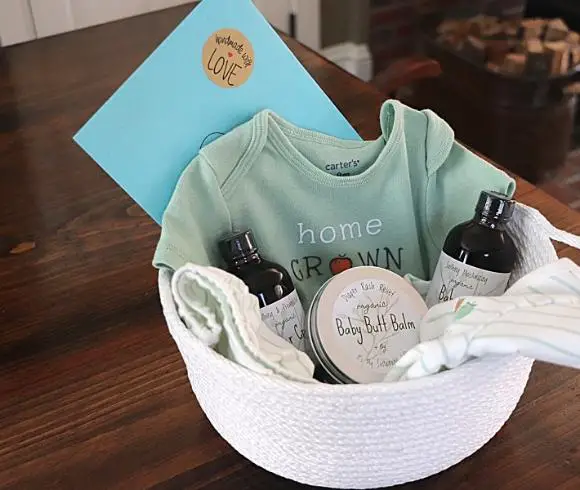
Home grown. How cute is that?
I immediately knew I would be making a simple rope bowl or basket to hold it all as I had all I needed to create one on hand. No travel needed to purchase any supplies, as I had leftover clothesline available to use, sign me up!
These simple rope bowls will definitely be on my list of handmade & homemade gifts to give!
ROPE BOWL SUPPLIES & MATERIALS NEEDED
To make your own rope bowl, gather the following essential supplies & materials. I’ve thrown in a few optional materials you may want to have on hand, depending on the end look of the bowl you are making.
ROPE BOWL ESSENTIAL SUPPLIES & MATERIALS
- SEWING MACHINE – This is an obvious one. I have used a Janome for year’s and highly recommend this machine, but any sewing machine with the option for a zigzag stitch will work
- BOBBINS – Depending on the size of the bowl you will be making, you may wish to have several pre-filled bobbins on hand. Small bowls can easily go through just one bobbin, where larger bowls can often take up to 3 bobbins of thread. Should you be altering the color of thread being used in one bowl, be sure to have bobbins filled with each of the colors you’ve chosen
- HEAVY DUTY NEEDLE – I recommend using a heavy duty sewing needle on your machine as you will be stitching between heavy layers. Using a “jeans” needle or a needle utilized when sewing through leather will work efficiently
- ROPE* – Can’t make a rope bowl without a bit of rope 😅. I’ve used clothesline (7/32″ cotton clothesline) that I had on hand for this task, but will be purchasing this type here in the future. Preferably you want a continuous length of at least 10+ yards (enough for a small bowl) as it can be tedious to join ends should you need more rope. 100% cotton clothesline, cotton clothesline with poly-core, or macramé rope all will work
- THREAD – Lot’s of thread in your choice of color. I prefer cotton thread (Gutermann is a favorite), and have used white only for this project. Mix it up to you liking however
- SCISSORS
- SCOTCH TAPE – Works wonders for cording or rope that may have a poly-centered core
ROPE BOWL OPTIONAL SUPPLIES & MATERIALS
There are a few optional supplies or materials you may wish to have on hand for making your bowl a bit more colorful.
- FABRIC – I recommend starting with 1/2 inch to 1 inch size width of fabric strips for adding color here or there within your bowl by wrapping the cording with it as you sew
- RIBBON – Optionally, you could wrap with ribbon for color
- LEATHER OR PLEATHER – Small cuttings of leather or pleather will add a decorative & colorful tab which covers the end of your stitching and look as though it’s a handle
- FABRIC DYE – Should you want to dye your bowl, I recommend using only 100% cotton rope and dye according to the dye’s manufacturers directions. Be sure to allow the rope to completely dry before beginning to stitch
- PAINT – Another colorful option
- TWINE – Add several layers of twine or small rope to add a layered look to the bowl
- YARN – And another option to add a bit of texture & color to the bowl
- COLORED THREAD – The color of your thread is totally up to you. When choosing colored thread, I would recommend using brightly colored threads in order to create high contrast
- LABELS – Should you create your own labels, attaching one will definitely add a professional touch to your bowl
HOW MUCH ROPE IS NEEDED FOR A ROPE BOWL?
At a minimum, I would recommend having at least 10 yards of roping on hand in order to create a smallish sized bowl. A medium size bowl can take approximately 40 ft. The amount of footage you will need is dependent on the size of the bowl and the type of handles you create.
For my medium sized bowl with a simple, single handle, I used about 30 feet.
Remember, when you come to the end of your rope, literally, it can be a pain in the hinney to attach ends together. Therefore, a continuous length is much easier to deal with than running out of rope.
Again, the rope you choose should be soft enough to sew through such as cotton. Ropes that are geared toward climbing or made completely of synthetic materials can be harder to sew through and should be avoided.
PREPARING THE SEWING TABLE FOR MAKING A ROPE BOWL
Unless you have a quilting table, or a flat surface for your sewing machine, you may want to create one by using books, a cutting board, or anything that will support your project evenly with your machine.
By evenly, I mean the “table” or support should be the same height as the left side of your sewing machine base.
By having an even surface, the larger your project becomes, especially during the mat or beginning round stage of your rope basket (the bottom of the basket), you can easily maintain a flat circle that has no curve to it.
PREPARE THE ROPE FOR MAKING A ROPE BOWL
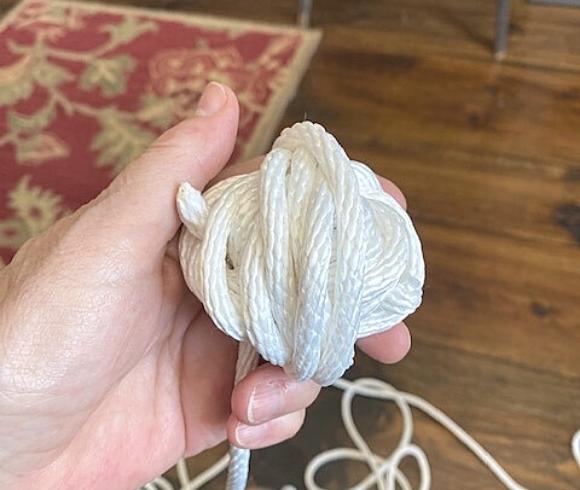
With such large footage of rope, it’s pretty easy to tangle. So taking a page from the knitters guide, before beginning your project, prepare the rope.
Roll your rope into a large ball. Simple. Easy. No tangles. I like to place my ball by my chair on the floor in a small wicker basket to hold the ball from rolling around the room as I sew 😅. I find it easiest if you place the basket and ball on the left side of your chair on the floor.
SEWING NEEDLES NEEDED FOR MAKING A ROPE BOWL
Here you just want to be sure you have the appropriate needle for the job placed in your sewing machine.
Again, choose either the jeans needle or a leather needle for sewing the rope bowl. These needles are a bit sturdier, and can withstand the workload you are going to make it do.
CREATING THE BOTTOM OF THE ROPE BOWL
Every project has a beginning. The rope bowl beginning is the bottom of the bowl, literally the center of the bottom.
Should you be using rope with a poly-core or center, be sure to follow the directions below. If you are using 100% cotton, skip the scotch tape process and begin with cutting the end sans tape unless fraying is an issue.
STEP 1
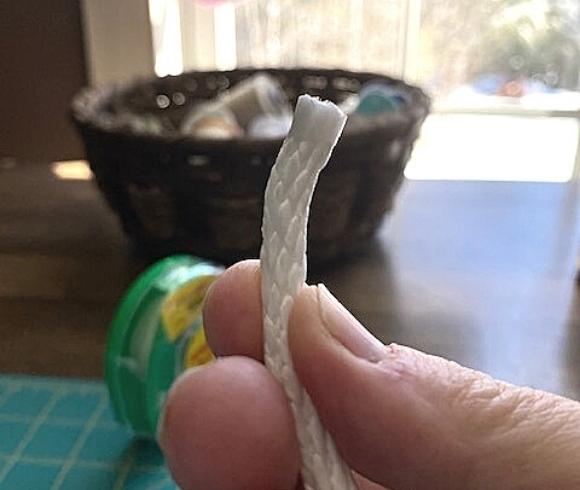
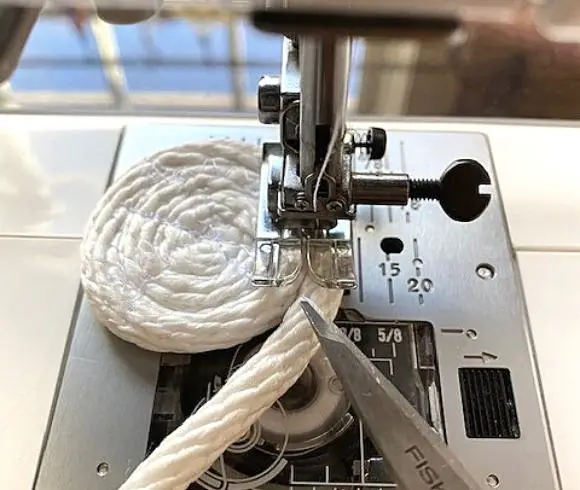
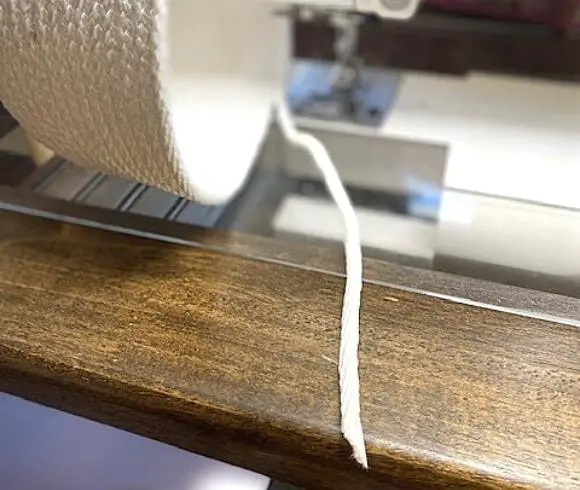
Begin by taking a piece of scotch tape, about an inch in length, and wrapping it around the rope end just where the fraying begins. You may want to watch the video below which shows this process.
Once wrapped securely around the rope, take a sharp pair of scissors and snip the frayed end of the rope off, leaving just 1/4 inch of tape left. This small amount of tape will disappear along with the white of the rope.
STEP 2
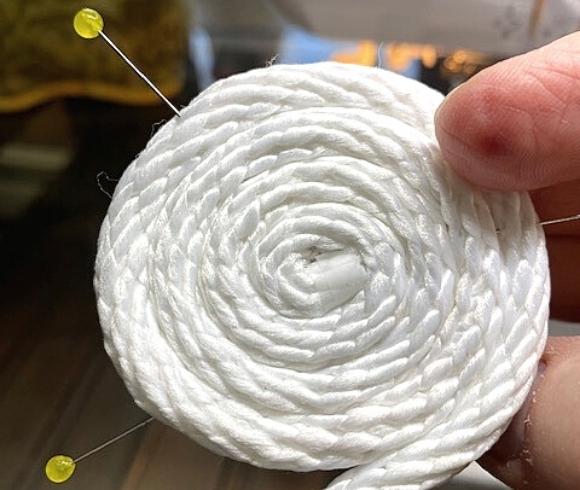
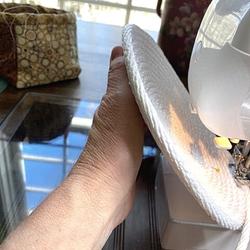
Taking the end of the rope with the tape, begin wrapping the rope into a circle, wrapping until you have 4 rows of rope. The 4 rows of rope will allow your feeder and foot on the sewing machine to securely fasten onto the round when you begin the cross-stitching. Secure the wraps with 4 pins as shown.
STEP 3
Using the straight stitch of your sewing machine, sew a straight line across the 3 center rows, back-stitching at the beginning and end of the stitching row. Remove the circle from your machine and trim the threads.
Turn the circle 90° and sew another straight line across the 3 center rows, back-stitching at the beginning and end of the stitching row. Remove the circle from your machine and trim the threads.
Remove the 4 pins.
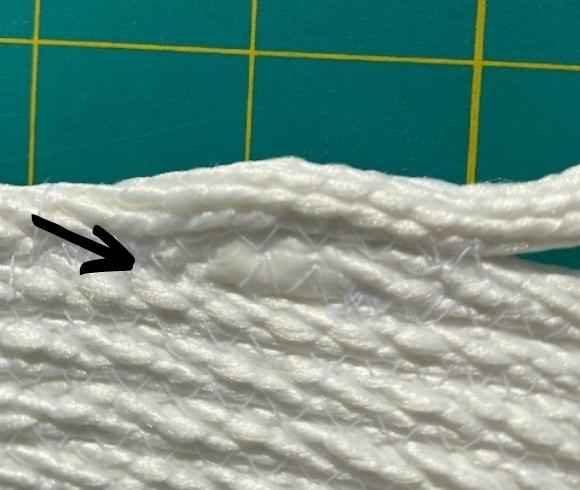
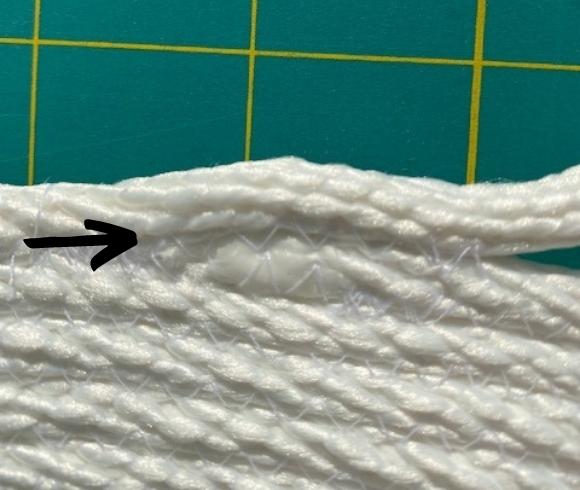
Place the circle back onto the machine and add a few straight stitches, back and forth just in the center to the first row on the circle. This will secure the center of the bottom and cover up the tape if any is showing.
Remove the round and trim threads. You can see where I’ve stitched this round in the image below.
PREPARE THE SEWING MACHINE SETTINGS FOR MAKING A ROPE BOWL
As we are ready to begin sewing our rounds for the rope bowl, we need to set the sewing machine to the zigzag stitch. For my Janome machine, I set the stitch to zigzag or #10 stitch choice.
You will also want to set your stitch width and length. For my machine I used a width of 4.5 and a length of 3.5. You can always take a piece of scrap cloth and test your stitch widths and lengths and then eyeball your rope in comparison to the stitches.
Keep in mind, we are looking for the side of the stitches to reach only about 1/2 way to center on each of the 2 ropes being sewn together.
BEGIN STITCHING IN THE ROUND TO CREATE THE BOTTOM OF THE ROPE BOWL
The trick when beginning to make the mat which will eventually be the bottom of the bowl, is to begin with the “round” on the left and the un-sewn cord coming off the right side.
You will be sewing & wrapping in a clockwise motion. By doing so, as your project increases in size, you will have the room needed to lift and maneuver your project in such as way as to create the needed curves for a bowl.
STEP 1
Place the round (so it’s on the left of the needle) back under your foot. Place the un-sewn area under your needle, centering the line of the sewn circle and the un-sewn cording in the opening center of your foot as shown below.
Optionally, you can start this stitching one round in toward the center to create a bit more strength and support if you like. I just started from where it was not secured or stitched and began.
As the area and circle is quite small when you begin sewing, you will want to have your machine speed turned down to low or better yet, manually (with the needle lifter on the right side of your machine) lift the needle up and down, lift the presser foot, turn slightly, and repeat until you can begin to safely stitch using the foot pedal. We only need to do this for the first few rounds as they are so small and with sharp turns.
Take your time with this fussy part. It goes quickly and you will soon be able to speed up the process.
HAND PLACEMENT FOR CREATING THE BOTTOM MAT OF THE ROPE BOWL
Once you have a large enough circle, for me it was about 5 rounds in the center, that you can begin to speed up, placing your hands appropriately to help guide the rope and turn the mat at the same time.
For the beginning stages of creating the bottom mat for the bowl, guide the cord being fed to the machine by just placing it over the left thumb with the fingers of the left hand guiding the mat around.
Use the right hand to guide the cording being fed snug up against the round, being sure the center of the two ropes are staying centered with the foot of your machine.
Once you have enough rounds, roughly 5 for me, remove the cording from the left thumb, draping it over the right thumb. As you stitch, allow the cording to naturally be pulled through by the machine, not adding any extra tension on the cord.
Use the first 3 fingers of the right hand to assist the left hand for turning the project, remembering to keep the center of the two cords in the center of the foot.
Using your pinky finger of your right hand to gently push the cording snug against the flat mat you are creating. Again, take a look at the short video below if you have questions.
Should you have quilting gloves, gloves that have a grip side to them, they come in handy on the left hand that guides the mat around as you sew.
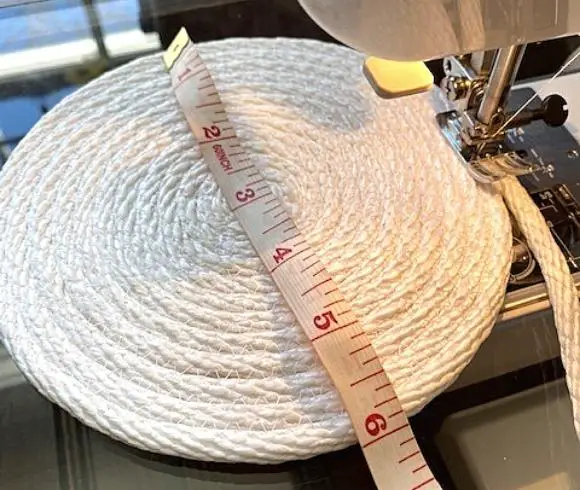
Continue to sew along in rounds until you have the size bottom you want. For me, I created a 6 inch bottom mat.
Since we’ve sewn on a flat surface you should have created a nice flat mat. Voilá, you’ve created a nice coaster or hot pad! Keep on stitching in the rounds if you are looking to create simple chargers for your tablescapes!
CREATING THE CURVED BOTTOM OF THE ROPE BOWL
Once you’ve created the size bottom you want, its time to begin to turn the bowl and begin making the curvature needed to eventually create the sides of the bowl.
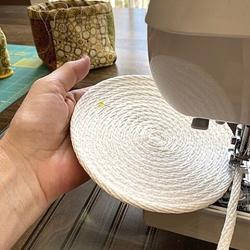
To begin the slight curve or gentle rounding of the bottom as I’ve created, you will need to place a marker on the top of the mat. I used a color tipped pin. This will mark the area as the beginning of the round as well as the end of a round.
STEP 1
To begin making the gentle curved rounded bottom, it’s a matter of hand placement of the left hand.
Sew to the marker area. Using your left hand, slide it under the mat on the side away from the sewing machine as shown in the far left image below.
My hand is resting on the sewing surface, and my left thumb is being used to guide the mat around as I sew.
Sew around the mat 3 times, stopping at the marker pin. At this point you should see a slight curve to the bottom of the rope bowl.

STEP 2
Lift the mat even further by placing your left hand vertically underneath the mat. The mat should be at about a 45° angle.
NOTE: No image shown for this step.
Sew for 3 complete rounds around the mat, ending at the pin marker.
STEP 3
Lift the mat so it’s held about 3 inches from the machine, my hand held vertically as in the center image above.
Sew around 2 times ending at the pin marker.
STEP 4
Hold the bowl upright so it’s completely vertical, almost against the side of the sewing machine, as shown in the far right image.
Sew around 2 more times ending at the pin marker.
You can remove your marker pin now if you like.
To make a sharper bottom transition is as simple as adjusting the height of your hand positions in the steps above!
SEWING THE SIDES OF THE ROPE BOWL
To create the sides of your rope bowl is simply a matter of continuing to sew in the rounds until you have reached the height or depth of the bowl you are wanting.
The sides of my bowl ended up being about 3.5 to 4 inches, creating a nice deep rope bowl with a gentle curving bottom.
Once you have reached the depth bowl you want, backstitch to secure your stitching.
Remember those choices in life? Here too is another 😅.
You can leave your bowl as is without a handle and cover your end with a leather, pleather, or cloth covering and stitch on, tie a simple knot and and stitch it to the bowl, or you can create a unique single handle as I’ve done.
CREATING THE HANDLE FOR YOUR ROPE BOWL
When creating the handle for your rope bowl, guess what? You have options 😅. I’ve chosen a simple looped handle, although there are many variations. As I continue creating these useful rope bowls I will be sure to update this post with other options!
HOW TO CREATE A LOOP & TUCK ROPE BOWL HANDLE
This type of loop & tuck rope bowl handle is easy to create and leaves a unique look to your rope bowl.
STEP 1
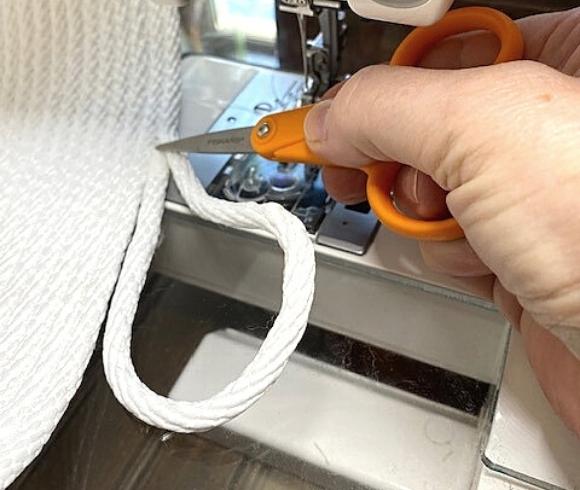
Once you’ve backstitched at the end of your rounds, decide how large or small you want your looped handle to be by looping your cording and eyeballing. For me, I left about a six inch length of rope.
I recommend wrapping the end of the length with scotch tape as we did at the beginning of this tutorial BEFORE you snip the cord. Snip the cord at an angle on the left side of the cording so that it fits snuggly into the crease of the loop you will be creating. Leave about 1/4″ of the taped end. Refer to the image below.
STEP 2
Loop the snipped cording back toward the bowl and tuck the snipped end tightly into the crease.
STEP 3
Place the bowl back under your presser foot just before where the looped end is tucked in, and stitch the loop (the bottom of the loop) closest to the bowl, over the taped area, backstitching completely to secure the loop to the bowl. Refer to the image below.
As you stitch, be sure to press the top of the loop beginning in to firmly place both cords toward the bowl.
STEP 4
Stitch the bottom loop cord to the top loop cord for about 1/2″ or so, backstitching completely back to the crease of the cord where you began stitching as shown in the image below.
STEP 5
You should be back at the crease of the handle (where the tape is) at this point. Stitch the handle to the top of the bowl (the bottom of the loop), backstitching to secure.
There you have it! You’ve created an easy project that is useful & decorative. From here, the skies the limit as far as how creative you can become with sewing your rope bowls!
Hopefully this rope bowl tutorial has given you the base knowledge of making your own rope bowls allowing you to do just that! Get creative!
Did this rope bowl tutorial guide you to making your own rope bowl?
Love, Light, & Laughter ~

SHOP THIS TUTORIAL
Enjoy this article? Please consider sharing it on your favorite social media channel! Want more? Subscribe below for the occasional update with all the “happenings on the hill”!
NEED MORE DIY INSPIRATION?
16 comments
This looks easier than I’d have thought.
Thank you for sharing how to make this at the Homestead Blog Hop!
Laurie
Your basket is so cute. A perfect vessel for lovely gifts. Suzan, I am happy to feature your wonderful rope basket at Love Your Creativity.
These are adorable and so versatile. Unfortunately, my sewing machine was a victim of the 2011 EF5 tornado that tore through Joplin. I’ve never replaced it.
Beautiful work!
This looks like a great project.
Those are beautiful! I had never even considered trying to make one before!
Thank you, Melissa! Hope you can give it a try!
This is such a great idea, I’m not sure why I haven’t thought of trying it before! Will definitely have to put aside some time for this, amazing gift ideas and people love when it is homemade!
Love to see your results! Happy stitching 😊
This is a great, fun, and somewhat easy way to make a basket. I just love baskets. Such a warm and creative way to give a gift. A gift within a gift. I love gifts that remind me of the person who sent the gift. So sentimental.
Love it! We finally have a sewing machine so I can make this!!
I am IN LOVE!!! they are adorable! I love personally made things! I’m definitely pinning for later! I didn’t know you had an Etsy shop!!! I’m so excited! Well done! Thank you for sharing your awesome wisdom and crafts!
You are such a creative lady! And, yes! This is the perfect idea for a gift basket!
This rope basket is so cute! It would make a perfect gift!
The recipient definitely loved it!
These are so cute! I wish I wasn’t so bad at sewing so I could make one 😂