
")
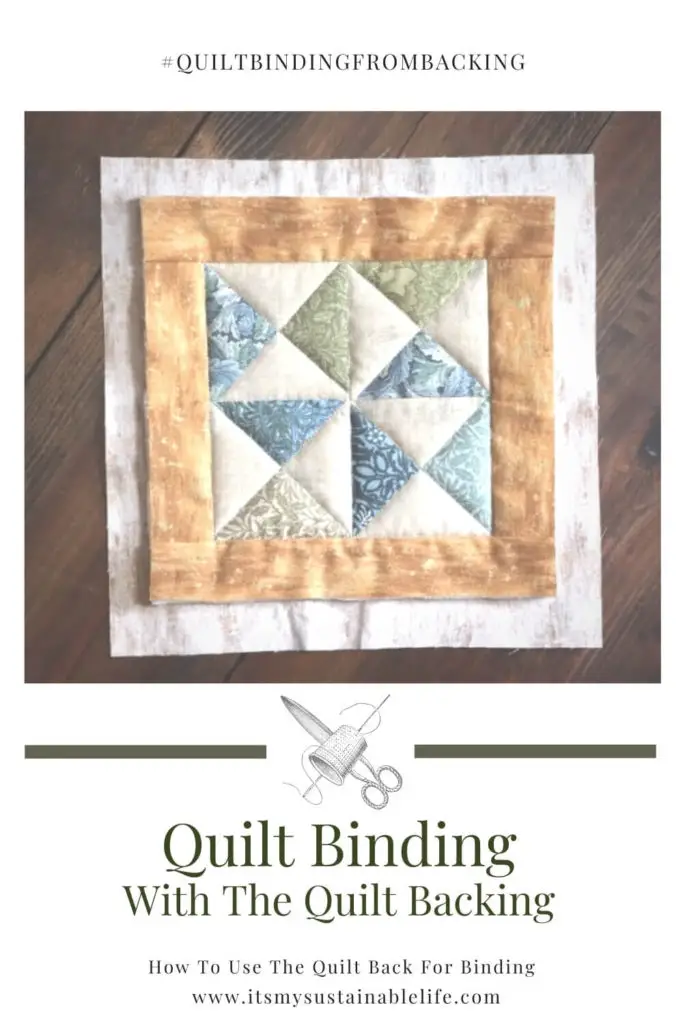
Quilt binding with the back of the quilt is an easy and quick way to finish off your quilt projects.
When I’m making quick projects I’m always looking for ways to work smarter not harder. You know the ones I’m talking about here. The projects that pretty much will never (well, almost never) be seen by the outside world, the ones that I just want to finish so I can use.
These are the projects that will not be given as gifts, or hopefully, be passed down as heirlooms. These are the “quick” projects that we won’t judge in any way.
So when I had several quilt blocks left over from a table runner project that didn’t quite make the cut (and I was too lazy to redo 🙂 ), I decided to use these leftover blocks and make some much needed potholder replacements.

So I ask that you please don’t judge here. I was in a hurry and just wanted these done. Like, right now 😉 You can certainly tell my time constraints by my lack of photography grace in these photo’s. My apologies up front!
If you’ve never made your own potholders, they are quick and easy to do. You can find a complete tutorial on how I do mine at Simple Quilted Potholder Tutorial, using a traditional double fold binding technique. Wonderful to use yourself or give as gifts!
The more traditional double fold binding method works very well and stands up to a lot of wear and tear, & in my humble opinion just looks better. This is the technique I go for when gifting or making a project that needs to last. And last a long time.
But, it is time consuming to bind traditionally! And this is time I didn’t want to spend with this project. So self-binding with the quilt backing to the rescue. Pretty much one and done!
My kind of finish 🙂
YOU CAN BIND A QUILT WITH THE BACKING
Yes, you can. Does it create my favorite end result? No. Is it easy to do with no hand sewing? Yes it is. Can you hand stitch it? If you want to!
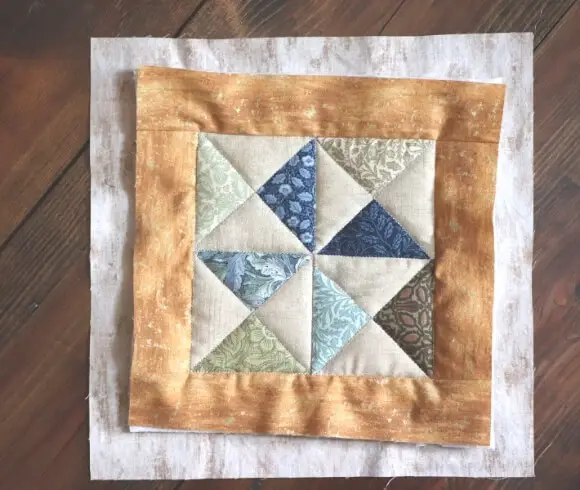
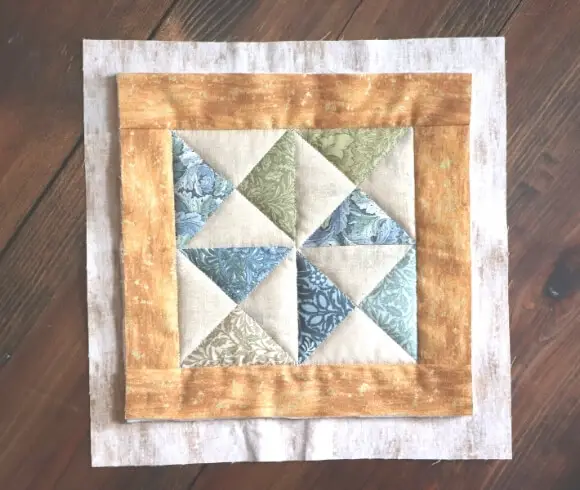
So what is a self-binding quilt? Simply put, it is when you utilize the backing material to create a finished edging around the quilt.
The biggest drawback for using the quilt binding with the backing technique is that it is topstitched on the top of the quilt, as opposed to the traditional binding methods of handstitching (at least that’s how I do it) on the bottom or backing side of the quilt. And when you are in a hurry as I was, you can see the variations of stitching along the edges of the binding.
Next time, I will use a more decorative top-stitch to finish off the project.
HOW TO SEW THE QUILT BINDING WITH THE BACKING
To sew the quilt binding with the backing fabric begin with your squared up pieced topper, batting that is at least 1.5″ larger all the way around the quilted topper, and coordinating backing fabric that is at least 2.5″ larger than the quilted topper
NOTE: When choosing your backing and utilizing the backing for the quilt binding, take into consideration that this fabric should be coordinating as it will be the edging on the top of the finished project.
STEP 1. Layer the materials listed into your quilt “sandwich”, centering all layers. Smooth the materials so there are no remaining wrinkles.
STEP 2. Baste to prepare for quilting. Don’t skip this step!
Below see for yourself the importance of basting your project BEFORE you quilt it (yes, I forgot to baste the one on the left in my rush). The materials will shift no matter how careful you are while stitching. Basting will hold all in place very nicely.
When it comes to basting your quilted projects you have options. One of my favorite basting tools is a “tagging” gun. Other options are basting pins, or basting spray. Your choice here.
STEP 3. Using a walking foo, quilt the 3 layers together. Important note here!! Only sew to the edge of the quilt top and not onto the batting or backing. Any stitches that go beyond the topper will have to be removed prior to the next step of trimming the batting.
You may be asking yourself at this point, “why not just cut the batting to match the quilted topper in the first place?”. I always leave extra batting around the topper edges as it tends to shrink a bit during the quilting process. Leaving yourself extra batting that can be trimmed later is a way to ensure you will not have a magically disappearing batting issue 🙂
STEP 4. Trim the extra batting to align with the edge of the quilted top, being careful to not cut through the overhanging backing fabric, picking any stitches that may have overlapped.
NOTE: Since I am making this quilted block into a potholder I have 2 layers along with the batting. I have a layer of batting and a layer of Insul-bright (for insulation).
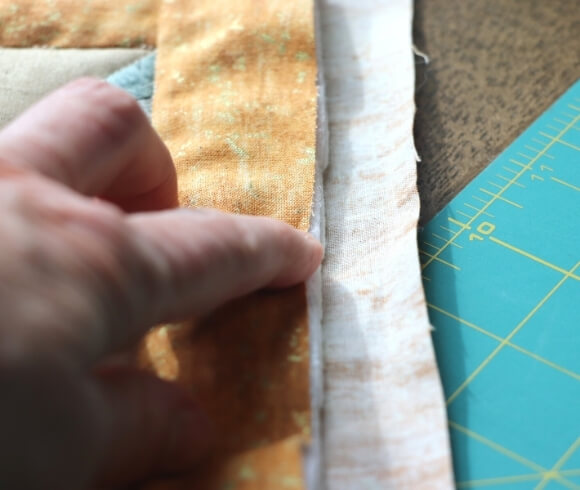
STEP 5. Using a ruler, measure and trim the backing fabric so that there is a one inch edge which extends beyond the quilt topper and batting(s).
STEP 6. Fold the 1 ” backing fabric halfway toward the quilt topper. The outer edge, or raw edge, of the extended backing material should line up with the edge of the topper and batting(s). I like to iron this to give it a crisp edge & help hold it in place. You can always dab with a bit of fabric glue if you choose to instead.
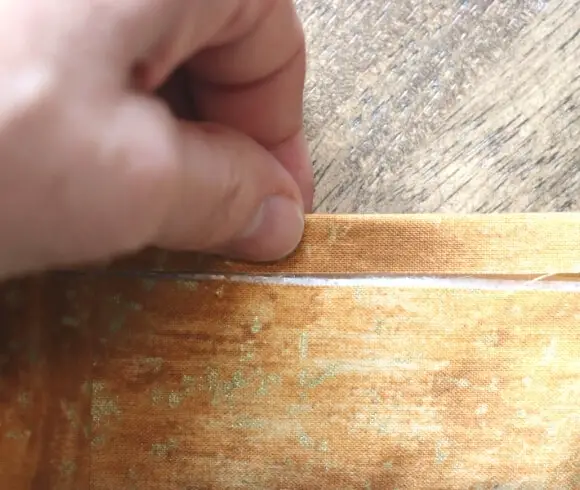
STEP 7. Fold the folded edge of the backing material over the top of the quilt topper and batting material once again to create your binding edge. Secure in place with pins, wonder clips, or even wooden clothespins.
BINDING QUILT CORNERS
When it comes to creating a nice corner in quilting projects, nothing beats a mitered one. Creating “mitered” corners can easily be accomplished when you are binding the quilted project using the backing.
STEP 8. Once you reach a corner in your final folding process to create the mitered corner, fold the binding into a triangle.
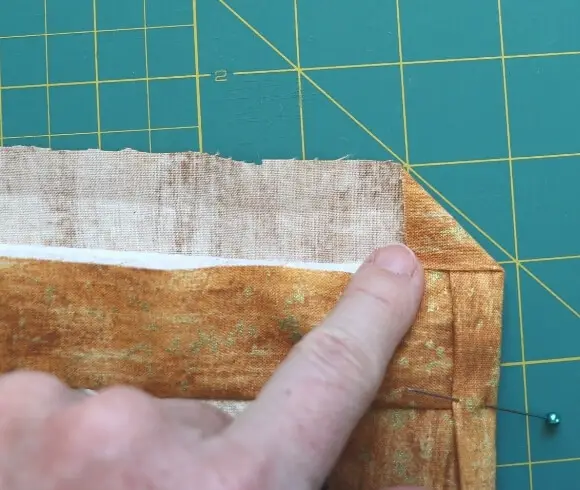
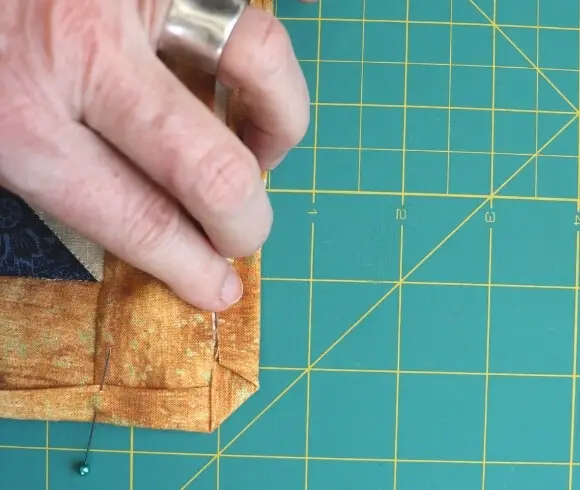
STEP 9. Keeping the binding folded into that “triangle”, and fold the raw edge toward the quilt top once again as you did on the first side. Fold one more time (as you did in Step 7) to create the mitered corner. Hold in place by pinning or securing with clips.
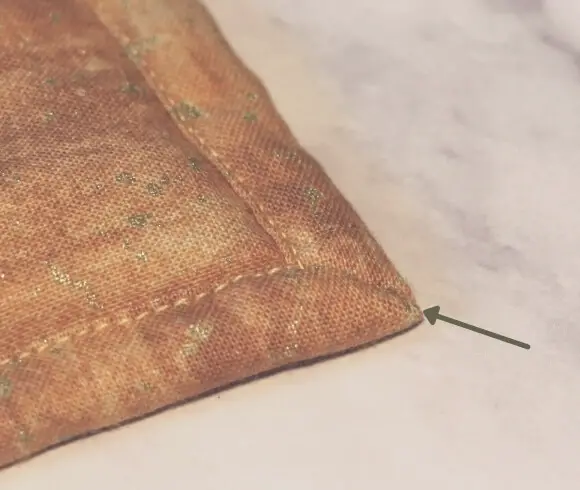
As you can see below, the final mitered corner is created.
STEP 10. Begin top stitching anywhere as closely to the edge of the binding as possible, once you have all your edges folded and mitered corners created, backstitching to secure once you have completed the circumference.
As I stated, next time I will use a decorative stitch to complete as the stitching is seen on the top of the project.
To complete these potholders using the “quilt binding with the back method” literally took me all of 20 minutes. Of course, I had the quilt tops already completed.
DRAWBACKS TO BINDING A QUILT WITH THE BACKING
There are a few reasons why this is not my preferred method of binding, and keep this alternative quilt binding method to smaller projects and those that I’m not overly concerned with the end results. Or when I simply have limited time on my hands 😉
- SQUARING UP – As it’s not the easiest method to square your project up, I would recommend keeping this method for use on smaller quilting projects like my potholders or a tablerunner
- STITCHING – You can view the stitching on the topside of the finished project. Next time, it’s a decorative stitch for me. The underside stitching does not look as “finished” as well especially when you quilt to the edge of the topper like I do. I may experiment with quilting the topper to 1″ of the topper’s edge next time to see if that cleans the backside up a bit
- FINISHED LOOK – Quite frankly, although this method of back-to-front binding is faster, the traditional method of creating a quilt binding has a more finished look in my opinion
There you have it! Ten easy steps to creating a quilt binding with the quilt back. Easy peasy.
Do you use this back to front quilt binding method?
Love, Light, & Laughter ~

- How To Sanitize Seed Trays
- How Often To Water Tomato Plants
- Winter Sowing In Milk Jugs
- How To Appliqué
- What Food Group Are Eggs In
23 comments
I’m always trying to find ways to re-use quilt scraps…. a great idea with potholder. It will turn out so nice I won’t want to use it.
Thanks for the easy to follow instructions! I love these potholders.
I hate basting, but after many experiences with crooked appliques and seams, I’ve learned my lesson. It always pays to take my time!
Thank you for this information. My sister in law makes wonderful quilts. I enjoy the one she made me every day. It’s something I don’t have time to do right now.
Such as art form! This looks amazing, and once you know the steps seems a bit easier – but will always take some practice!
But for a quick project, I think it turned out pretty nice.
So cute! I’m always in awe of people that have an eye for crafts like this.
Very neat technique. I think it looks great! I would never know that’s not how you are “supposed to do it.” 🙂
You are a truly talented woman Suzan!
I think binding with the backing is the prettiest way to finish off a quilt or quilted product. Thanks for sharing this with us on the Homestead Blog Hop!
Nice work! But it definitely looks way above my skill level! LOL
I love the idea of making your own potholders, store bought ones are so generic! Love these!
Congrats on the Etsy Shop! My friend has one and does really well!
You make it look so easy and yet I know I would not achieve such a clean look at all 😹
Such creativity! Very beautifully done!
I will have to try this on potholders…should be a small enough project for me to actually finish LOL
Thanks so much for sharing! I am just about ready to start my first small quilt project, and this was really helpful.
Love to see your project, Katharine! Thanks for reading!!
This makes quilting so easy! Thanks for all the great tips!
Very cool way to use leftover materials!!
oh my goodness that is beautiful!! What great talent and skill!
Your too sweet! Hope you can give them a whirl 🙂
I’m featuring you this week! Thanks for sharing with us at the To Grandma’s house we go link party, happy spring!