
")
The last few years have seen a resurgence in the old fashioned skill of fermenting foods at home, and for good reason. These probiotic rich foods not only help restore gut health but are also beneficial for boosting immunity & aiding digestion. Making your own fermented vegetables at home has never been more simple.
Thank you to True Leaf Market for sponsoring this blog post. This post contains a
The craft of fermenting foods has been in practice for millennia as a way to preserve foods. The lineage of fermented foods is steep, reaching as far back as 6000 B.C., according to an article in Food and Nutrition, “The History and Health Benefits of Fermented Foods”. In this same article, it was stated that
“nearly every civilization since has included at least one fermented food in its culinary heritage”.
– Food & Nutrition
With our modern day gut health issues at an all-time high, it is no wonder that these foods rich in nutrients & probiotics have found their way back into our daily diets in the last two decades and have gained popularity. No longer is it necessary to utilize ancient methods in fermenting foods. New, easy to use, simple tools are now available at very reasonable costs and allow the home fermenter to create & enjoy these healthy foods within days.
EDUCATION IS KEY
I highly recommend educating yourself with appropriate ferment processes. In my research, I found a few highly recommended reads and great additions to any culinary library. “The Art of Fermentation” by Sandor Ellix Katz. This New York Times bestseller as well as the winner of the James Beard Foundation Book Award for Reference and Scholarship in 2013, is a detailed comprehensive guide for the home fermenter. Katz goes into detail about safety, techniques and troubleshooting issues that may arise. It does not, however, contain recipes.

“Real Food Fermentation: Preserving Whole Fresh Foods With Live Cultures In Your Home Kitchen” by Alex Lewin, does contain recipes. It also provides the home fermenter with optional tools needed, the basic processes, how to begin, and a general guide to choosing the right ingredients, to name a few.

FERMENTING FOOD E-BOOK FREE FOR YOU
We have compiled a short 16 page ebook for your easy reference, Fermenting Food. In this beautifully illustrated ebook you will have access to the following topics;
- What Is Fermentation
- Benefits of Eating Fermented Foods
- Types of Fermented Food
- Make Your Own
Be sure to grab your copy by simply pressing the green button below. Did we mention…it’s FREE?
FERMENTING METHODS
The fermentation process is when carbohydrates are converted to alcohol or organic acids (lacto-fermented) by utilizing micro-organisms such as yeasts or bacteria under anaerobic (without oxygen) conditions. There are multiple methods for fermenting, a few of which are as follows.
Vinegar Brine Method
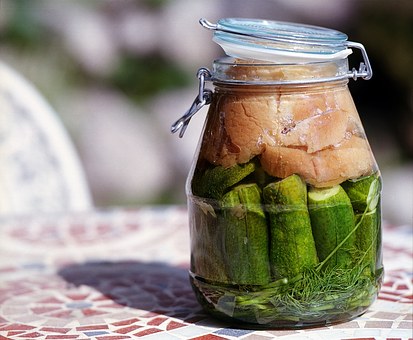
The vinegar brine method is undoubtedly the most common method of fermentation utilized by home canners. Think pickles & dilly beans. YUM. This method is easy to accomplish, and the foods last for 1-5 years.
Lactic Acid Fermentation
This method of fermenting requires a “starter” or a source of lactic acid bacteria. Foods that routinely use this method are yogurt, see my article on how to make your own yogurt, “Easy Homemade Yogurt, Making It Perfect Every Time”, and sour-dough bread.
Alcohol Yeast Method
This method, also known as ethanol fermentation, allows yeasts to break down sugars anaerobically into cellular energy creating by-products of ethanol & carbon dioxide. Common foods utilizing this method are beer, wine, and breads.
Butyric Acid Method
Butyric acid or butanoic acid, is a four carbon acid, and a short-chain fatty acid (source). According to an article “Butyric Acid In Irritable Bowel Syndrome“, butyric acid is thought to have many gastrointestinal benefits.
– NCBI
“butyric acid is an important regulator of colonocyte proliferation and apoptosis, gastrointestinal tract motility and bacterial microflora composition in addition to its involvement in many other processes including immunoregulation and anti-inflammatory activity”.
Foods that naturally contain butyric acid include, animal fats, butter, some cheeses, and kombucha. See how to make your own kombucha ferment in my article, “Kombucha Kraziness! How To Make With The Continuous Brew Method”.

All of the above methods except the lactic acid fermentation method will produce gas.
EQUIPMENT
There are a wide variety of equipment choices on the market today in many price ranges. From simple mason jar lids with pumps averaging $8.99 to traditional crock style fermenters averaging $129 and up. I was fortunate to receive a Trellis & Co Stainless Steel Jar Fermentation Kit, generously provided by True Leaf Market. I utilized this kit for my first fermenting & absolutely love the simplicity of it.
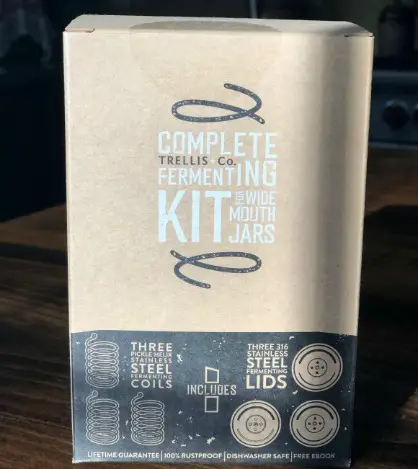
This kit is reasonably priced at $35.08 at the time of this writing through True Leaf Market and includes the following:
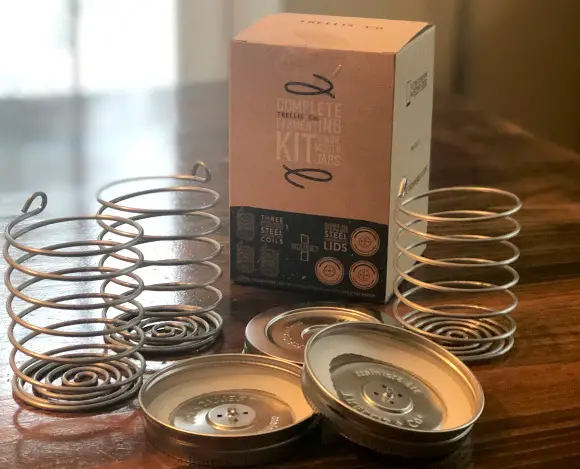
- 3 Stainless Steel Lids with waterless silicone airlocks that fit wide-mouthed mason jars
- 3 Pickle Helix weight coils – to hold vegetables down for fermentation
- Free fermentation guide
TIPS FOR SUCCESS
Anaerobic
The biggest hurdle in creating a successful ferment is keeping it anaerobic. What does that mean? Basically, keeping all oxygen from reaching any of the food matter you are trying to ferment. This kit does that for you, ensuring success on the first try (at least it did for me:) ). The helix weight coils kept my foods submerged without any effort on my part by pushing them toward the bottom of the jar when the stainless steel lids are placed on.
“Submerging in brine conquers evil every time”.
– Fermento & Brine
Brine
Don’t be afraid to add additional brine if needed to submerge your ferments. A simple brine recipe can be made by adding 3 Tablespoons of good quality salt in 1 Qt. of good well water or purified water. Chlorinated water should not be used as it can inhibit the fermentation process negatively.
Good quality salt is important. It is recommended that a high quality, fine sea salt be used as it contains a higher mineral count. Iodized salt and salts with anti-caking agents should be avoided as well as they can also inhibit the beneficial growth in cultured foods.
Temperature Matters
The optimal temperature for foods to ferment is roughly 70 F. Ferments can tolerate 65 F to 72 F, but these temperatures will effect the time needed for the foods to ferment fully. Be sure to check often if temperatures fluctuate. I found that as my house temperatures fluctuate from night temperatures of 62-64 F to daytime temperatures of 68 F, I let my foods ferment for 7 days and was rewarded with wonderful results.
Time
Time will differ based on what type of food product you are fermenting. Thin, porous vegetables such as shredded cabbage will ferment quicker than that of larger,
Cleanliness
Cleanliness is your ferments best friend. Sterilize your equipment by placing jars, lids and any other equipment that can be safely boiled into a pan & cover with water. Bring to a boil and cook for 5-10 minutes at a slow boil.

Mold
Air and exposure are the worst enemies of ferments. I found that the helix coils provided in this kit submerge all the ferments nicely, and ensure that molds will be kept to a minimum or absent all together. One of my “tests” created mold while the other was completely mold free. The one that created the mold was due to an error on my part (I had left a bit of food above the brine level by error), not that of the equipment.
Some ferments will create a surface mold that will develop in a paper thin layer, making it impossible to remove. Heavier molds can be scrapped off the surface and removed if you wish. I chose not to keep mine that developed a heavier mold.
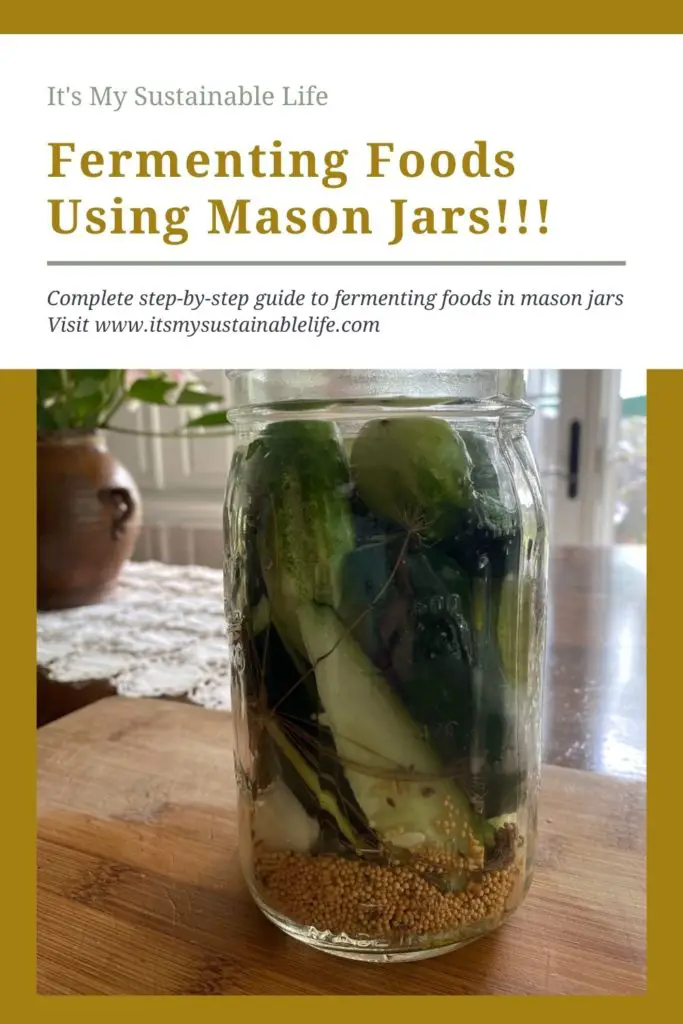
THE PROCESS
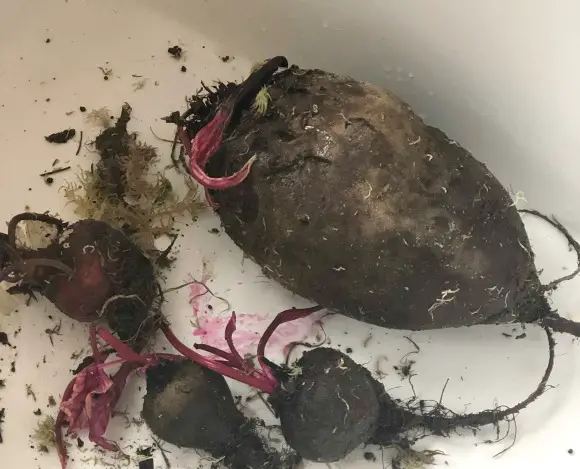
The process of fermenting with this kit could not be simpler. I chose to ferment cabbage and beets (two of my favs 🙂 ) for my first ferment. I had several huge beets from last falls harvest that I needed to use up as well as a few smaller ones. You can also add seasonings if you choose. Popular ones for this type of ferment are ginger, garlic, caraway seeds, and dill.
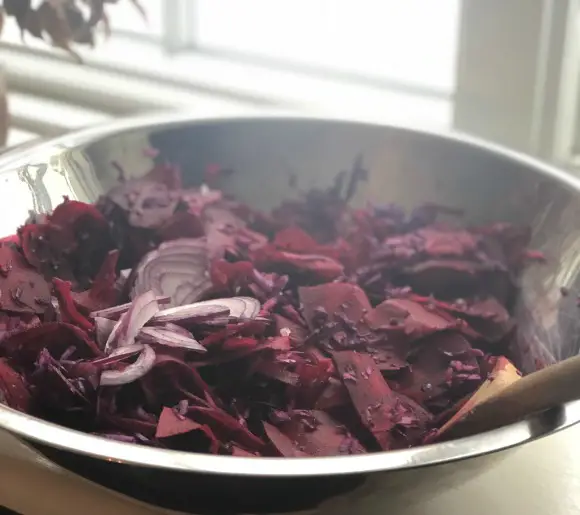
Preparing The Food
My Cuisinart Food Processor made quick work of shredding both my beets, onions (1 used) and my cabbage (1 small head), which I placed in a stainless steel bowl. I added the required salt (1-2 Tbl per quart) to the mixture and massaged with my hands to be sure all was covered with the salt.
Let the ferments sit in the salt for at least an hour if not more to allow the juices to release.
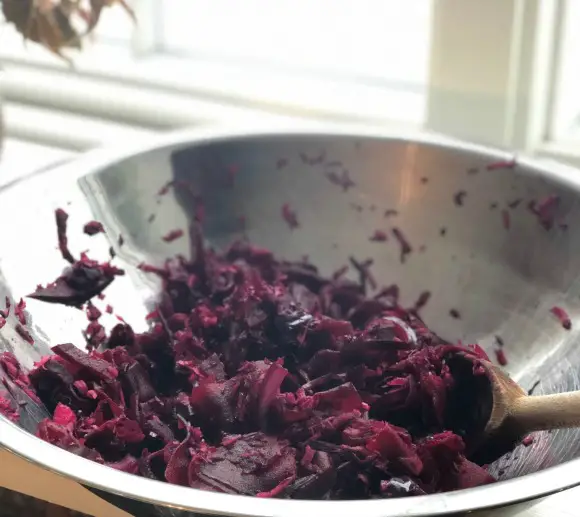
Once the juices release (I let mine sit for two hours), begin to pack your your sterilized mason jars. Pack firmly, pushing down the foods with a wooden spoon to eliminate any air bubbles. The foods should be covered with liquid. If they are not, make additional brine as listed above and add to the jar to just cover the food.
TIP: I recommend before adding any additional brine to place the helix coil (if you are using this kit which can be found HERE) and covering to see how much brine you actually need to add. You may find that since the coil pushed the foods down, no additional brine is required.
If you are not using this kit, you may find that some of the food floats. Should that occur, you will need to place a weight on the top to submerge the food completely.
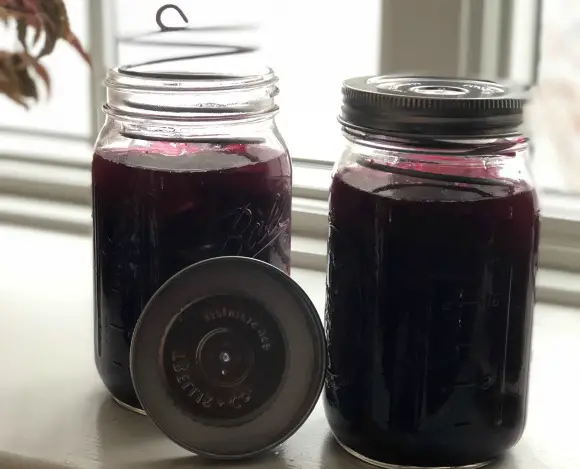
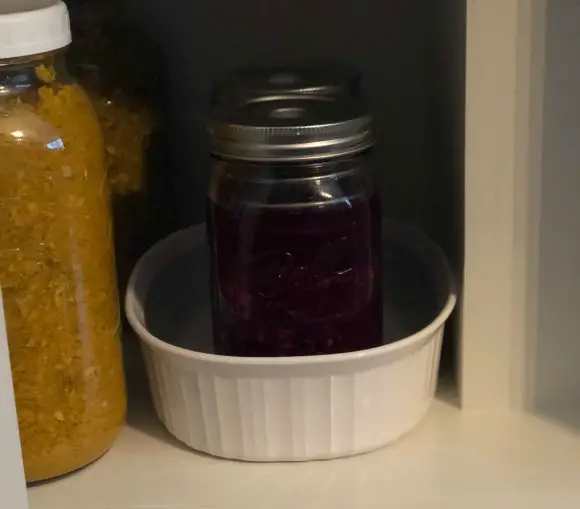
Secure the jar lids on tightly and place the ferments on a plate or dish (in case of any overflow) in room temperature out of direct sunlight. I placed mine in my kitchen cupboard in a Pyrex dish next to my batches of brewing fire cider elixir.
If you are using the Trellis Stainless Steel Fermenting Kit, no need to check daily and “burp” the jar to release any pent up gasses. These one-way “waterless silicone airlock” lids are designed to allow the gasses to release without letting any oxygen in, creating a maintenance free fermentation process! The lid design also allows you to stack your fermentation jars without issue. Very convenient :).
Fermentation Time
Leave your jars to ferment for at least 5-7 days, burping at least daily if you are not using the kit. You should see bubbling occur on top. This is good! Your ferment is brewing appropriately. Check every few days for any mold development. Scrap off any heavy molds. After 5-7 days, give your ferment a quick taste test. If it has reached its tangy flavor to your liking, place jar in refrigerator to store. If a longer period is needed, leave for up to one week more to reach its desired flavor.
REVIEW
I found this kit to be simple to use, convenient, and cost-effective. I would have no issue recommending this kit to any home fermenter. Why?
- Cost Effective – If purchased through True Leaf Market, at only $35.08 per kit this kit is more reasonably priced than other retailers I’ve checked AND click on the True Leaf Market banner ad above and receive FREE shipping!) This kit provides the tools you need to have 3 batches brewing simultaneously.
- Convenient – The no-burp lid takes the worry out of having to remember to keep an eye on those ferments. The stainless steel helix weight coils work amazingly to keep the foods submerged without having to add weights.
- Well Made – The coils are stainless steel, unbreakable, and compress without effort to hold those ferments down.
“Our patent-pending PickleHelix combined with our unique waterless airlock lid/valve is the only 100% medical-grade (316) stainless steel fermenting system for mason jars on the market!” - Maintenance Free – Due to the one-way valves, the waterless airlock lids are truly maintenance free. No need to top off fluid or burp during the ferment.
- Ease Of Use – even for a newbie like myself, this kit was a breeze to use. Even better, True Leaf Market, offers a FREE downloadable fermentation guide with the purchase of the kit.
- Reviews – With 1877 total reviews on True Leaf Market alone, this kit receives a glowing
5 star rating.
Overall I highly recommend this kit. The ONLY drawback I found was the little silicone cover that goes on the middle top of the lid can be easily misplaced. I speak from experience. Fortunately, I was able to find mine and store it safely with the rest of the kit once I realized what it was.
Whether you are a newbie to the fermentation process or an experienced fermenter, give this kit a try! You won’t regret it.
Be sure to follow IMSL on social media and subscribe below to receive our FREE once-per month newsletter, “happenings on the hill” & stay up-to-date with all the craziness here on the homestead.
Love, Light, & Laughter ~

21 comments
Hello, this is one of my favorites for Encouraging Hearts and Home, this week! Stop by and say hello, and this post has been pinned!
Oh my gosh, thanks for this! My son and I were talking about fermenting foods, pickling and such, and this post has given me some great guidelines. 😀
So glad you found this helpful! This kit from True Leaf Market really made all the difference.
Wow, I’ve never tried this!
Hope you can give it a try! It’s so easy and works wonderfully for creating any ferment you’d enjoy!
Thank you for sharing at #ThursdayFavoriteThings. Pinned and shared. Have a lovely week. I hope to see you at next week’s party too!
This is a great and informative post! I’m relatively new to fermenting, and spent a good bit of February doing various projects and summarizing them on my blog. Some of the equipment you mentioned here is new to me. I’m going to pin this for later so I can do a bit more research on some of the things you mentioned. Thanks!
Hi Darcy ~
Thank you so much! Love to hear what your favorites are to ferment!
We love fermenting, and currently have a batch of bread and butter pickles on the counter! Love those coil weights, will have to check them out!
That’s awesome! Let me know how you like the weights!
Excellent and education post – what a fantastic kit! I also use mason jars to ferment – LOVE IT !
What are your favorites to ferment? Always Looking for new recipes!!
Hi Suzan! This is one area that I need to learn but I have felt overwhelmed! I love that your blog has great information regarding steps and processes. I now feel motivated to learn this skill!
Hi Theresa~
Thank you so much for your compliments. You got this!!
I have seen people doing this and I have been inspired to try but at the same time I am extremely nervous. I do a lot of canning but I have never tried fermenting. Your post really helped me to understand a lot of the things that those experienced people don’t address. Thank you for sharing your wealth of information!
Thank you so much, Michelle!
Suzan, this information was so helpful! I have been eating cleaner, healthier food lately, and have wondered about the fermentation process. Thanks for breaking it down into easy steps! I think I can actually do this. 😉
Hi Rebekah!
Thanks so much! Give it a try, it really is a very simple process. You can do it!!
Hi Jennifer ~
One of the nutritional benefits of fermenting is that the fermentation process makes minerals bioavailable resulting in a more nutritious ferment. Redmond Sea Salt and Pink Himalayan salts are considered dry salts that are rich in minerals and would result in highly nutritious ferments.
Put those beets to good use this summer and give it a try!
Wow, what a wealth of information! Thank you for breaking down the process in layman’s terms. I’ve been interested in trying this myself (specifically I’d love to make my own kombucha) but feel super intimidated by the process. Knowledge is power, and this article definitely gave me some motivation to get started on my own. 😊
Hi Laura ~
Thank you so much, I’m glad you enjoyed it. Give this a try. I was in the same boat as you, making my own Kombucha for years as well as homemade yogurt, but always a bit leery of fermenting. The process was extremely easy and have added it to my repertoire 🙂